Trust me, you’ll forget the boxed pudding mixes and cheesy shortcuts with this made-from-scratch banana cream pie recipe because it is so much better than the artificially-flavored concoctions. Real ingredients mean real flavor, and the little extra time it takes is so worth it. Oh, and please put the diet and calorie counting aside when you dig into this deliciousness just for once. Heck, one slice may not be enough. But I won’t judge you, friend, because I know the feeling. 😁 The luscious cream filling in this recipe is a showstopper. At first, it was too thin. But then I added heavy cream, and now it’s perfect for coating the banana slices. Its custardy flavor hits the spot every time.
Recipe Ingredients
How to Make Banana Cream Pie
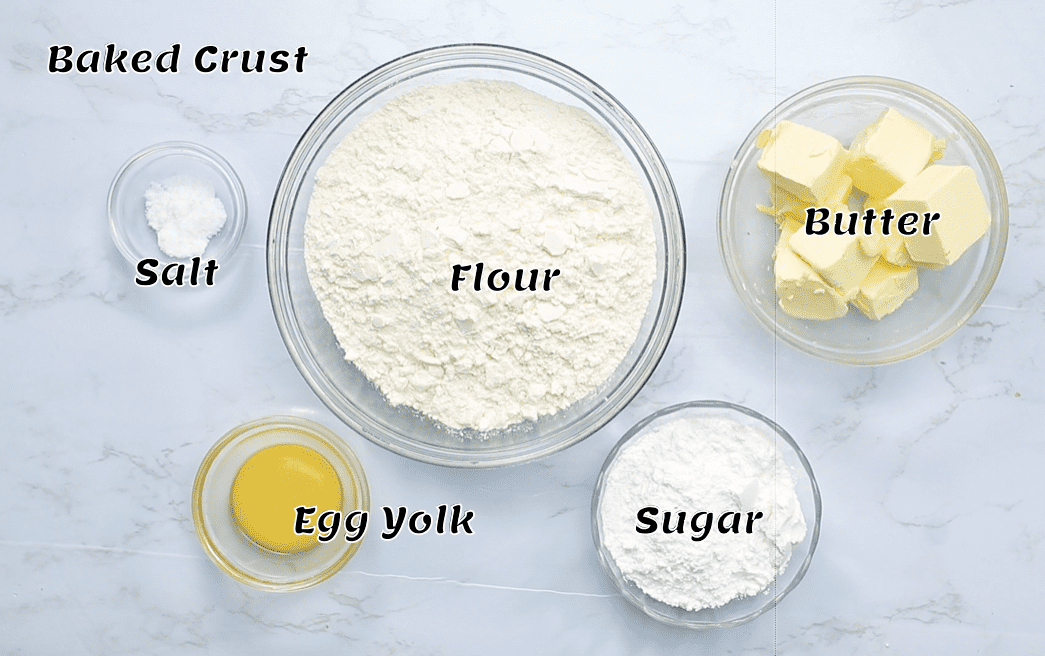
Make the Pie Crust and Bake
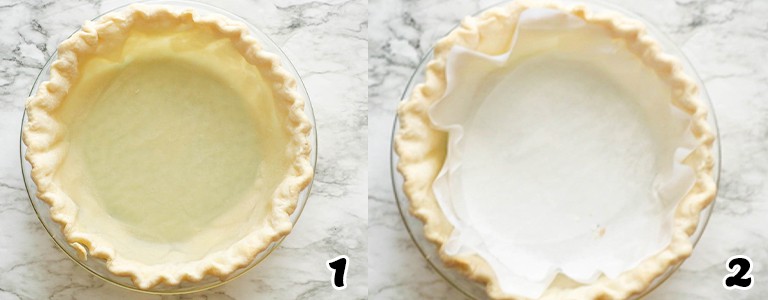
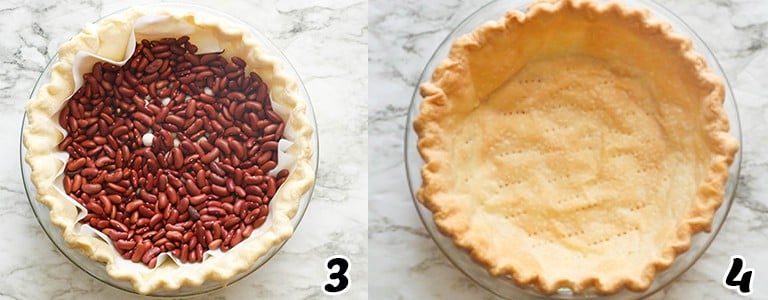
Grease the Pan – Butter or spray a 9-inch pie pan with a removable bottom – ensuring it has been generously greased. Set aside.Pulse – Place flour, salt, and sugar in a food processor and pulse a few times to mix the ingredients.Add Butter – Throw in butter and pulse until rough dough forms.Add Eggs – Then add eggs a little at a time – pulse until the dough barely comes together.Knead the Dough – Remove the dough and place it on a work surface – knead just enough to incorporate all the flour, working the dough as little as possible.Form a Dough Ball – Do not overwork the dough; otherwise, it’ll be tough. When it’s ready, the dough will be barely moist and come together into a ball.Make the Crust – Lightly press the dough into the prepared pie pan – working from the center until the bottom and sides are evenly covered with pastry. Again, be very gentle when pressing your dough into the pie pan. (Photos 1-3)Freeze – Place the pie pan in the freezer and freeze for at least 30 minutes; this helps prevent the crust from lifting. If you are in a rush, then bake with beans to prevent rising.Preheat the oven to 400℉/205℃ and place the rack in the center of the oven.Bake – Bake crust for 20 to 25 minutes or until the crust is dry and golden brown. Remove from oven and set aside. (Photo 4)
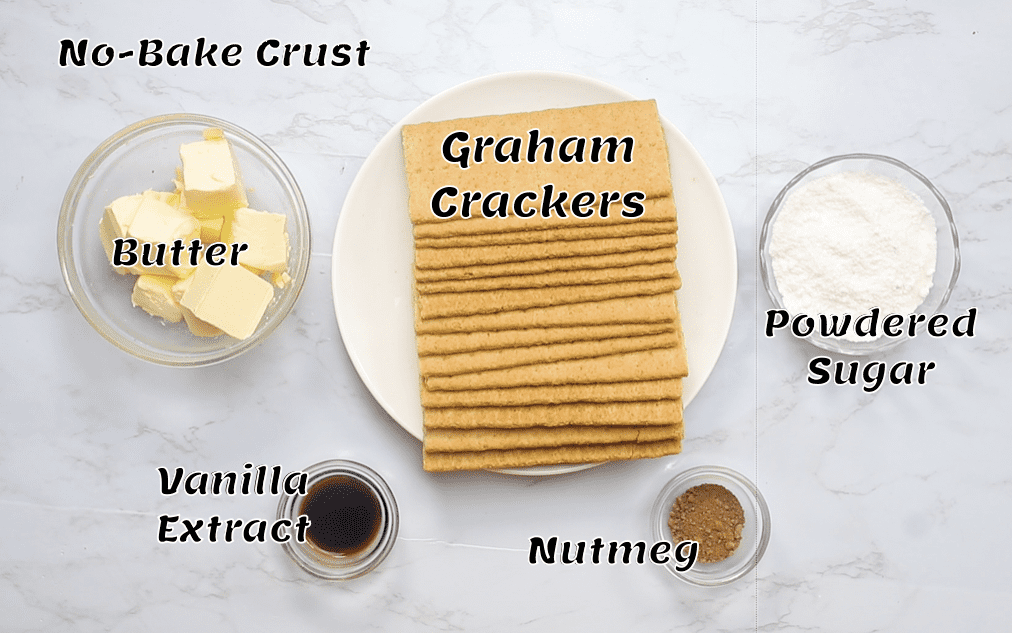
No-Bake Crust
Crush the Graham Crackers – Blend graham crackers in a food processor. You can also place them in a large resealable plastic bag and crush them with a rolling pin until finely ground.Combine – Add butter, vanilla, sugar, and nutmeg to a small bowl. Mix until thoroughly combined and crumbs slightly come together.Press onto Pie Pan – Press the graham mixture evenly onto the bottom of a 9-inch springform pan. You may use the back of a cup to press it down.
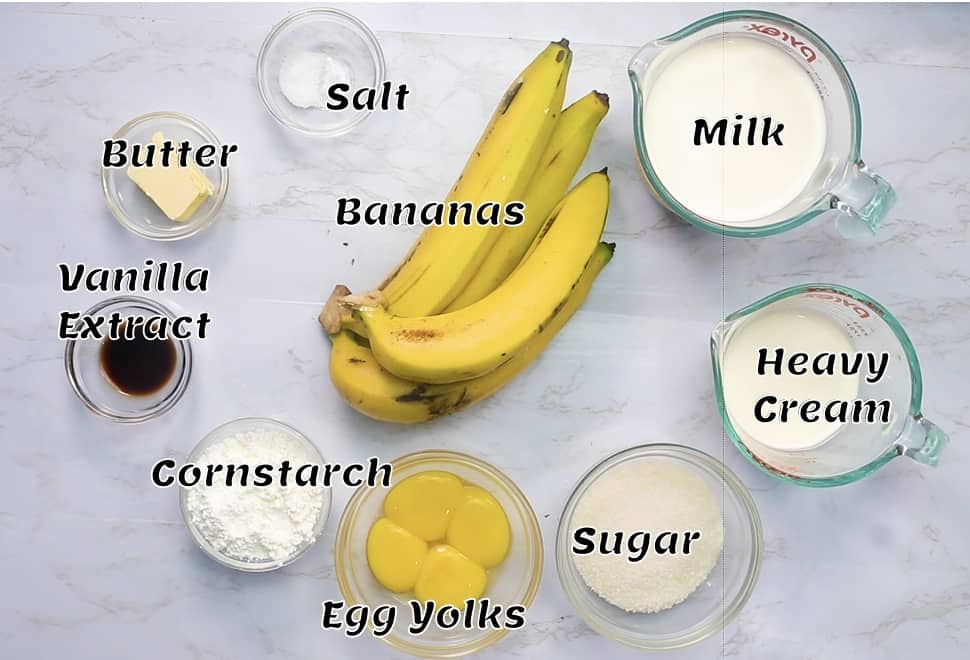
The Cream Filling
Dry Ingredients – Add dry ingredients to a saucepan (cornstarch, sugar, and sugar). Stir until combined.Wet Ingredients – Whisk milk, heavy cream, and egg yolks in a medium bowl.Combine – Gently whisk the wet ingredients into the saucepan until the sugar dissolves, and there are no lumps.Simmer – Place the saucepan on the stove at medium-high heat, constantly stirring until it starts to bubble. (Watch it so it doesn’t burn.)Cook for 7-10 minutes or until the mixture has thickened.Butter and Vanilla – Stir in the butter and vanilla until thoroughly blended.Cool – Pour in a bowl, then cover the surface directly with plastic wrap. Allow it to cool to room temperature, and refrigerate until ready to use.
Assemble the Banana Cream Pie
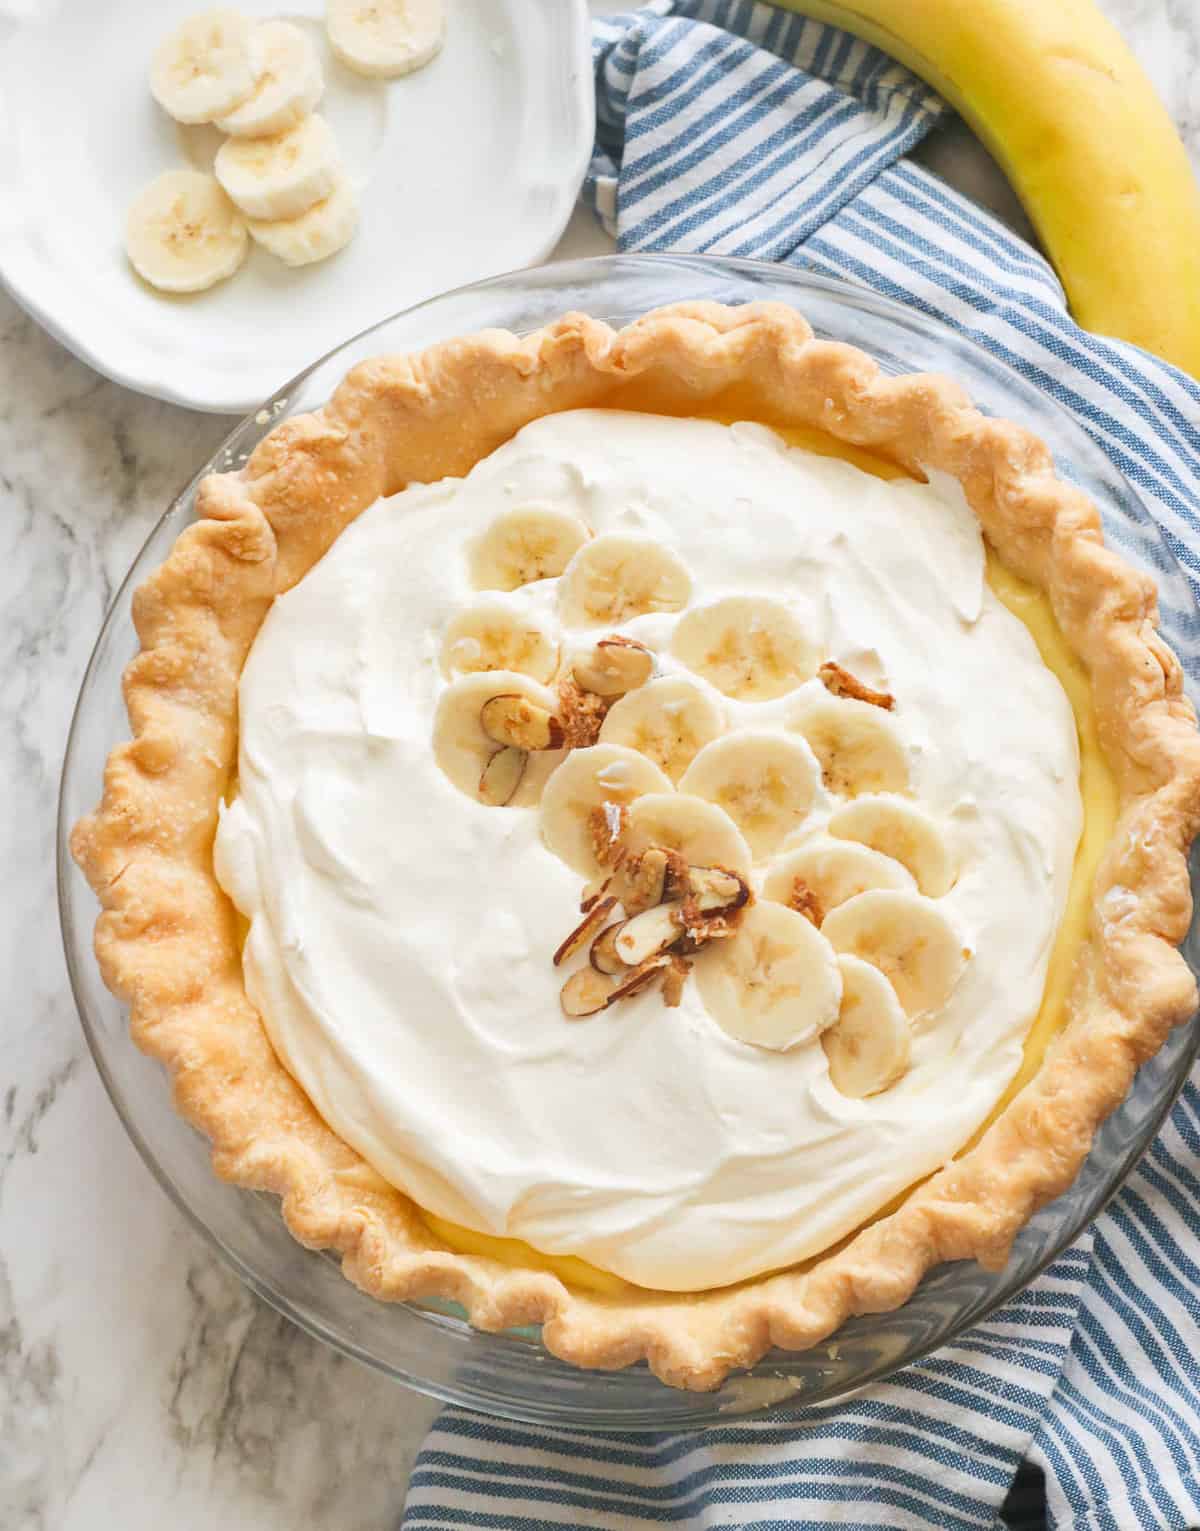
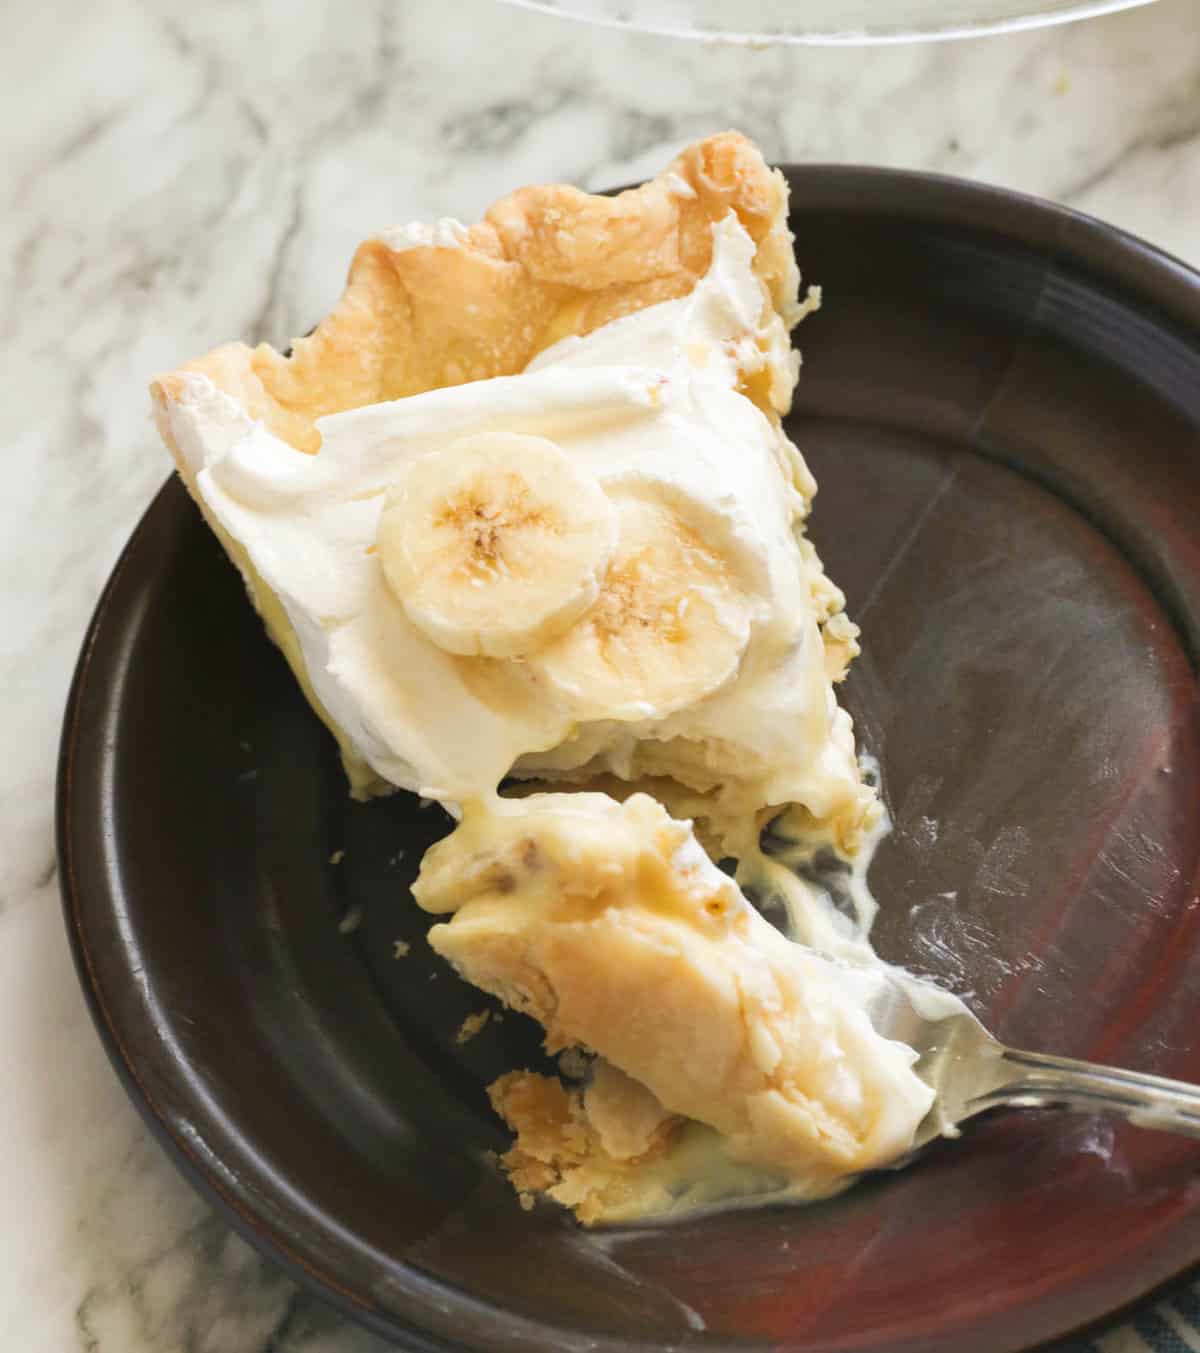
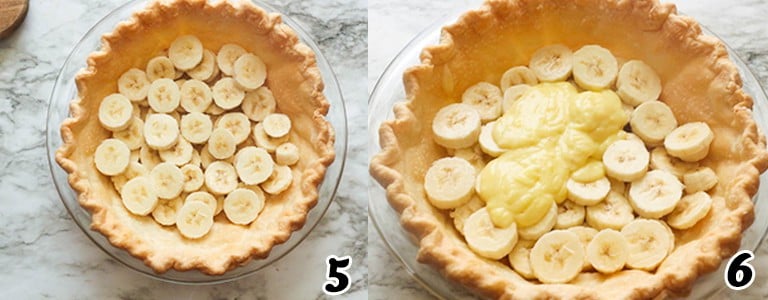
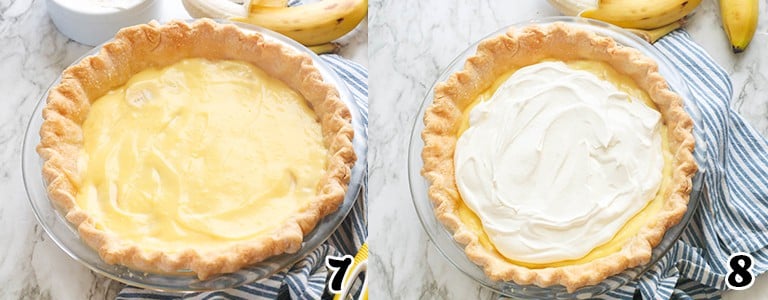
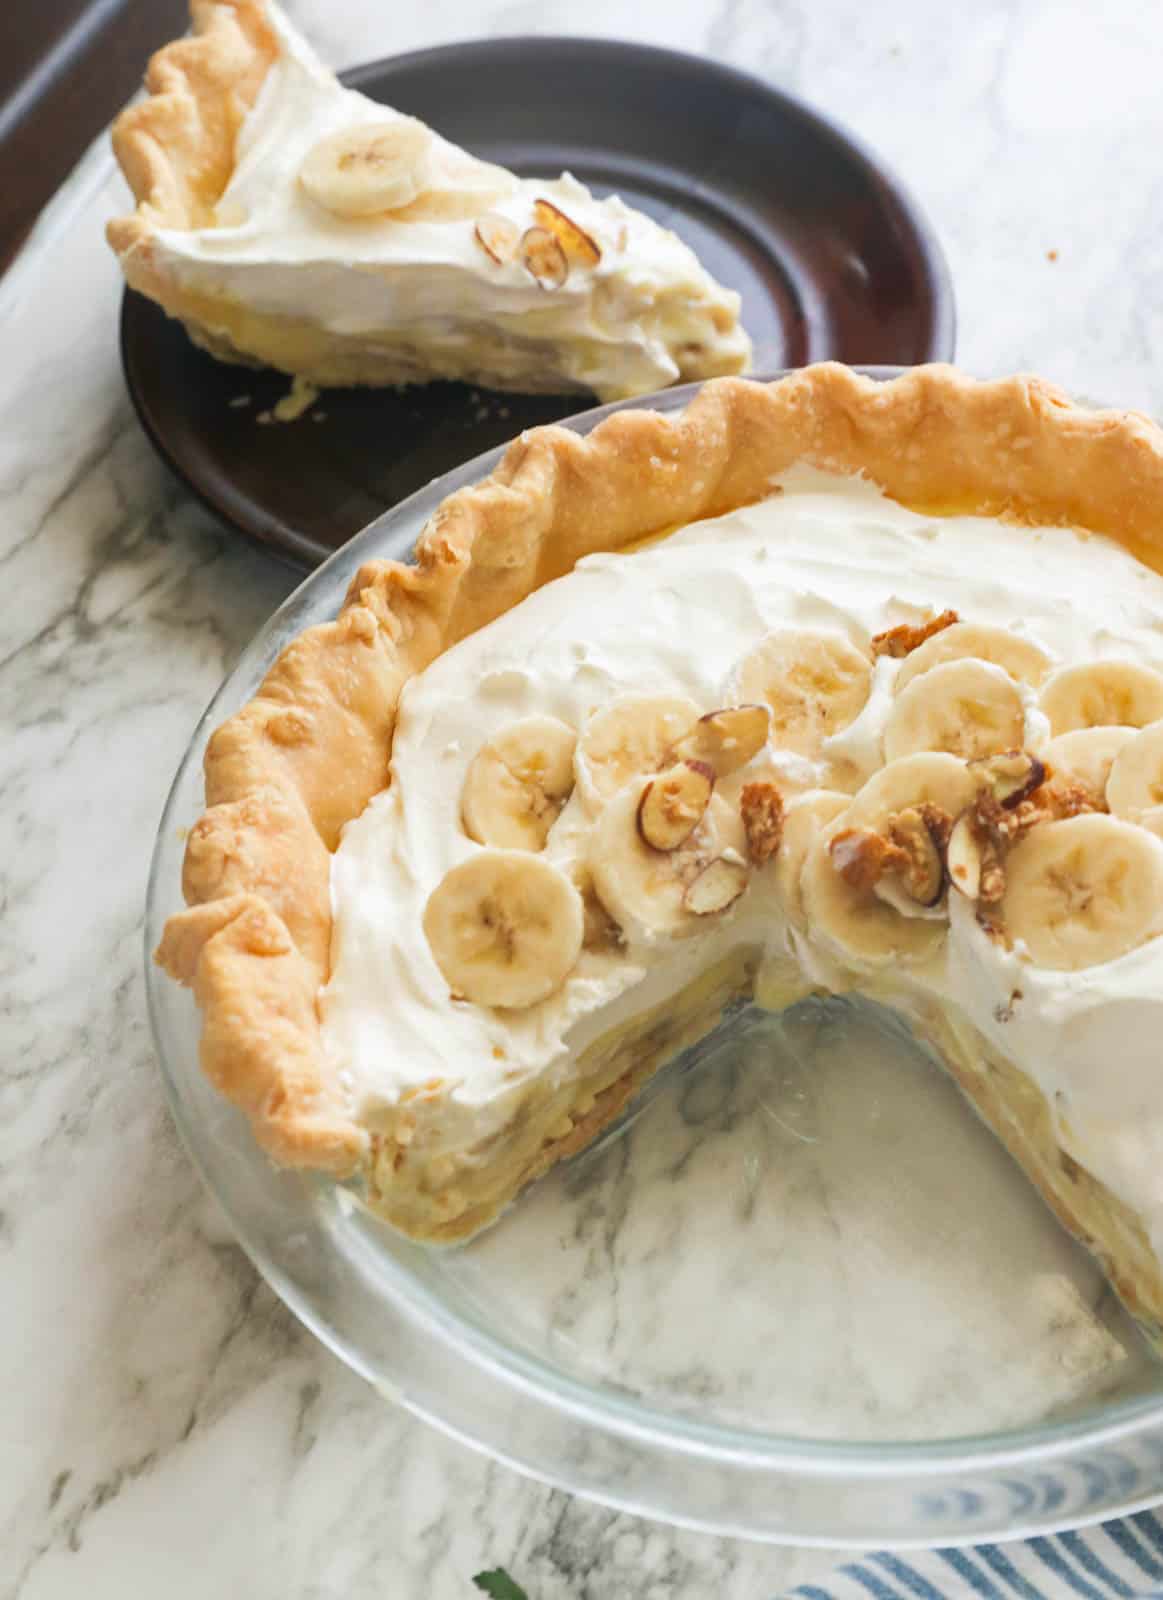
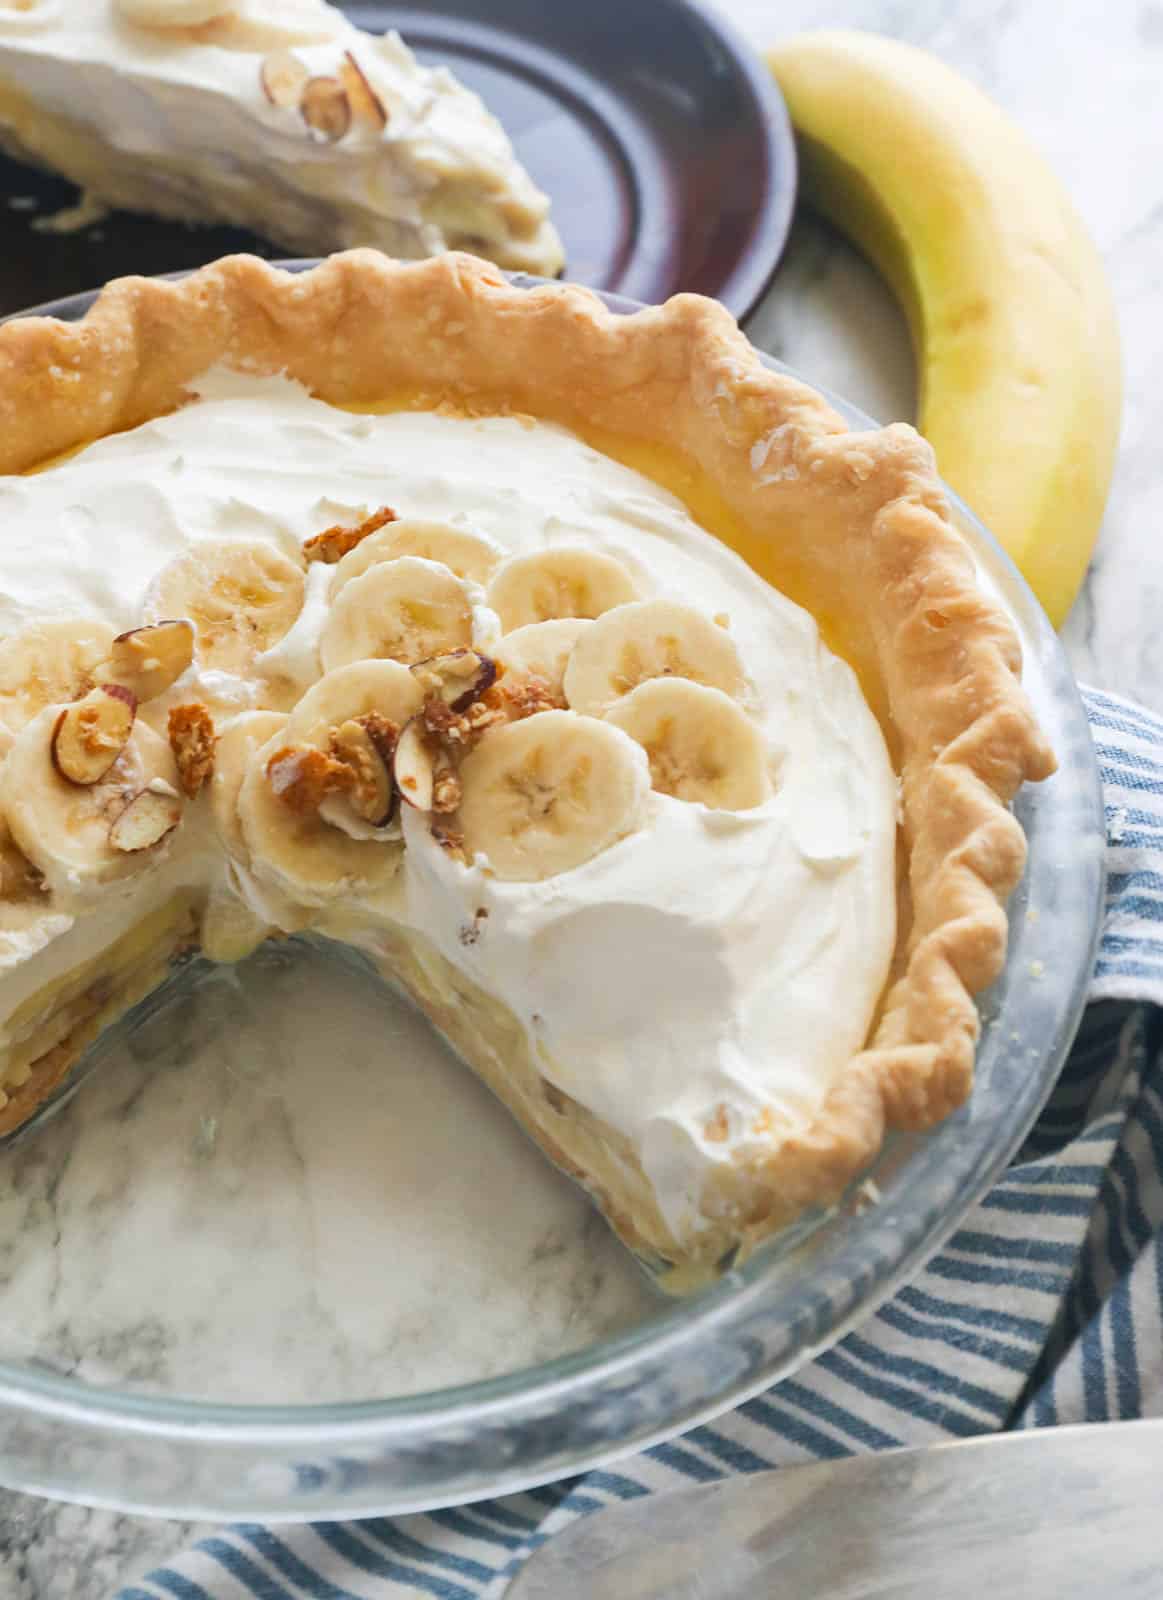
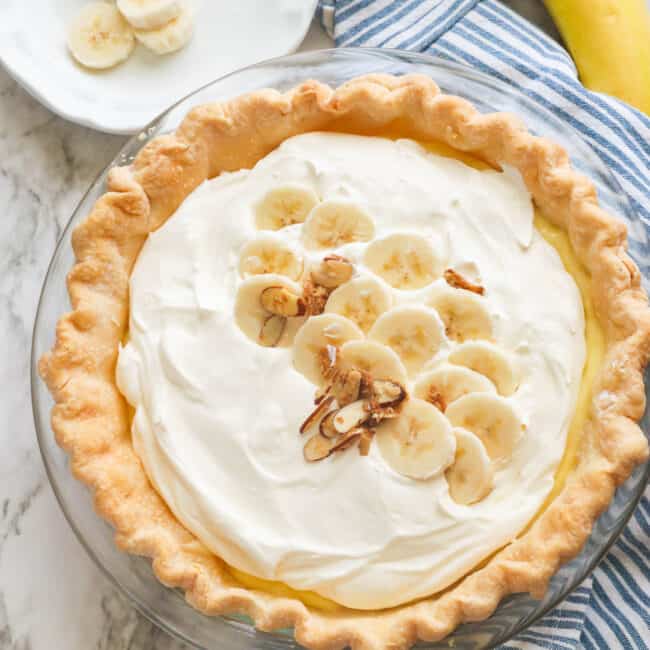
Arrange Bananas and Pudding – Arrange the sliced bananas on the crust and pour the pudding over them. Place the pie in the refrigerator until the pudding has set, about 3 hours. (Photos 5-7)Whip the Cream and powdered sugar for 5 minutes or more until it becomes light and fluffy, with soft peaks.Flavoring – Add ½ teaspoon of vanilla extract, then continue whipping until you have stiff peaks.Finishing Touches – If desired, decorate the edges of the pie with whipped cream. Refrigerate until you’re ready to serve it, then top with sliced bananas and sprinkle with almonds. (Photo 8)
Recipe Variations
Tips and Tricks
Make-Ahead Instructions
You can make the pie crust dough ahead of time and store it in the refrigerator for up to 5 days. Or you can also assemble the pie a day early to give it enough time to set in the fridge. Don’t add the whipped cream and toppings just yet. Cover the surface of the custard filling with a cling wrap to prevent forming a crust on top. Then, when you’re ready to serve it, add the whipped cream and decorate.
Serving and Storage Instructions
This banana pudding is best served chilled because it has time to set and let all the flavors meld. I suggest refrigerating this pie for at least 6 hours for the best results. Store leftover banana cream pie (if you have any) in an airtight container or wrap the pie pan loosely with plastic wrap. It will last refrigerated for up to four days. In the heat of the summer, I love to freeze banana cream pie. It should last three months if you wrap it well in freezer wrap. When you’re ready to serve, remove the pie from the freezer 10 minutes before, so it’s not brick hard, then dig into a mouthwatering banana ice cream pie. Or you can thaw it completely overnight in the fridge before serving.
What to Serve with Banana Cream Pie
This drool-worthy dessert is the perfect ending to a classic Southern meal of fried chicken, mashed red potatoes, mustard greens, and easy coleslaw. And don’t forget a steaming cup of chai tea latte to top it all off.
More Fabulicious Banana Recipes to Try
Banana FrittersPumpkin Banana BreadBanana PancakesMoist Banana CakeBanana Zucchini BreadBanana Pudding
Conclusion
This melt-in-your-mouth Banana Cream Pie is a crowd-pleaser. And I’m sure you’ll go bananas over it! Are you thinking of adding something like pineapple or coconut to this already awesome recipe? Let me know below.❤️
Watch How to Make It
[adthrive-in-post-video-player video-id=”WmGK7jsy” upload-date=”2022-10-18T13:39:28.000Z” name=”BANANA CREAM PIE 92 SECONDS.mp4″ description=”Banana Cream Pie is a classic dessert featuring rich, velvety, creamy layers of homemade custard and banana slices in a buttery homemade pie crust. ” player-type=”collapse” override-embed=”false”] SavThis blog post was originally published in November 2017 and has been updated with additional tips, new photos, and a video.