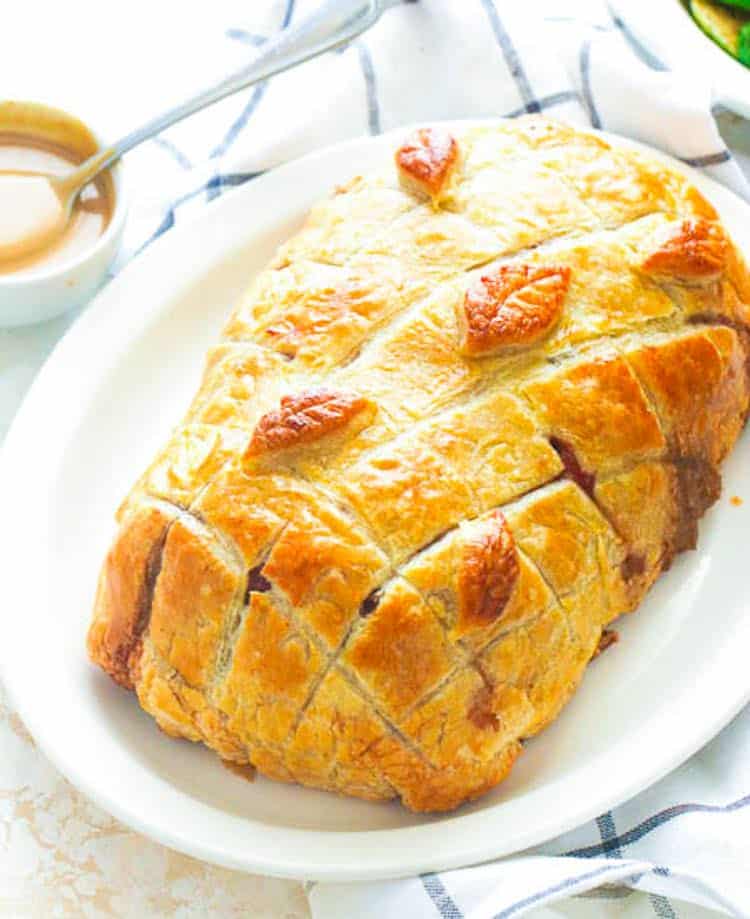
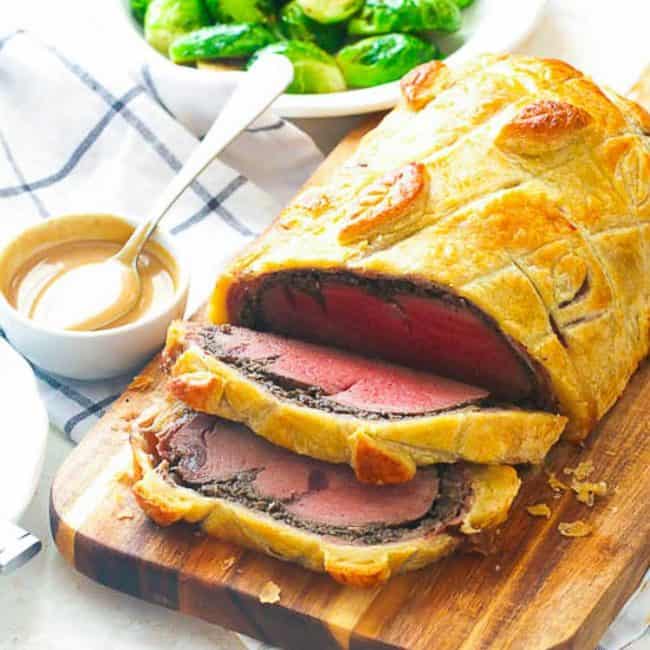
A few years ago, my brother celebrated Christmas in London. His colleague’s parents served this outstanding holiday dish. And when he returned, he asked me if I could make it for our family. I remember how challenging it was the first time I made Beef Wellington. But of course, who can say no to family, right? So, I found a more straightforward version while honoring the traditional ingredients for a delicious result! Traditionally, it is a tenderloin wrapped in pâté (sorry, purists, I left this one out), duxelles (a delicious mushroom mixture), dry-cured ham, and puff pastry. Then, bake it to a beautiful golden brown for a sensational centerpiece.
Recipe Ingredients
How to Make Beef Wellington
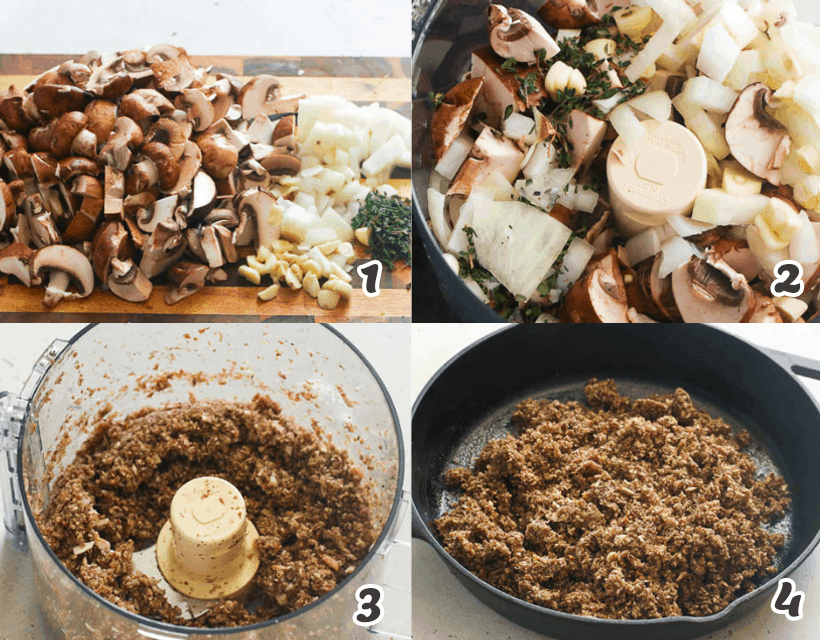
Duxelles
Chop – Put the mushrooms, onions, garlic, and thyme in a food processor and pulse until finely chopped. (Photos 1-3) Saute – Heat a large saute pan over medium heat, then add butter or olive oil. Add the mushroom mixture, and sauté for 15-20 minutes or until most of the liquid has evaporated. (It’s essential to remove as much moisture as possible so the bottom of the pastry doesn’t get soggy.) Season with salt and pepper and set aside to cool. (Photo 4)
Beef Tenderloin
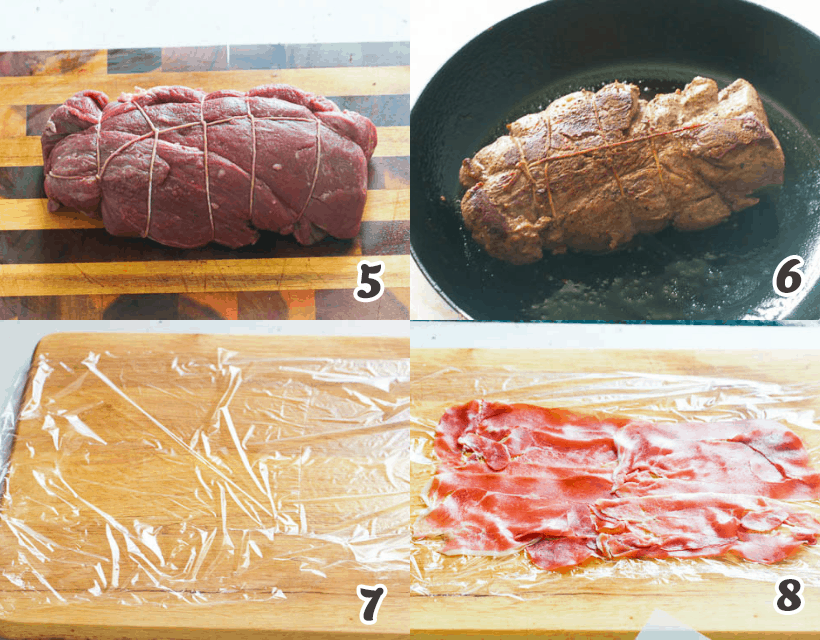
Shape – If the tenderloin isn’t evenly thick, even it out by tucking the thinner end under for a rectangular shape. Tie the tenderloin into a log with kitchen twine in about six places to hold its shape while searing. (Photo 5) Season the tenderloin with salt and pepper on all sides. Sear – Heat oil over high heat in a large oven-safe skillet. Once it’s hot, add tenderloin, turn the stove down to medium-high heat, and sear for 2 minutes per side. (Photo 6) Cool – Transfer to a plate and let it cool slightly. Remove the twine, and brush the seared tenderloin with optional Dijon mustard.
Wrapping
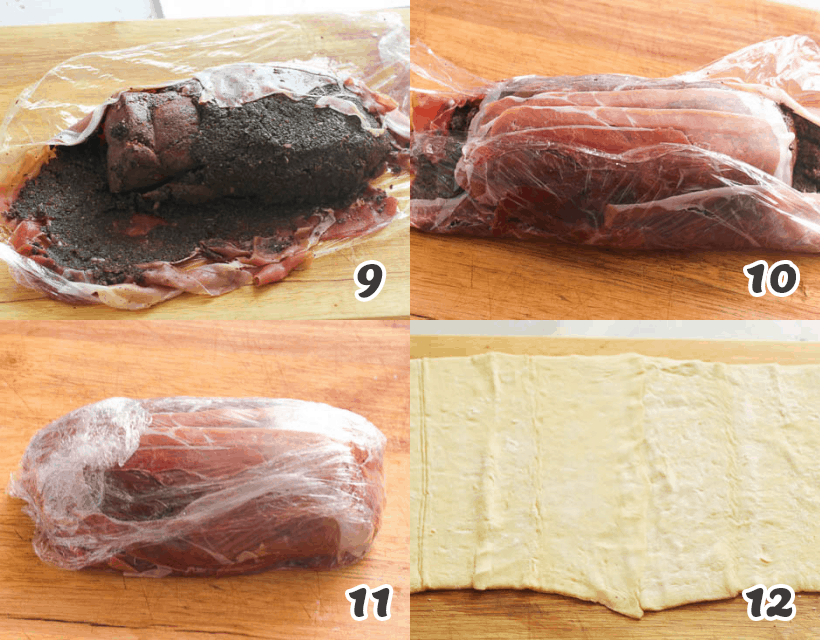
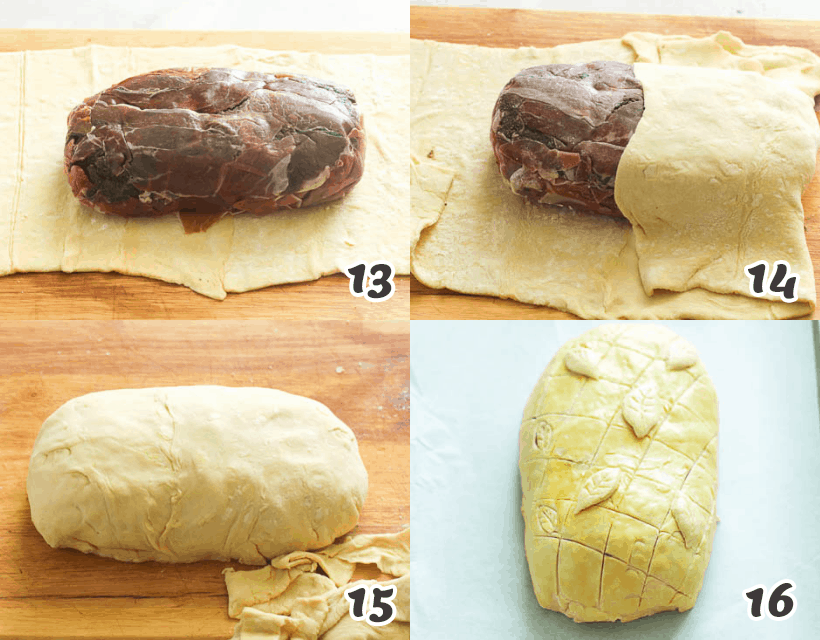
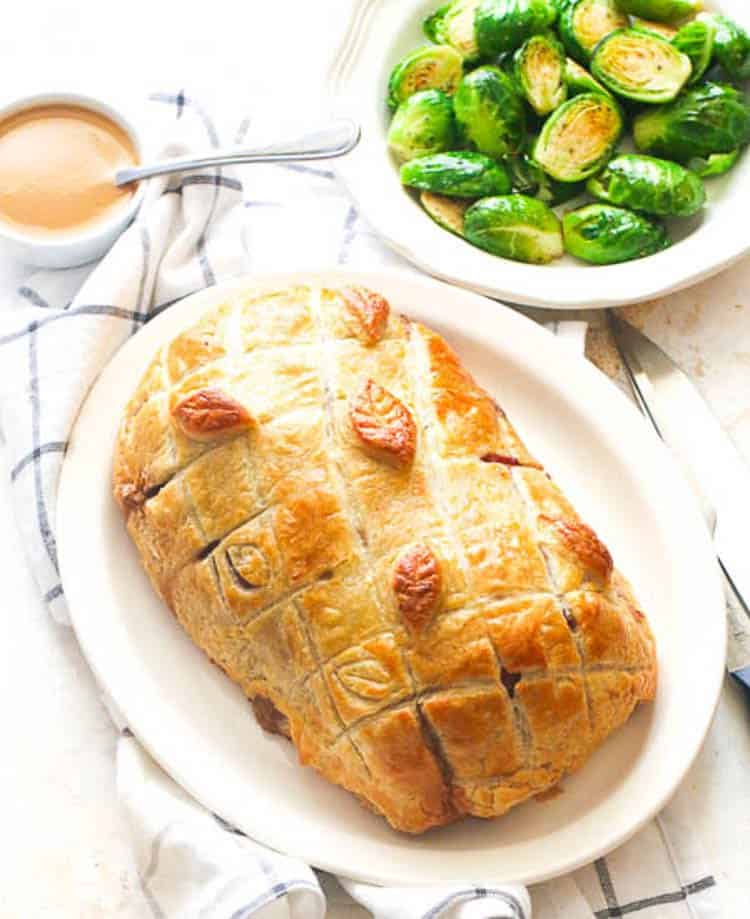
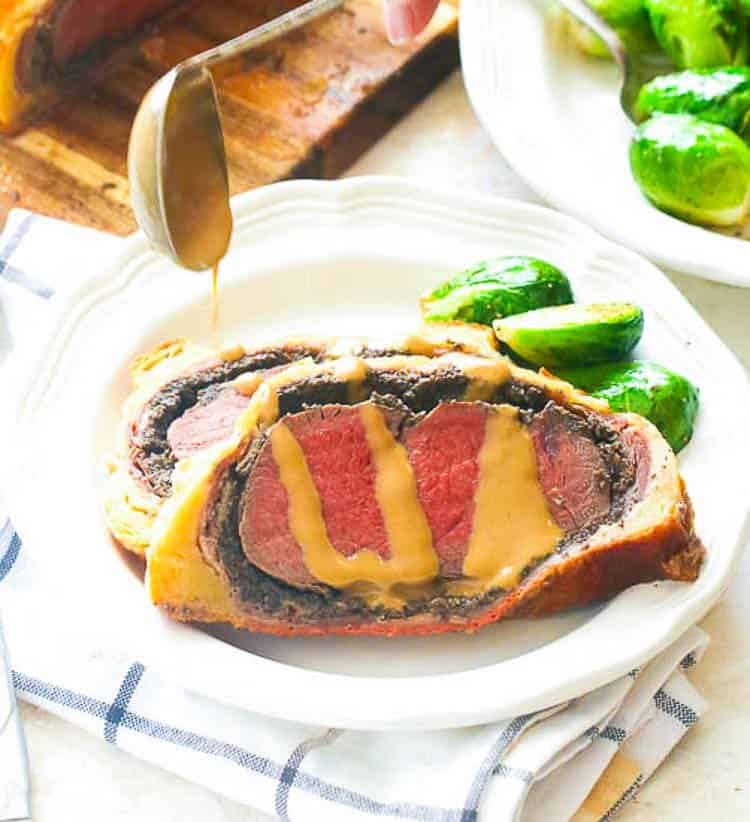
Prosciutto – Lay a long piece of plastic wrap (about 15″×15″) on your work surface. Carefully arrange the prosciutto slices on the plastic wrap in an even layer, overlapping them slightly. It should be large enough to cover the entire tenderloin. (Photos 7-8) Duxelles – Spread the mushroom mixture evenly on the prosciutto with a spatula. (Photo 9) Tenderloin – Using the plastic wrap, roll the tenderloin up (including the ends) in the prosciutto and duxelles, completely enclosing it so everything stays together and retains a rectangular shape. (Photos 10-11) Chill it in the fridge for 30 minutes so it keeps its shape. Preheat oven to 425℉ (220℃). Puff Pastry – Roll your puff pastry into a rectangular shape on a lightly floured surface. Measure and ensure that the pastry is long enough to go all the way around the tenderloin. You may have to seal two sheets together to make it longer. (Photo 12) Beef – Remove the tenderloin from the fridge and carefully cut the plastic wrap off. Transfer the meat to the middle of the puff pastry. Slowly wrap the beef in the puff pastry. Cut off extra pastry ends, reserving for decoration if desired. (Photos 13-15) Decorate – Cut decorative leaves from the leftover pastry dough and arrange them on the wrapped beef tenderloin. Chill it for 10-15 minutes. Brush the top and sides of the pastry with egg wash, then make slits on top of the wrapped beef with a knife to create steam vents. Place on a baking sheet. (Photo 16) Bake 30-40 minutes or until the puff pastry browns to a beautiful golden. If the pastry browns too fast, tent it with foil. Cooking time will vary depending on the meat’s thickness and your preference; an instant-read thermometer will read 125-130°F (50-55℃) for medium-rare. Rest – When the beef has reached the desired doneness, take it out of the oven and let it rest for 10-15 minutes before slicing. However, leaving it too long before cutting might cause soggy puff pastry.
Wine Sauce
Saute – Heat a small pan with butter or oil. Then add onions, garlic, bay leaf, and thyme; sauté for 1 to 2 minutes. Wine – Pour in the wine and stock and continue cooking until sauce has reduced by about half. Remove from the heat and strain. Cream – Pour the liquid mixture back into the pan and add heavy cream and mustard. Cook for a few minutes until sauce thickens—add salt and pepper to taste. Serve – Drizzle it over your sliced Beef Wellington.
Recipe Variations
Tips and Tricks
Cook the mushroom duxelles until all excess liquid evaporates to avoid soggy pastry. Wrap the tenderloin tightly to prevent holes or gaps, resulting in a better shape and even cooking. Roll the puff pastry as thin as possible without tearing so it cooks golden brown before the beef overcooks. Brush the inside of the puff pastry with an egg wash before wrapping the tenderloin to reduce the risk of sogginess. An instant-read meat thermometer saves on the guesswork. When it reaches 125℉ (50℃), your tenderloin is medium-rare.
Make-Ahead and Storage Instructions
You can make your Beef Wellington ahead! Follow the instructions up to and including wrapping the beef in plastic wrap. Store it in the fridge until the next day or in the freezer for 2-3 months. Thaw or remove it from the refrigerator, roll out your puff pastry, unwrap the beef, wrap it in the puff pastry, and bake. Leftovers are a lifesaver! Slice Beef Wellington into individual servings and refrigerate in an airtight container for 3-4 days. Or freeze individual slices in freezer ziplock bags for up to 2 months. To reheat frozen Beef Wellington, pop it straight into a 400℉ (200℃) oven for 15 minutes.
What to Serve With Beef Wellington
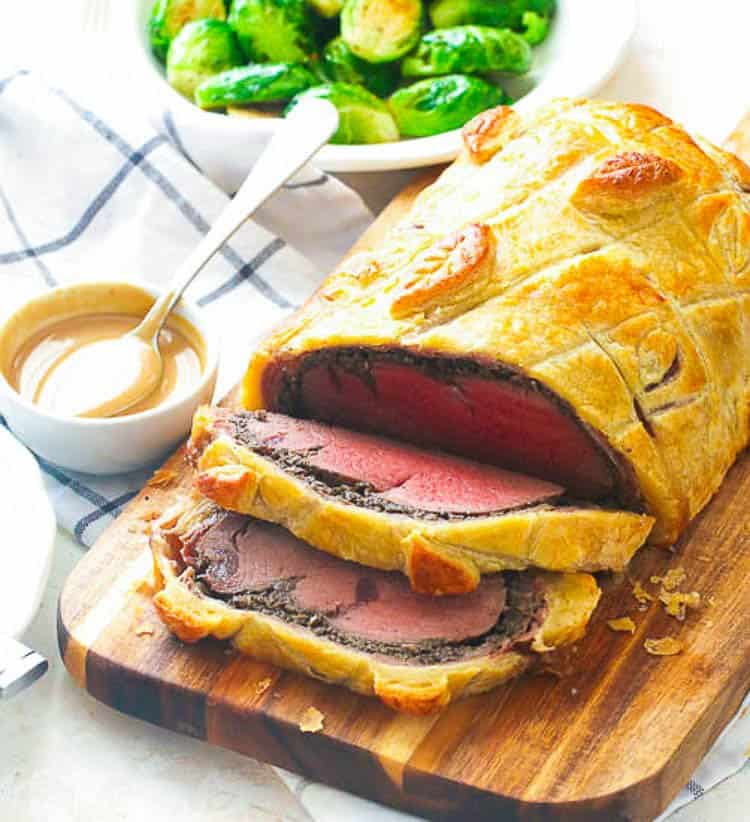
Beef Wellington is a one-pot meal. But sauteed Brussels sprouts, green beans, and a tossed salad complement beef well. Finish this heavy meal with a lighter dessert, like a fruit tart or ambrosia salad.
More Holiday Main Dishes to Choose From
Smoked Turkey Roast Turkey Breast Smoked Spatchcock Turkey Brown Sugar Glazed Ham
Watch How to Make It
[adthrive-in-post-video-player video-id=”vcqTGSSZ” upload-date=”2020-12-02T08:23:23.000Z” name=”Beef Wellington” description=”Juicy, tender, and showstopper BEEF WELLINGTON wrapped in prosciutto slices, mushroom duxelles, and a flaky crust then served with a wine-infused sauce. Serving this dish at your next gathering will get you rave reviews from everyone!” player-type=”collapse” override-embed=”false”] This blog post was originally published in December 2020 and has been updated with additional tips, new photos, and a video.