When I was younger, these were called meat and cheese trays or fancy hors d’oeuvre platters. I loved to stack a slice of salami and provolone on a cracker, then top it with an olive. And I couldn’t stay away from them. These babies can carry a hefty price tag if you buy them already prepared. I thought it would be a nice gift for a friend’s baby shower, then got sticker shock. Oh no, you know I can do so much better on my own. And, of course, it was a lot cheaper.
Charcuterie Board Tools
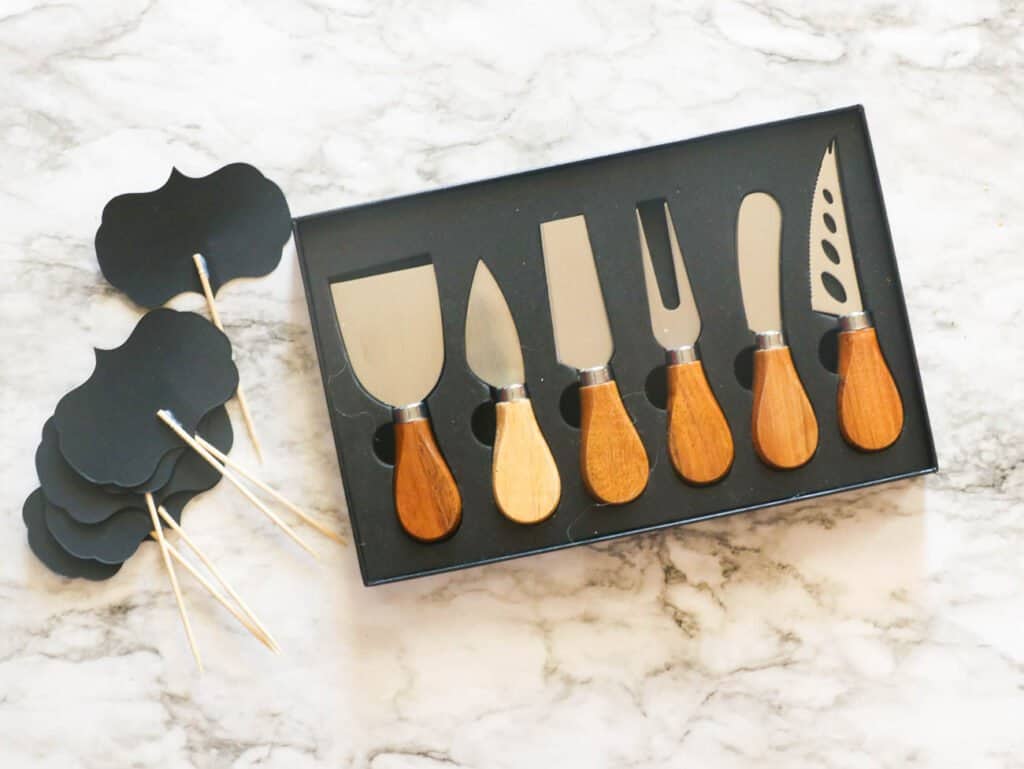
There’s not a lot to put in this section. You need: 1) an attractive wooden board large enough to arrange your ingredient selection. (If you want something more elegant, you can use a marble slab.) You might want some 2) cute little forks and knives so people can grab what they want without touching the food. And some 3) ramekins or small bowls for dips and sauces will make a tidier presentation.
What You Need for a Charcuterie Board
You can get as fancy or as uncomplicated as you want because this versatile platter is much easier than it looks. The following are just suggestions for charcuterie board ideas.
Gather Your Ideas
The planning stage starts with talking to yourself. No, we’re not crazy; we’re getting it together.
How many people are you serving?Will this plate be the star of the show, or will there be more on the table?What’s the budget say?
How to Make a Charcuterie Board
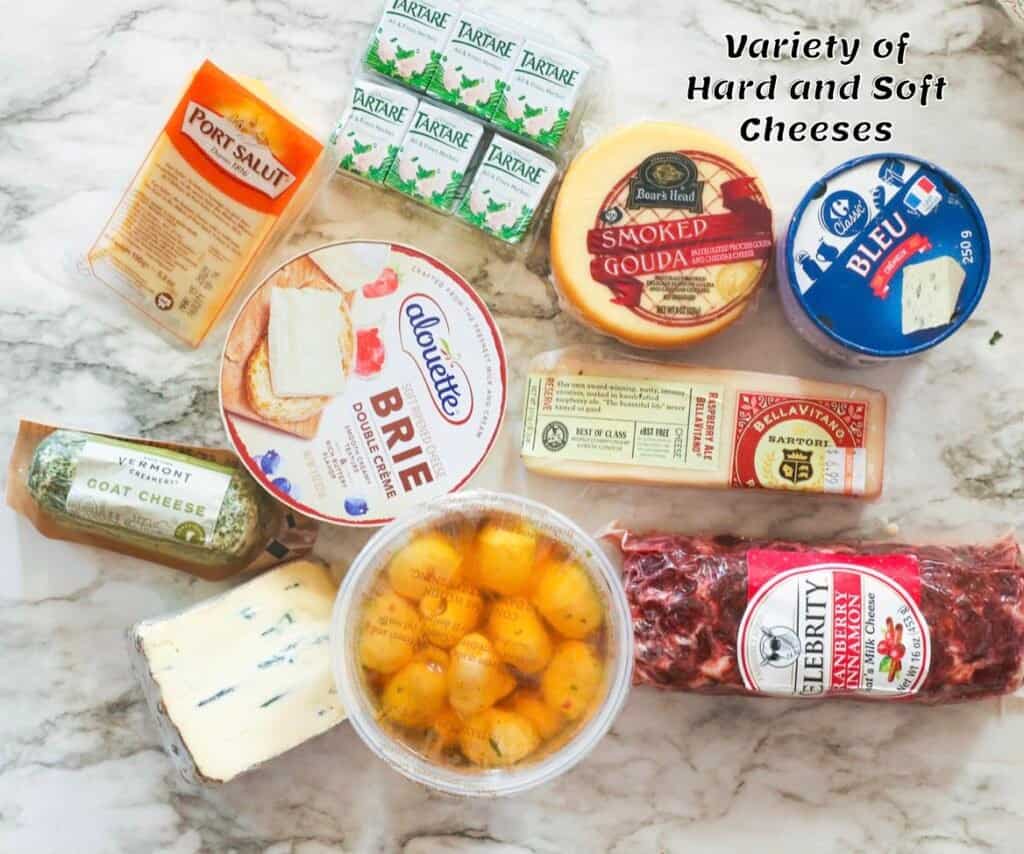
Pick a Board There are different boards to choose from – use whatever you have on hand. Wooden cutting boards, marble boards, serving trays, or even a large plate. If purchasing a charcuterie board, check out the home goods department for the best selections. Start Assembling
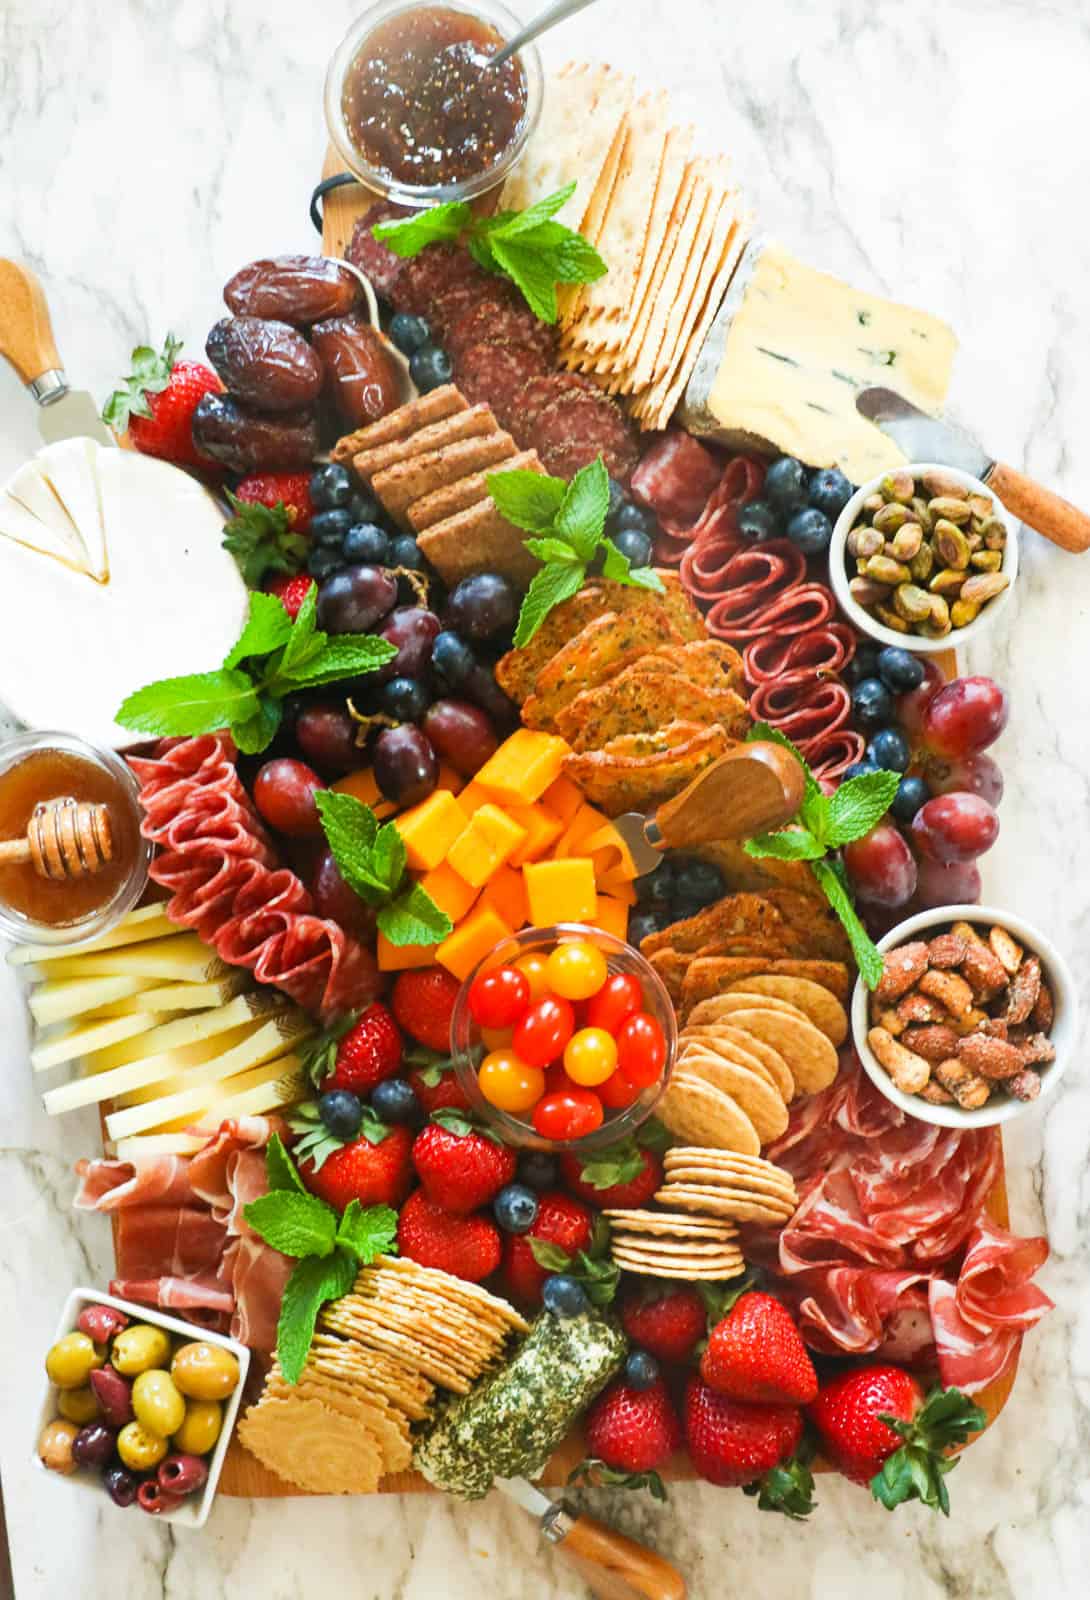
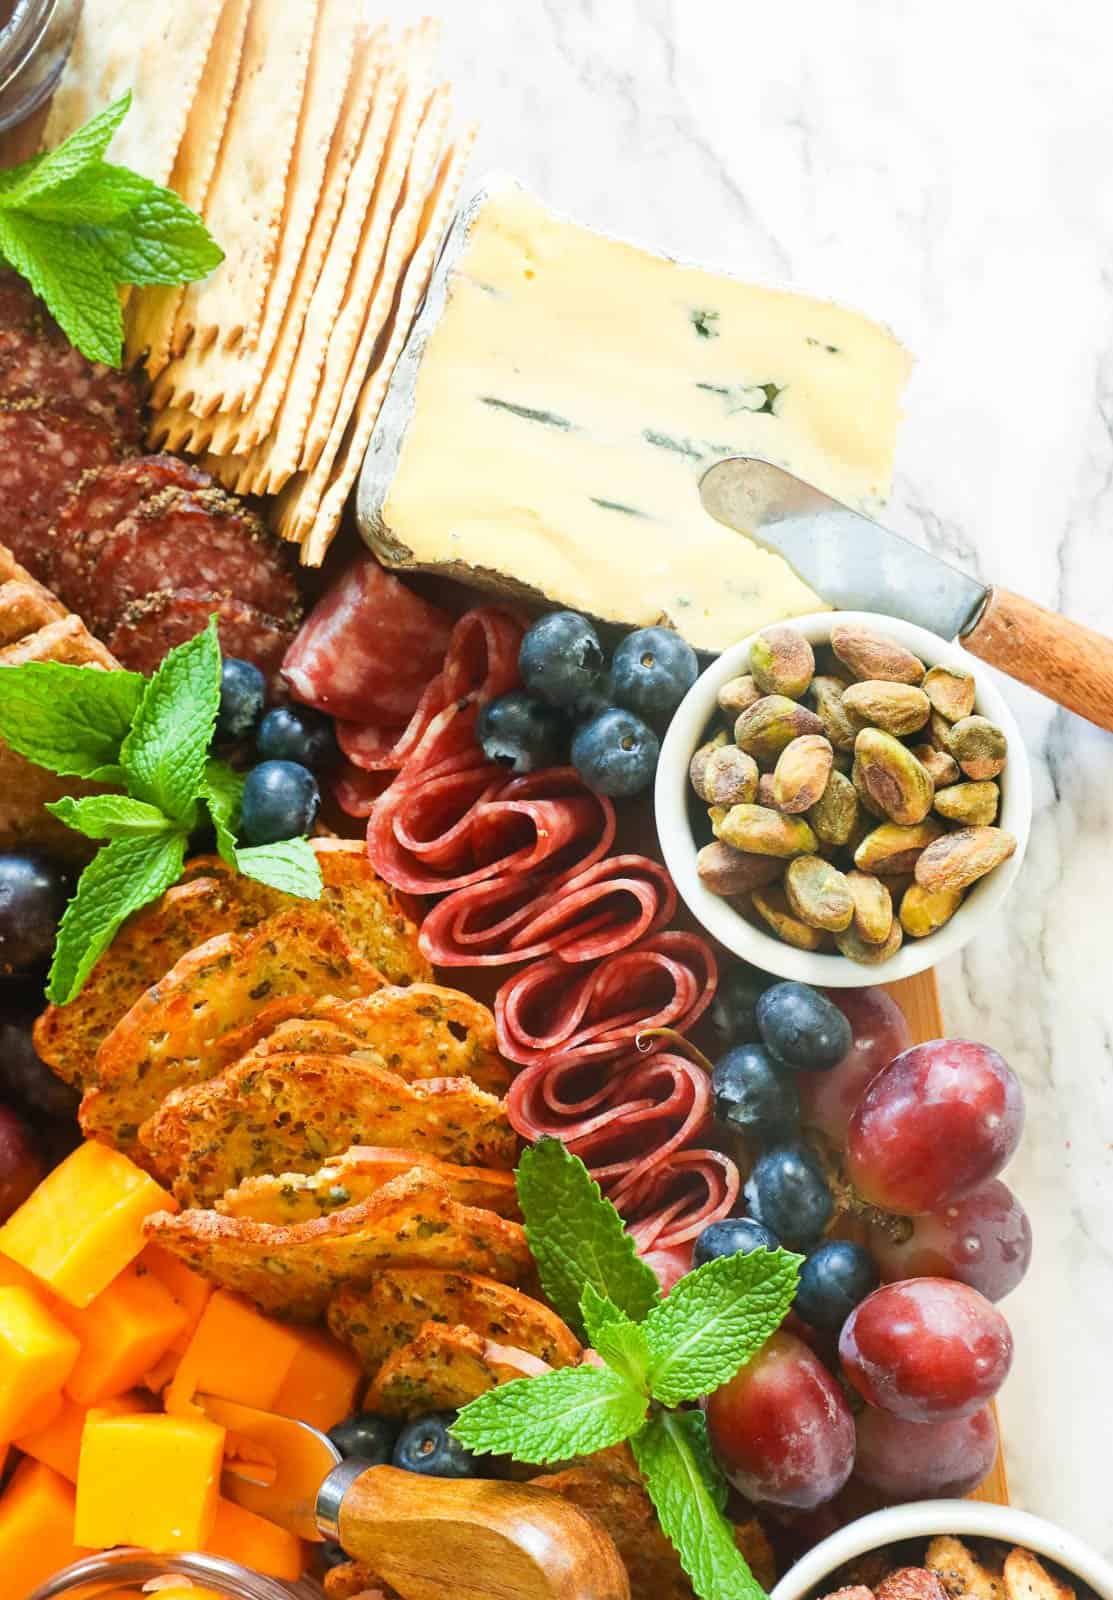
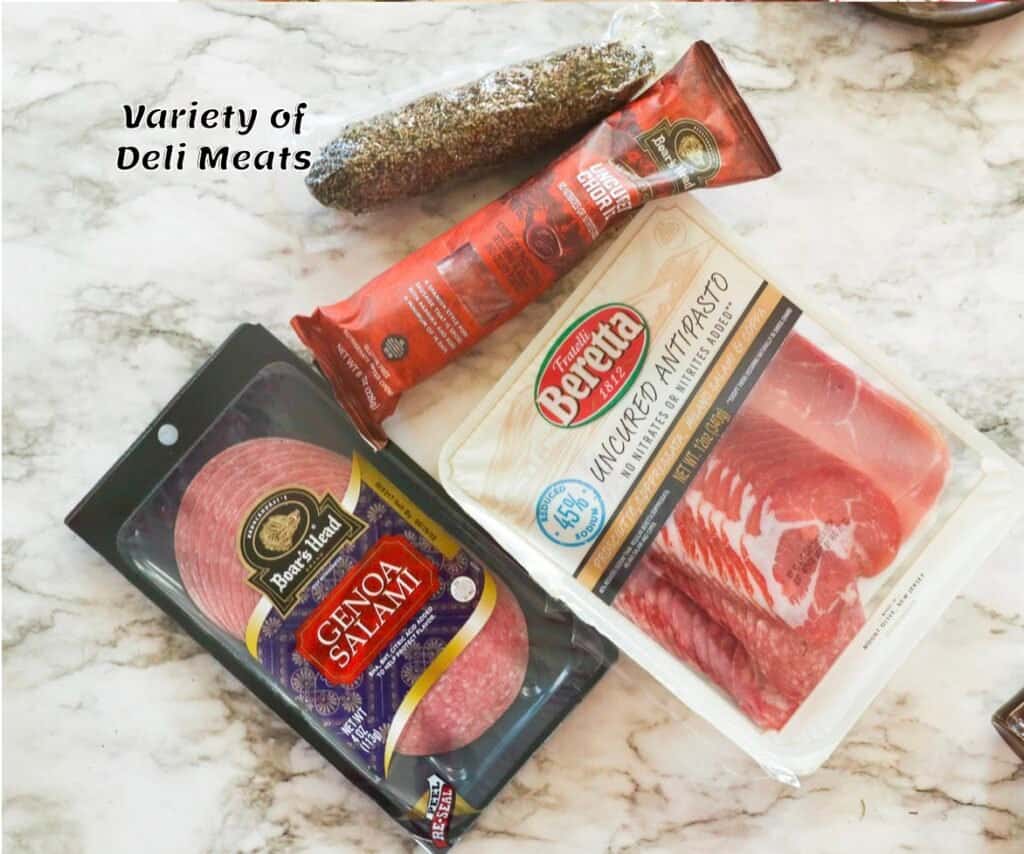
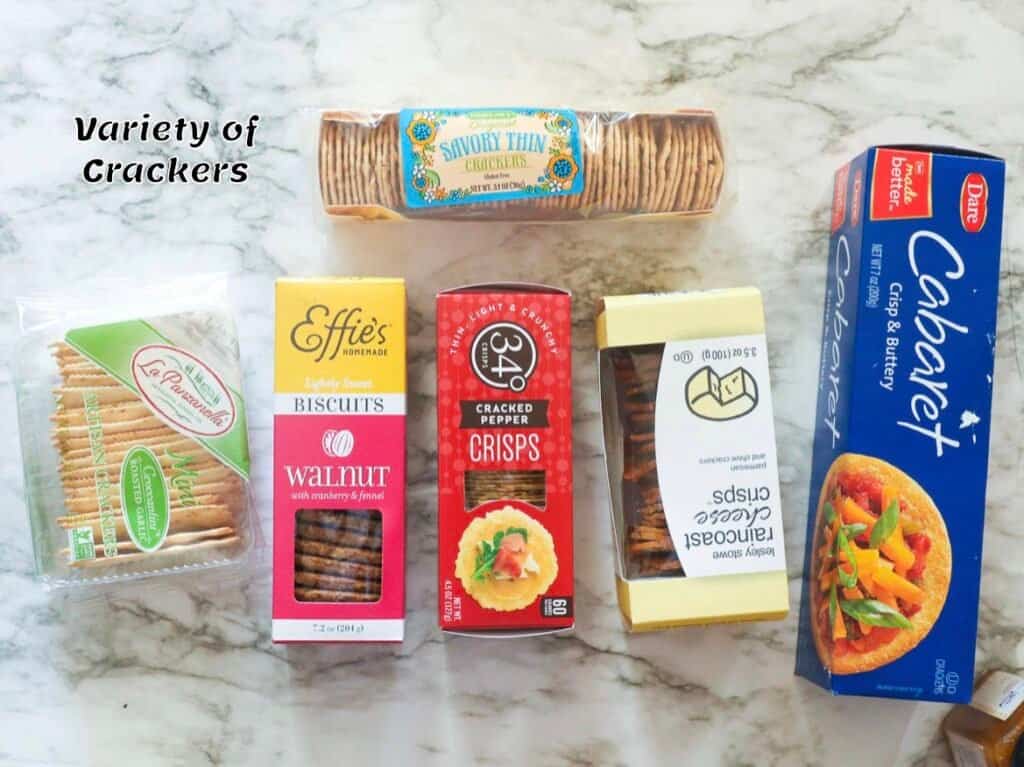
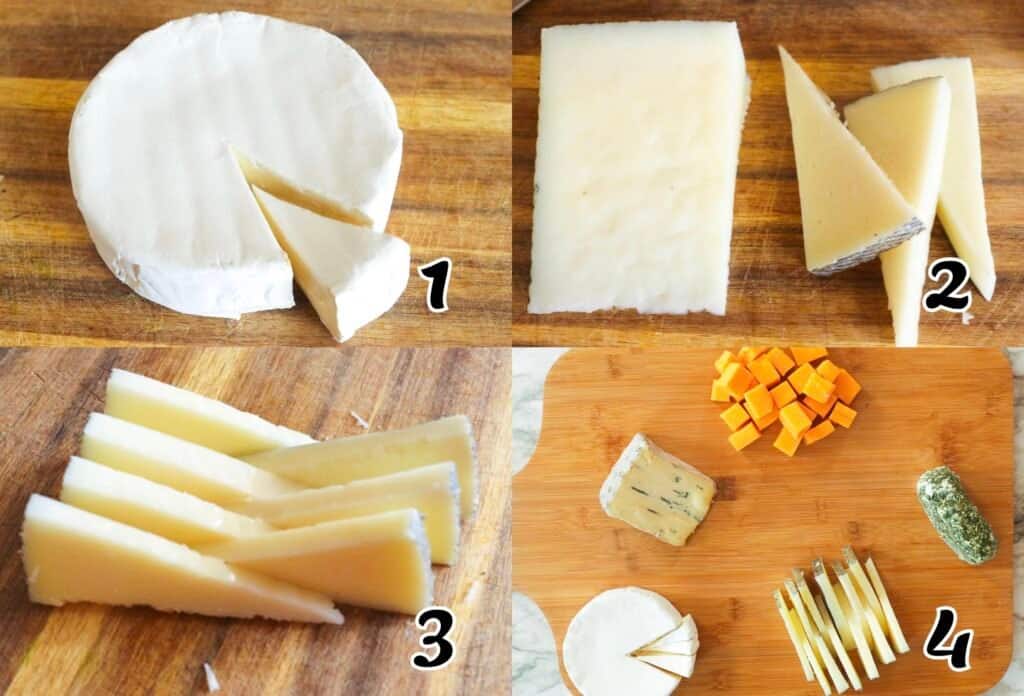
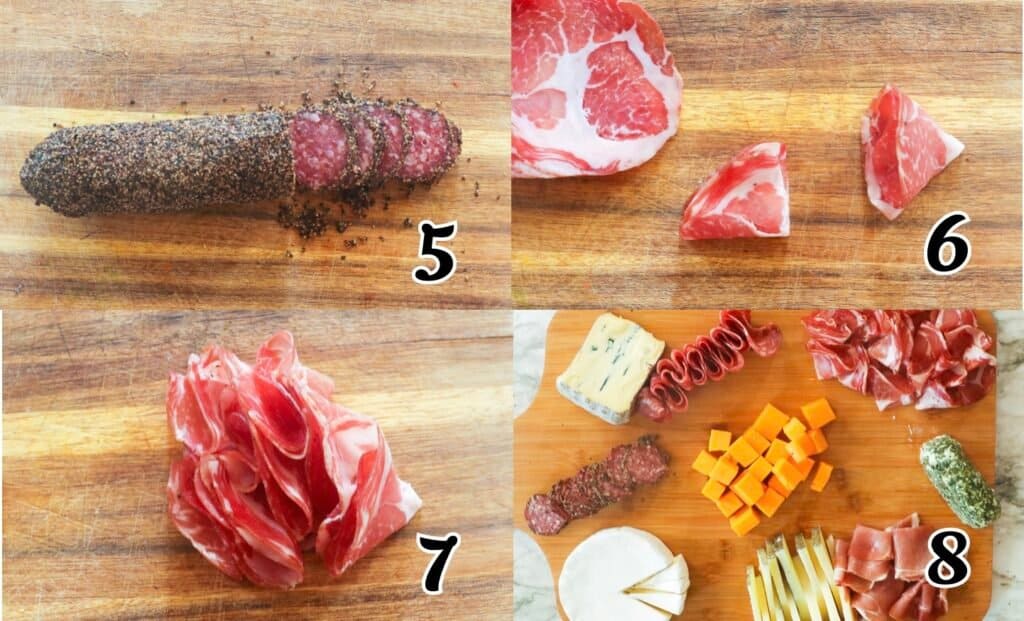
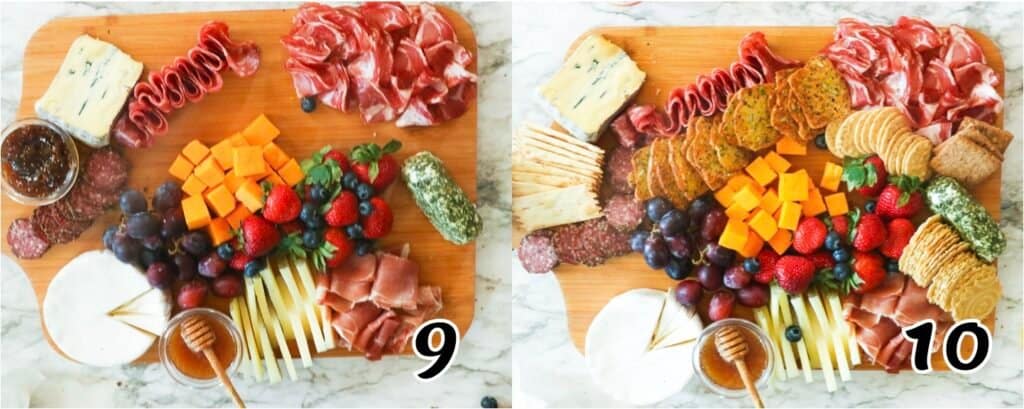
Start with large items or cheeses. Be sure to place any cheese that needs cutting on the side of the board to facilitate cutting. Continue setting the cheese far apart from each other. (Photos 1-4)Thinly slice meat and fold in quarters or decoratively (as shown in the photo). Place on the board, and repeat with the remaining meat. (Photos 5-7)Lay crackers on the board, as desired. (See photo for reference)Proceed with the rest of the ingredients. Place the fruit next to a cheese it pairs well with; no worries if it does not work out perfectly. Put nuts and smaller items like olives in small bowls or cups. (Photos 8-10)Fill in the nooks and blank spots with remaining small items (fruits, snacks, crackers, or whatever rocks your boat). Remember, you might have to move a few things around while creating your board. Enjoy!
Tips and Tricks
Make-Ahead Instructions
I prefer to assemble my charcuterie board as close to serving time as possible. Once you have everything organized, it only takes a few minutes to prepare. Of course, you can organize everything beforehand, even the day before. I cut up my meats and cheeses and refrigerate them until it’s time to put everything together. Ditto for the fruits and vegetables. They can be cleaned, cut up, and stored the day before. And, of course, any condiments like jams, spreads, or tapenades can usually be made beforehand and stored in serving dishes to go directly from the fridge to the charcuterie board.
Serving and Storage Instructions
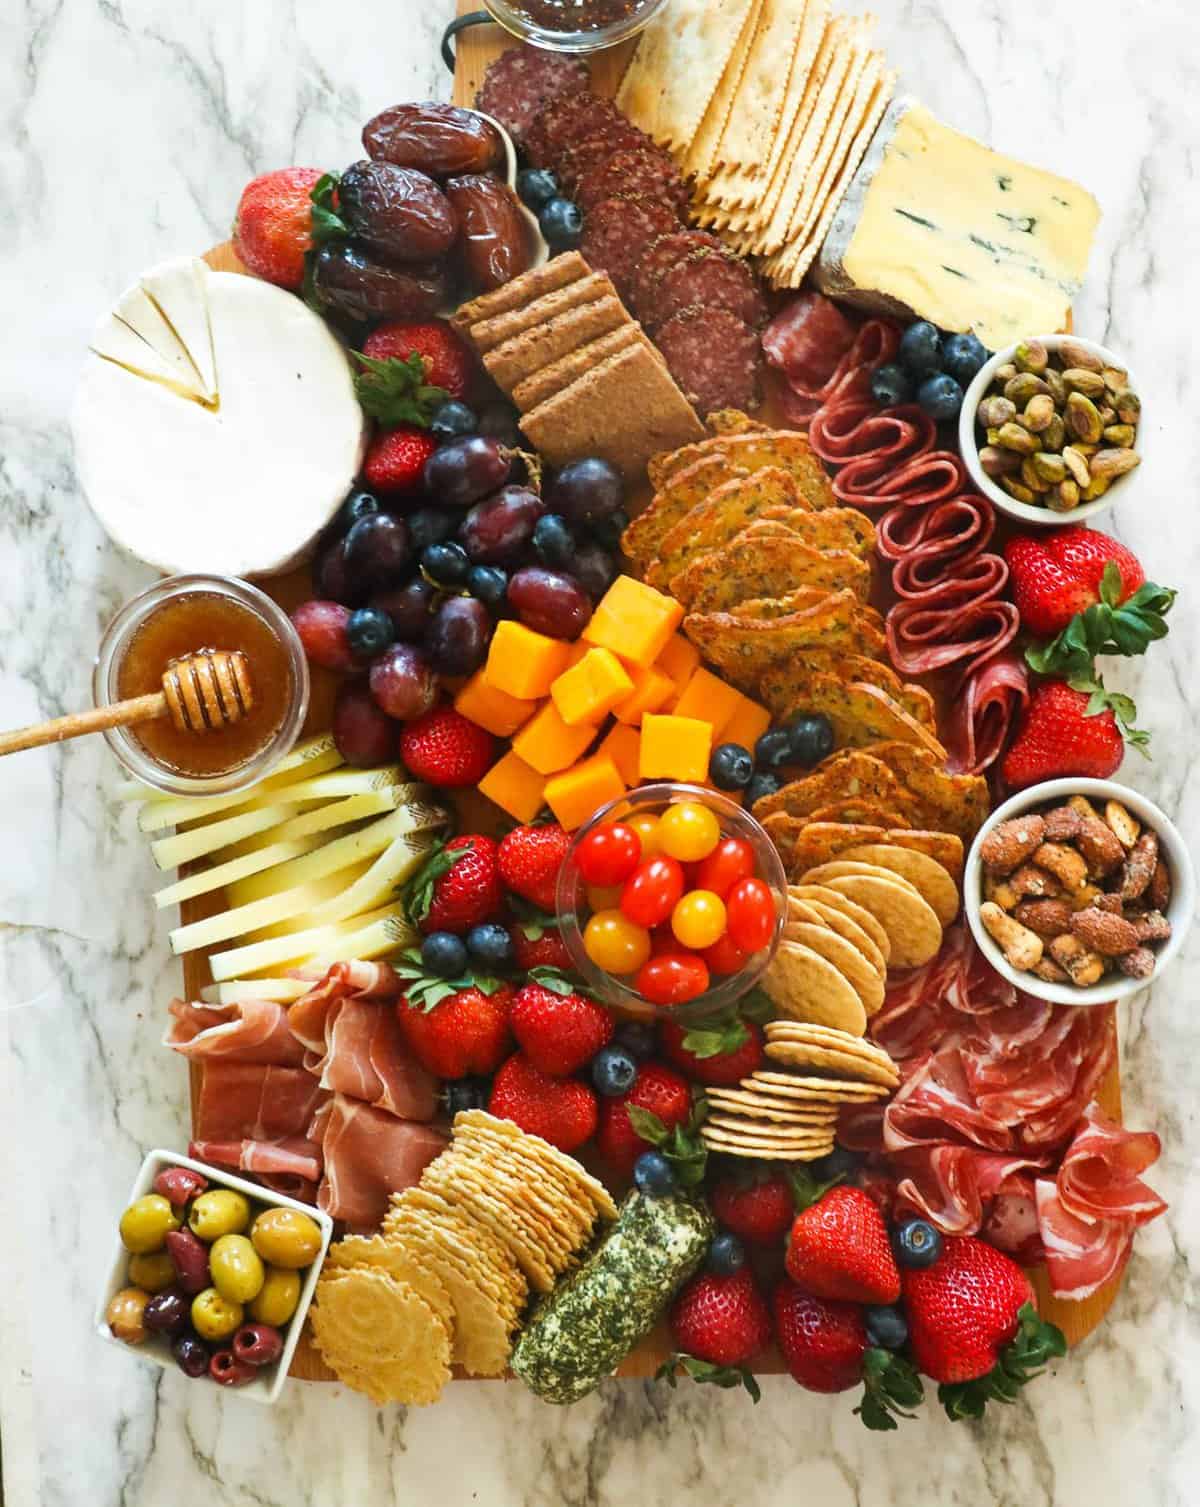
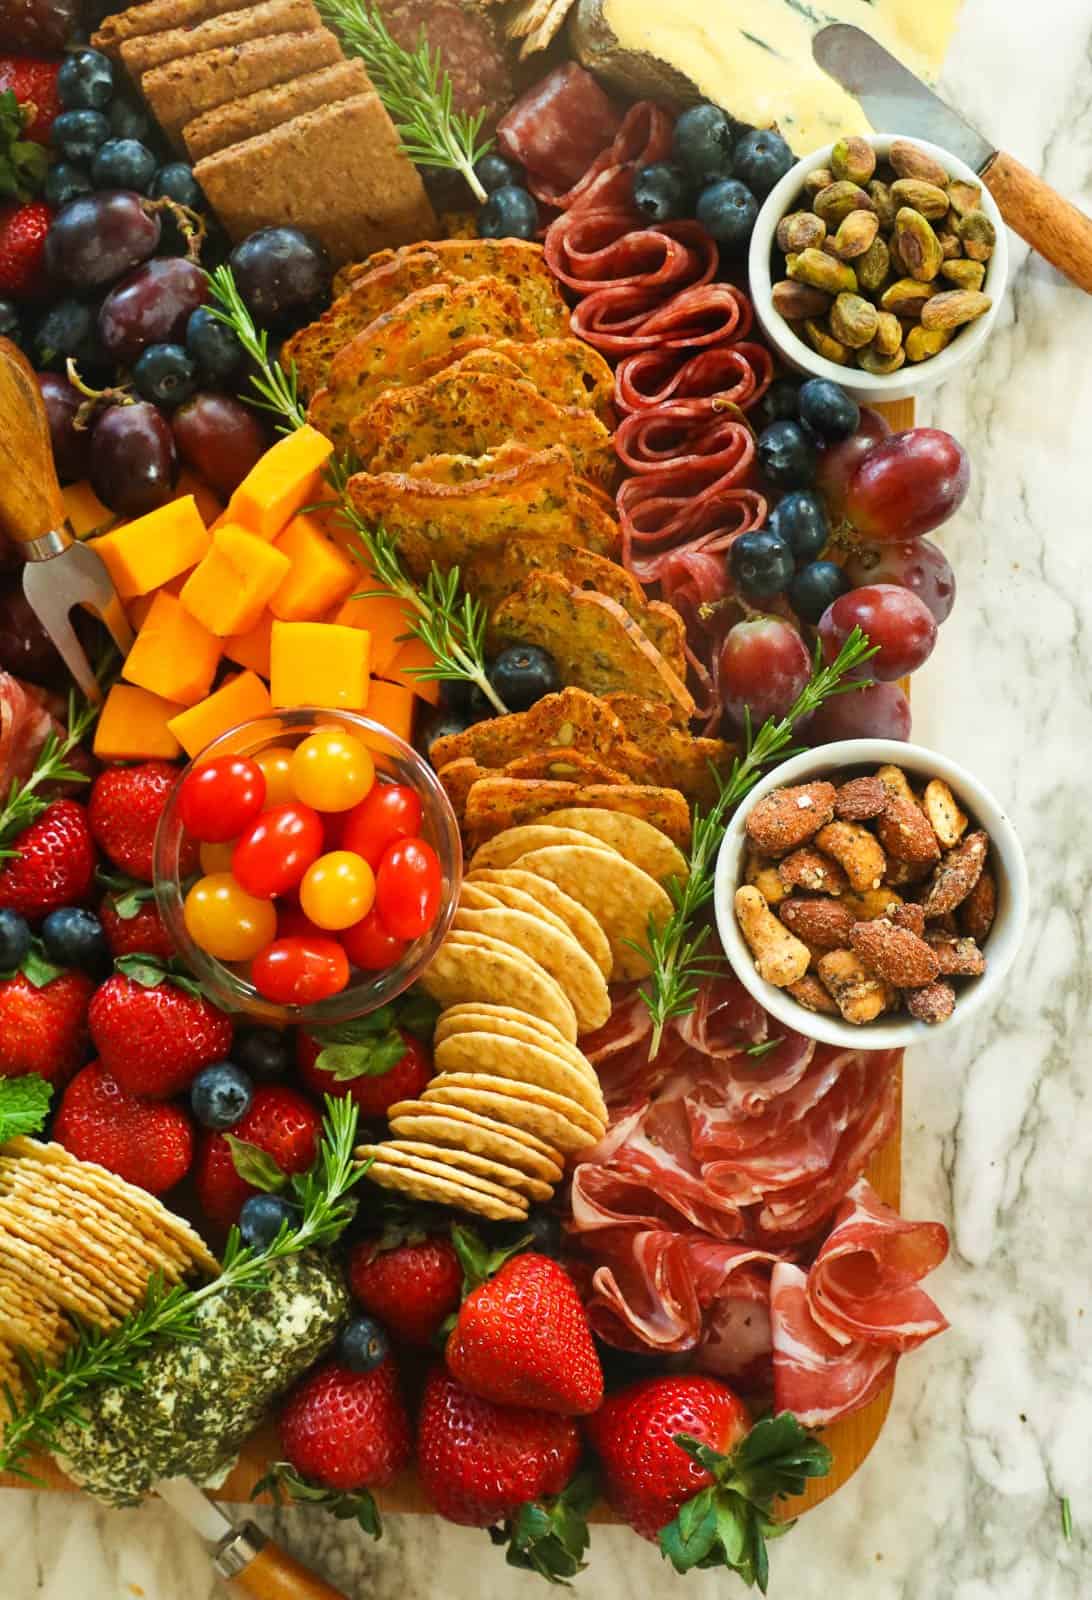
The great thing about charcuterie boards is that there’s no right or wrong way to make them! I start by getting all the ingredients together and then let my imagination and creativity run wild!
To assemble the charcuterie board, I suggest putting the larger items on the board first. Think large wheels of cheese, bowls of dips or spreads, or a jar of breadsticks.Then pile on the meat! Fold and arrange the meat in different ways to create texture on the platter.I put the crackers and bread next and try to pair them with the meats and cheeses. Remember not to fill up your board with bread. You can serve extra bread and crackers in baskets on the side.Finally, I fill in the gaps with fruits, pickles, nuts, and garnishes. Here your imagination can really go to town! Try to arrange your board so that it is visually appealing and well-balanced.
Storing leftovers is easy! Cheeses, meats, vegetables, and fruits can all be placed into individual containers and stored in the fridge for snacks the next day.
What to Serve With a Charcuterie Board
Fancy appetizers call for memorable cocktails! One of my favorites is a Mai Tai, one of the prettiest drinks out there. Peach bellinis are another must-try; they’re elegant, simple, and gorgeous. And what goes better with cheese than wine? Try an awesome mulled wine for something extra-special. For some non-alcoholic options, mango juice and strawberry watermelon juice are great additions to any party! They’re quick, refreshing, and super delicious.
More Appetizing Appetizer Recipes to Try
You don’t have to serve homemade items on your charcuterie board. But if you’re feeling adventurous, I recommend these goodies to personalize your charcuterie board!
Southern Cornmeal Fried ShrimpHomemade BreadsticksFlatbreadSpinach Artichoke DipSmoked Salmon Dip
Conclusion
There you have it! All my tips and suggestions for making your own bespoke charcuterie board! Get creative, have fun, and get ready to be showered with compliments at your next cocktail party! How do you plan on personalizing your charcuterie board? Let me know below. ❤️