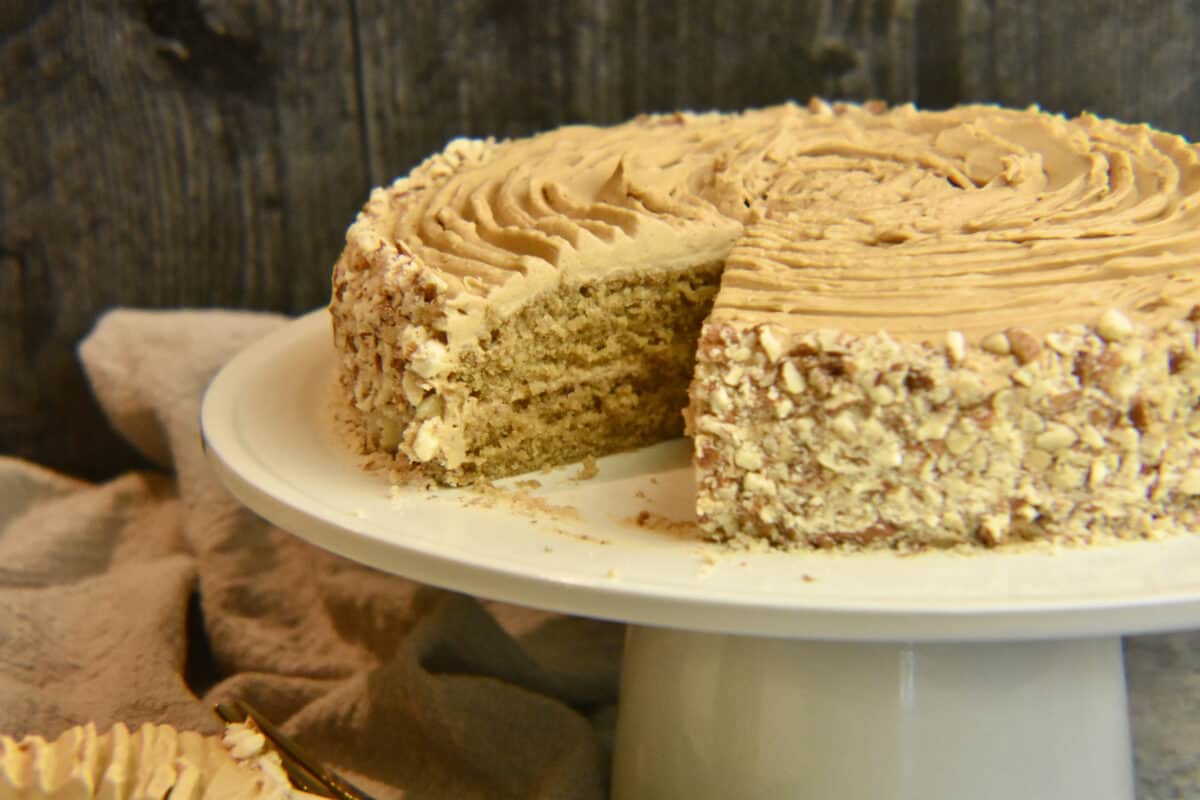
This cake, popular in Pakistan is also often featured in dessert menus and tea time menus in the United Kingdom. Popularly known as Coffee Layer Cake or Coffee Walnut Layer Cake, it’s different from the typical coffee crumb cake you may be used to here in the USA.
The History
Oddly enough, history reveals that early coffee cakes rarely contained coffee in them. As per ohdanishbakery.com, as coffee became popular in Europe around the 1600’s, the Danish took to pairing sweet breads with the slightly bitter beverage. These Danish sweet breads became known as coffee cakes without having an ounce of coffee in them! Today these early coffee cakes are known as Danish, named after their place of origin. Coffee cake today, whether it’s the crumb variety enjoyed by Americans or this layered version I’m presenting to you, actually contains a little of the actual brew in it’s mix.
My Story
For me this particular cake reminds me of tea time in Pakistan. That “tea trolley” you’ve probably read about in many of my posts was often graced with this cake. Different bakeries had their own signature version, the most famous one being that made by Bombay Bakery in Hyderabad, Pakistan. The 100 year old bakery is actually featured on tripadvisor.com.
Needless to say, it will take many an attempt before I can perfect a copycat version of that coffee cake. I hope to have that recipe tested and developed soon, but in the meantime,I hope you enjoy this version.
Created to fulfill and recreate fond memories, each bite takes me back in time to places and people who are no longer in existence today. That is the beauty and connection of food, whether or not we realize it.
The Recipe
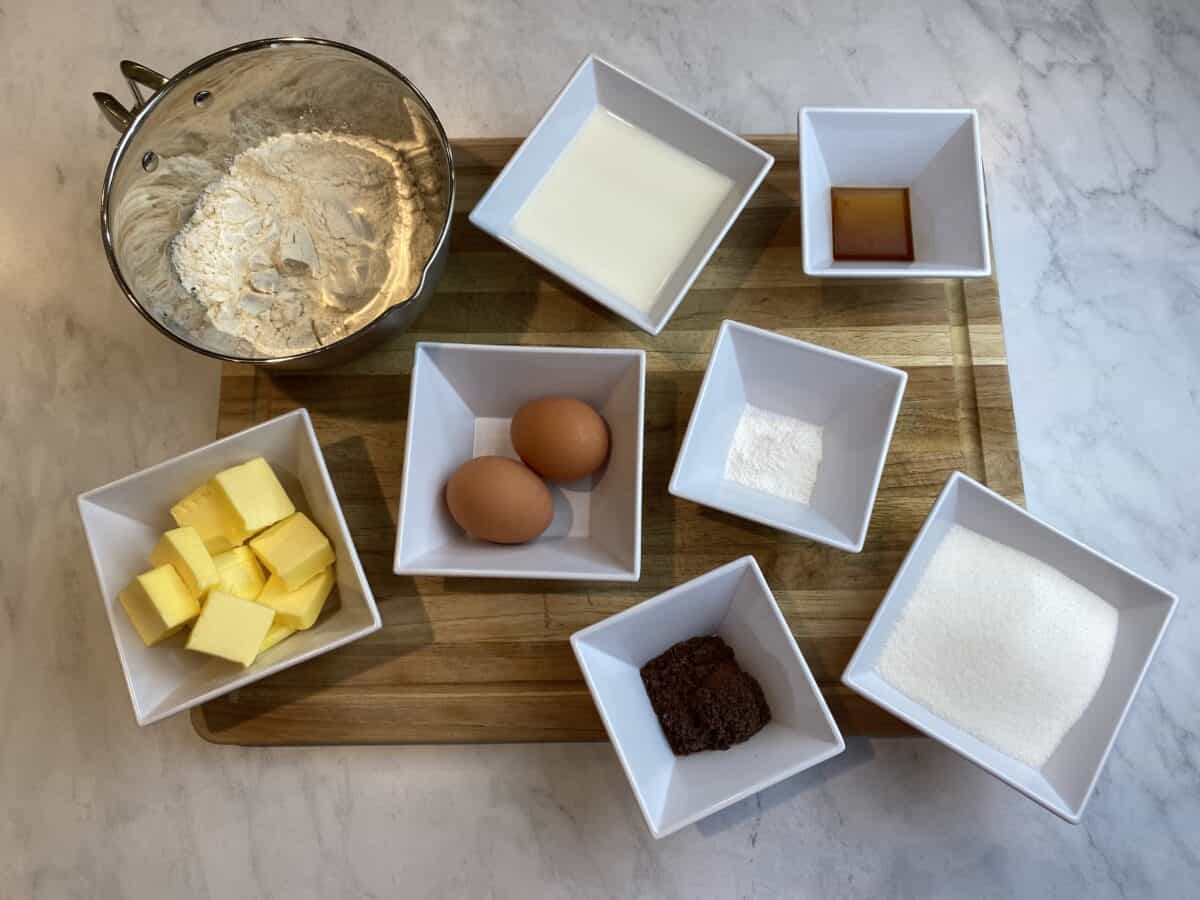
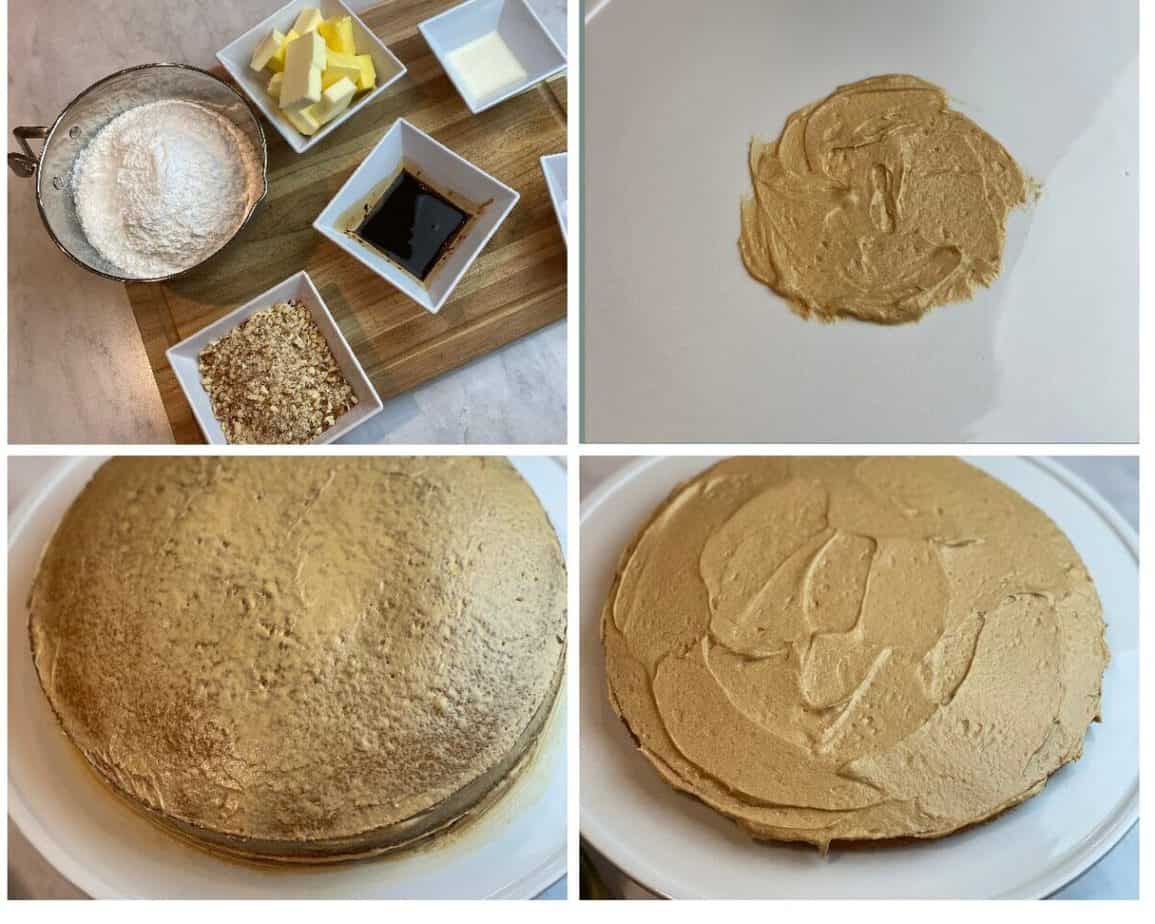
The first and most important step in baking a cake is to have the ingredients at room temperature. This ensures that the batter comes together quickly and that the cake is light and fluffy.
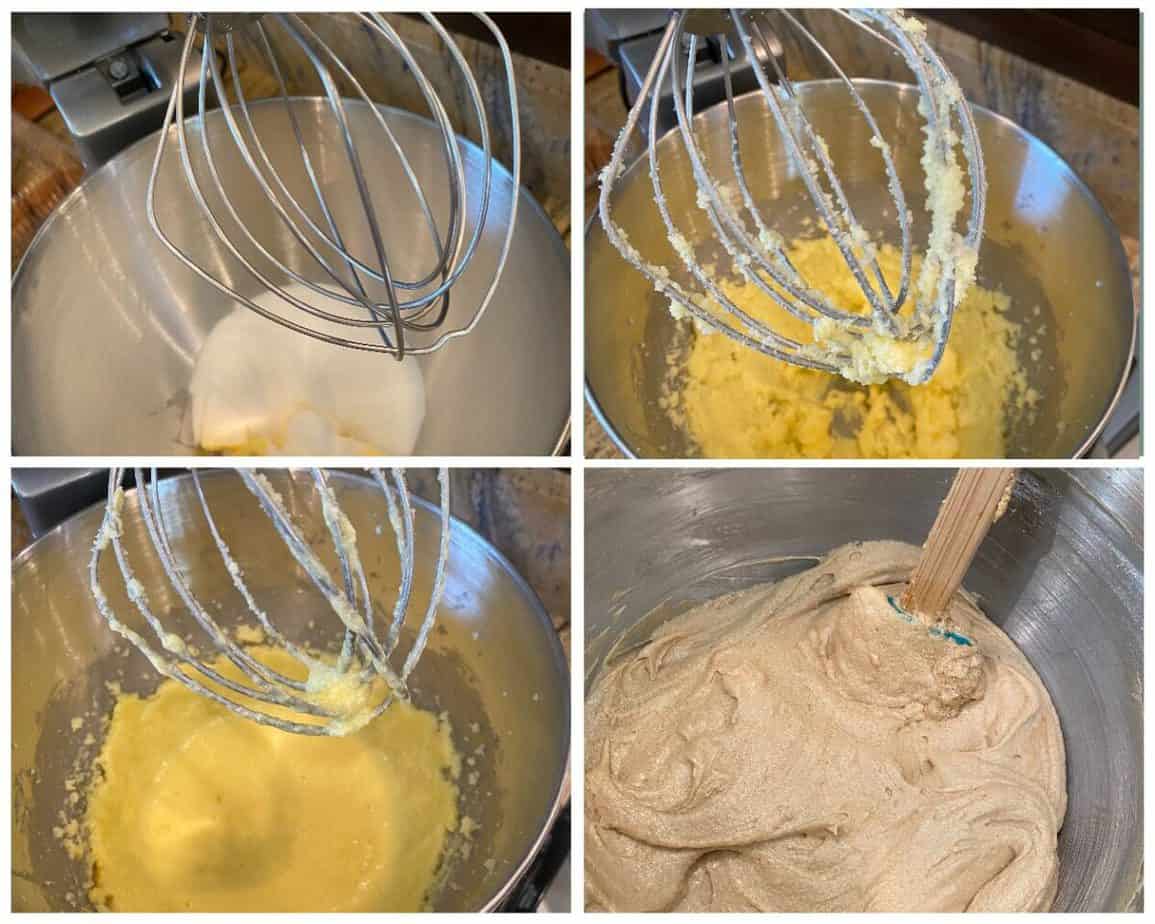
Mixing The Batter
The first step in mixing a batter is usually creaming the butter and sugar together. As the butter and sugar are creamed together, air is trapped in the batter. As the cake bakes, this air expands and produces a fluffy cake. However, overbeating can have the reverse effect, so a 1-2 minute beating time is ideal. Overbeating in general can make a cake dense as it causes gluten to develop. This is where alternating dry and wet ingredients during mixing helps. The batter comes together more quickly and efficiently this way.
The trick is to mix everything just till it is all combined and then pour it into the pans.
Baking The Cake
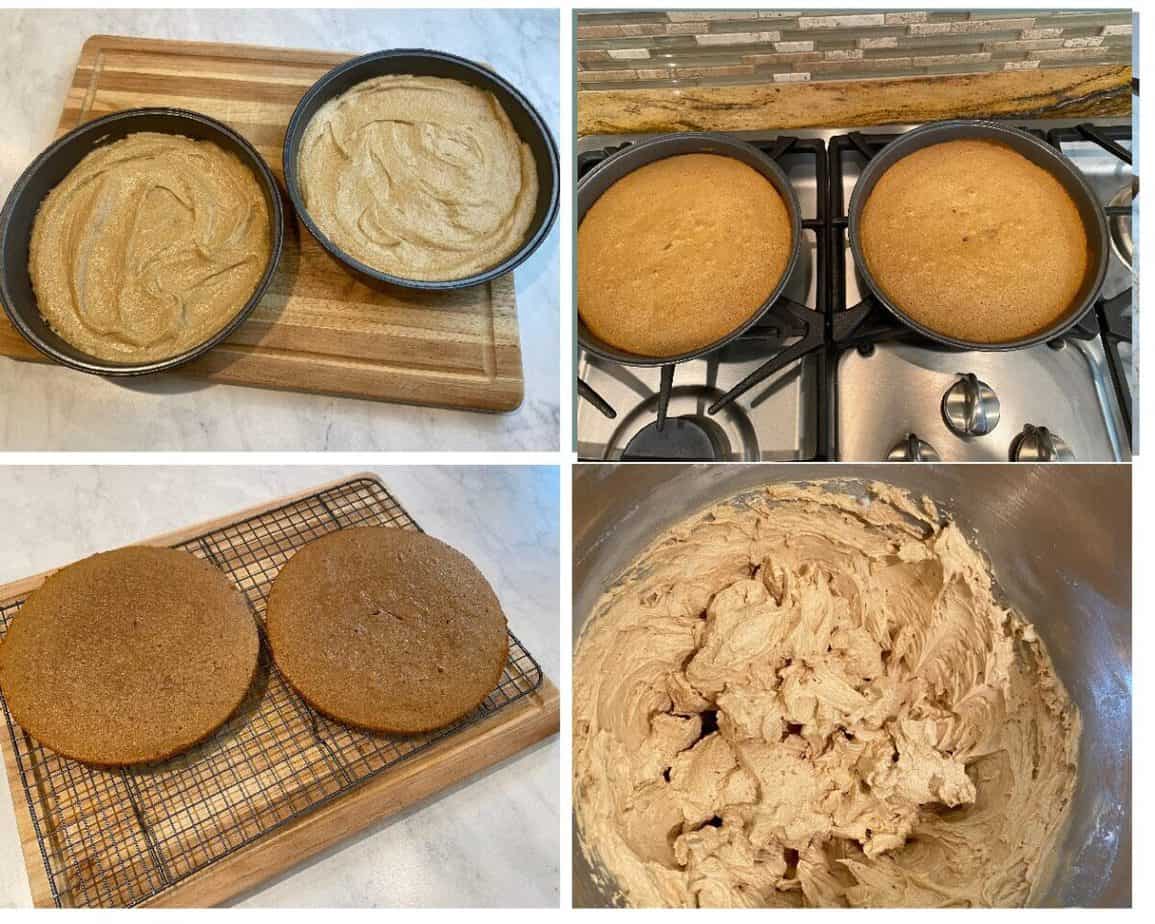
When you pour the batter into the pans, try and make sure the quantity is evenly distributed in both pans. This will ensure even layers. I use measuring cups to do this, or you can use a digital scale and weigh the pans to make sure that distribution is even. Make sure not to overbake the cake. I usually check on mine about 5 minutes before the final time given since ovens and cooking conditions vary. There are a few different ways to check and see that the cake is done, please make sure to read the Notes in the recipe card to decide which one works best for you. TIP: In the event that your cake does turn out a bit dry, the trick is to brush a little simple syrup on the cake. A little flavoring can also be added to the syrup to add some depth if needed.
Time To Ice The Cake
While the cakes are cooling, it’s a good idea to prepare the frosting (as instructed below) and chop the nuts. Once the cake is cool, I begin by spreading some icing on my cake plate as shown below. This helps the first layer stick and stay in position as you ice the rest of the cake.
Tips On Icing The Cake
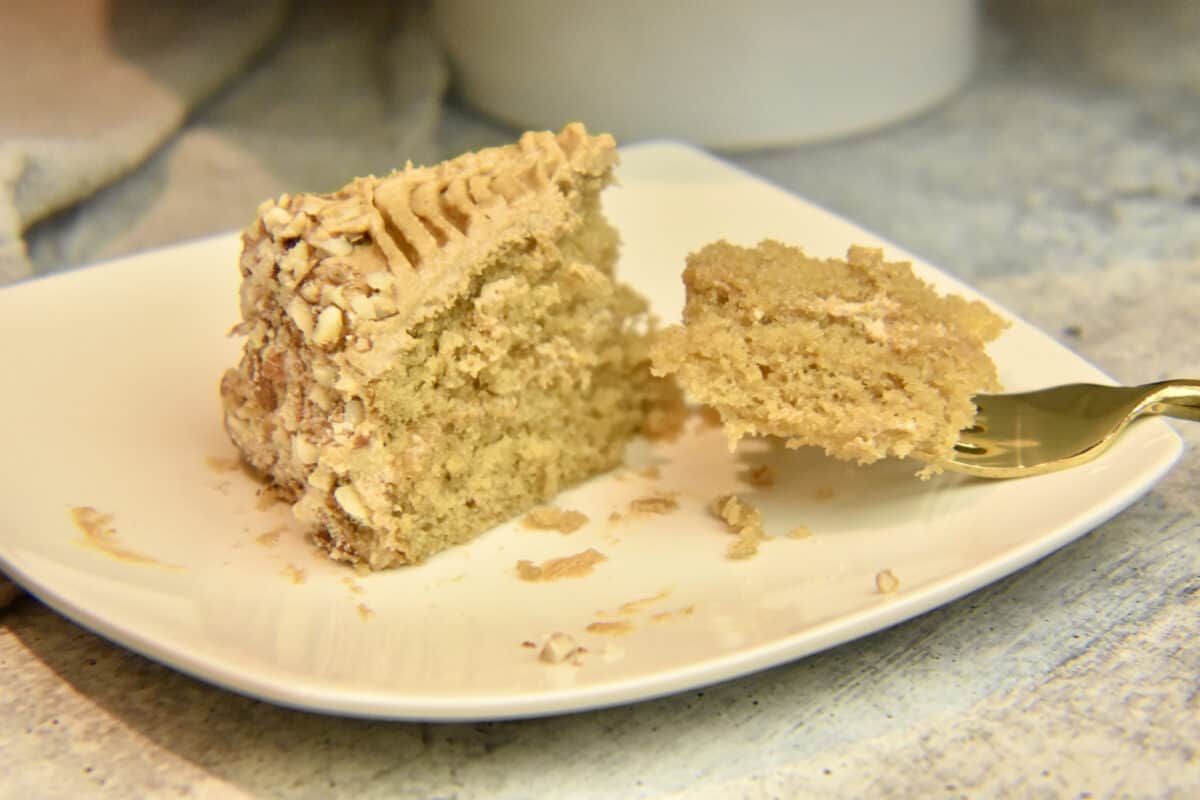
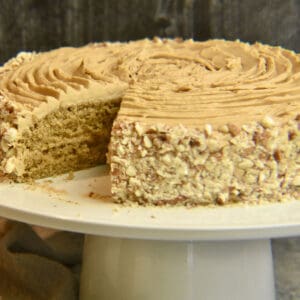
Trim the rounded top off your layers, if necessary, to flatten them and make icing the cake easier. Make sure the cake is totally cool before attempting this.Since the cake is easier to ice when completely cooled, consider making it a day ahead of time and icing it the day you plan to serve it.Freeze the top layer before adding it to the bottom one to prevent breaking it.Spread the crumb coat and chill the cake for 30 minutes before adding the next layer of frosting.Once the frosting is done, use a fork or an icing comb to create some texture on the top.Press the almonds around the sides of the cake and chill the cake for 10-15 minutes to let them set.Clean the edges of the platter using the back of a knife and serve your cake!
I hope you decide to try this delicious cake and enjoy it as much as I do! Don’t forget to rate the recipe when you’re done!