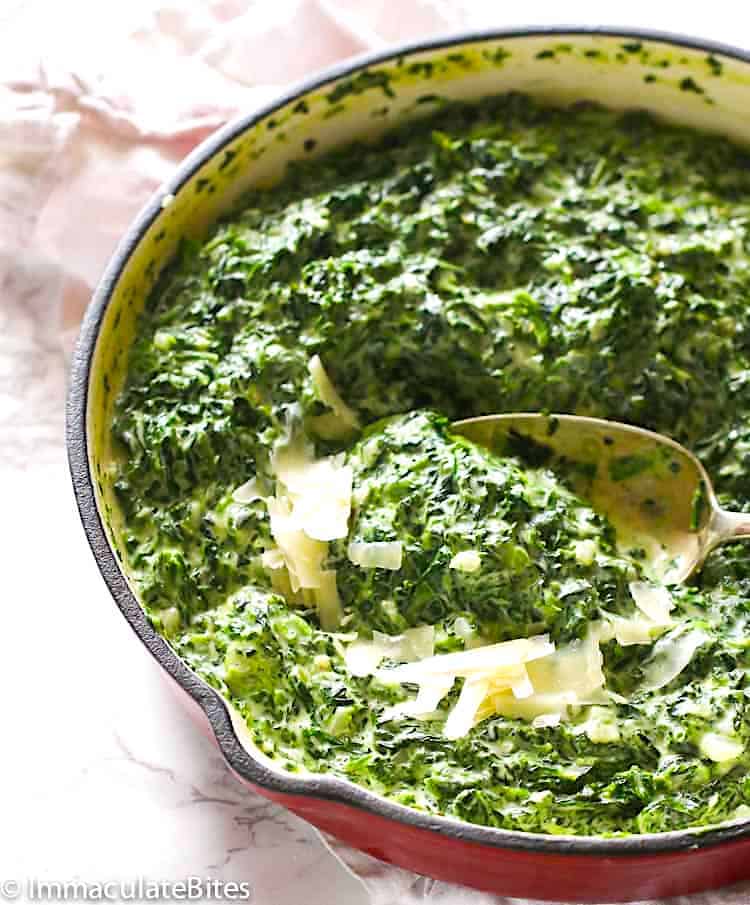
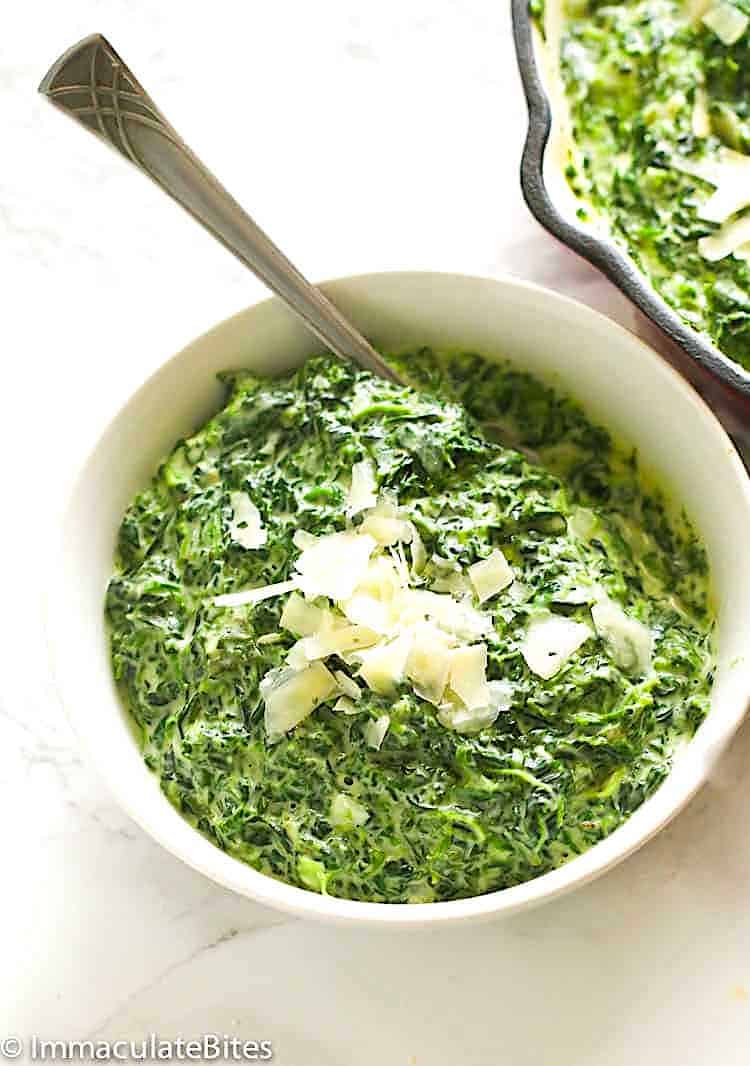
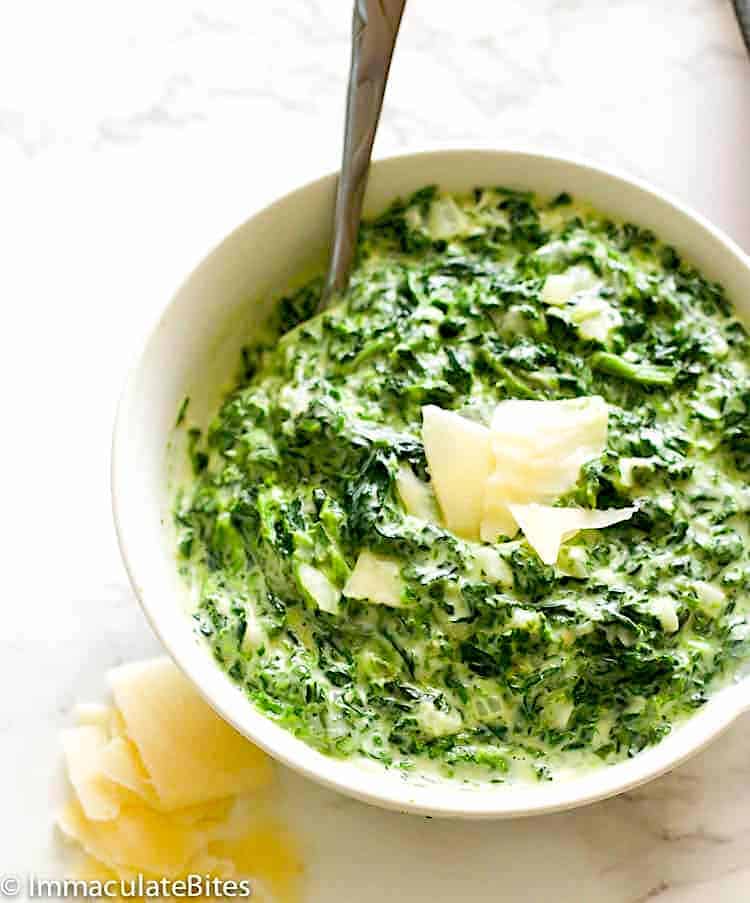
One thing I’ve noticed about side dishes is that anything creamy is always a big hit. Have you, too? This creamed spinach is no exception. It takes a green leafy vegetable and hides it from the kids with just the right amount of milk, cream, and cheese. And so the whole gang goes in for seconds! 🙌 It’s pretty simple to throw together, too. You just whip up the white sauce, season it, and throw in the spinach. Voila! In about 15 minutes, you’ve got the perfect side for fish, meat dishes, and potatoes. Secondly, the cheese! Fresh parm and Gruyere make the white sauce creamy and extra flavorful. 😋 Lastly, my secret ingredient—nutmeg. This spice truly balances the flavor and adds a heavenly warmth.
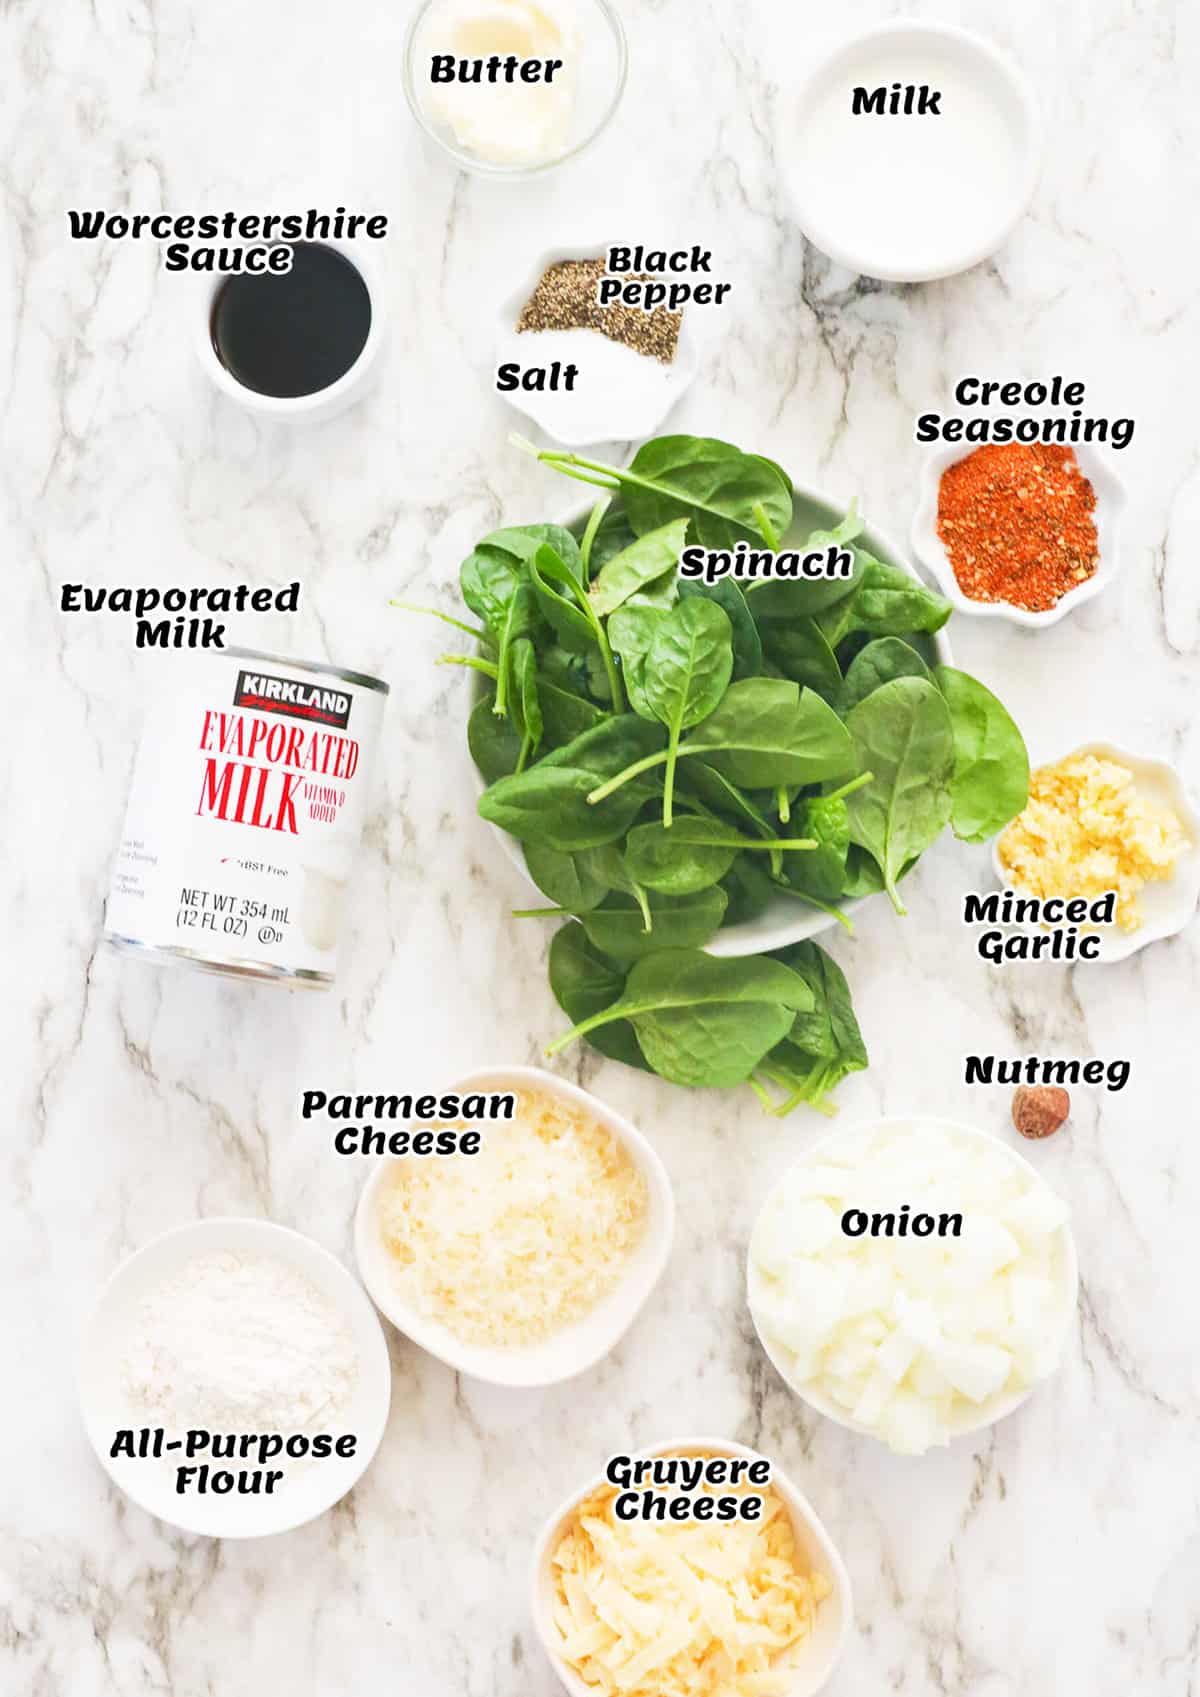
Recipe Ingredients
How to Make Creamed Spinach
Prepare the Spinach
For Frozen Spinach – Thaw spinach, then drain extra moisture using a colander (squeeze it to get it all out) and set it aside.For Fresh Spinach – Bring a large pot of water to a boil and lightly salt it. Then, add fresh spinach leaves, letting them cook for about a minute or just until wilted. Drain any extra water from the spinach using a colander. Then, rinse the spinach with cold water to cool it. Finally, squeeze any excess water out of the spinach and set it aside.
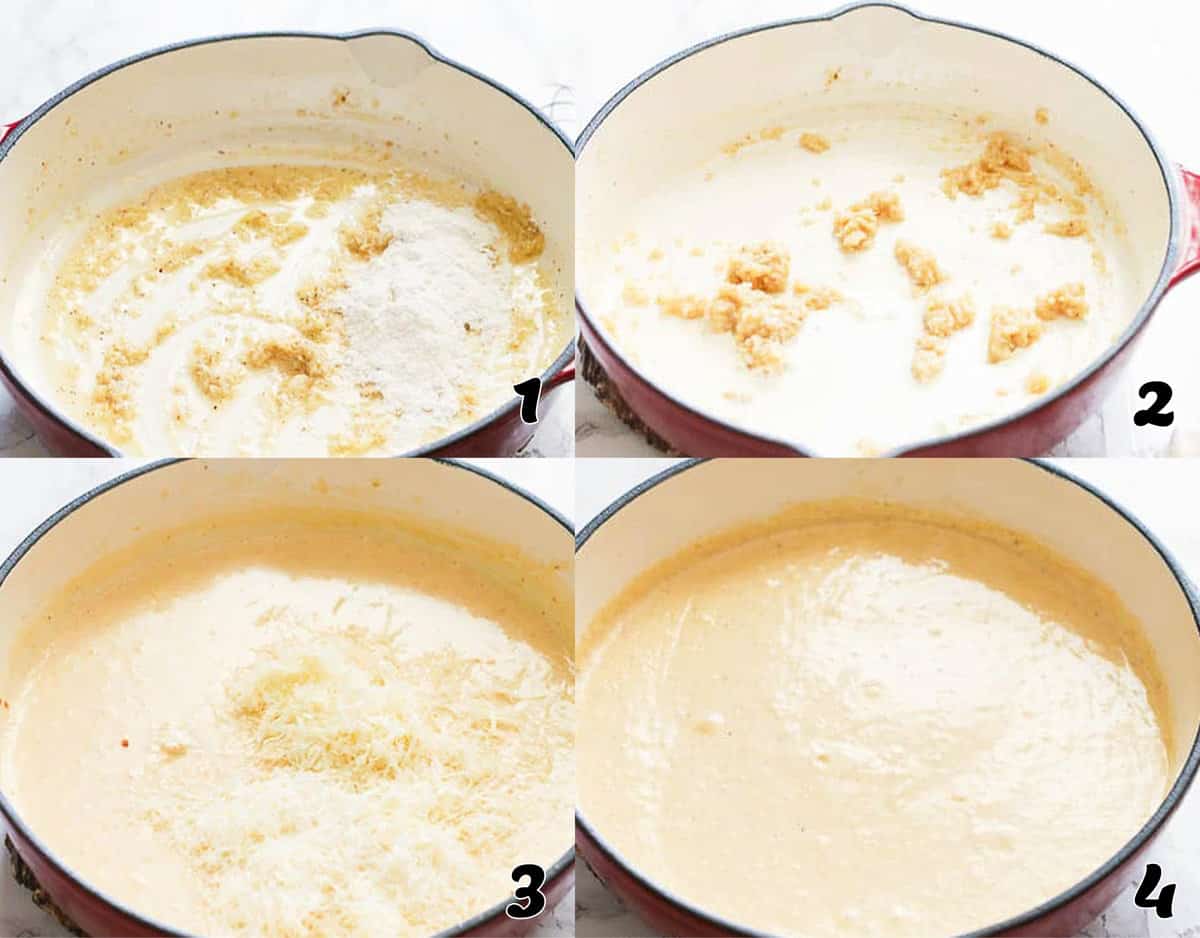
Make the Cream Sauce
Saute Seasonings – Add the butter to a large cast-iron skillet over medium heat, let it melt, then throw in the garlic, onions, and Creole seasoning. Stir continuously for about 2-3 minutes or until fragrant. Be careful not to burn the garlic.Make the Roux – Add the flour and whisk until it is fully combined with the onion mixture, then continue cooking for about a minute to get rid of the raw flour taste.Add the Milk – Slowly add evaporated milk, followed by the regular milk.Simmer – Lower the heat and let the sauce simmer gently, whisking constantly until the sauce begins to thicken, 3-5 minutes.Add Cheese – Next, stir in the cheeses, and continue stirring until everything’s melted and evenly combined and smooth.Add the Spinach, stirring until it’s smothered in the white sauce. Finally, stir in the nutmeg and Worcestershire sauce.Serve – Give it a taste test and adjust the seasonings to taste. Remove from stove and serve piping hot.
Recipe Variations
Tips and Tricks
Make-Ahead Instructions
This dish reheats pretty well, so feel free to make it a day or two ahead of time. Let it cool completely before covering the surface with plastic wrap or parchment paper. This will keep it from forming a skin. Refrigerate and when you are ready to serve it, simply heat it up over low heat on the stove until it starts to bubble. 🤤
Serving and Storage Instructions
Serve this creamed spinach recipe piping hot. You can store leftovers in the fridge for 3-5 days. You can reheat it gently over low heat on the stove, as mentioned above, or pop it in the microwave for a minute or two. Creamed spinach also freezes well for three months. Keep it in an airtight container, of course, and then defrost it in the fridge overnight before you reheat and serve.
What Goes with Creamed Spinach?
Creamed spinach makes an amazing side dish for just about any protein. I love serving it with smoked spatchcock turkey or Southern fried catfish. It also goes great with potato dishes. Try it alongside fried potatoes and onions or Duchess potatoes. You won’t be disappointed.
More Spectacular Spinach Recipes to Try
Conclusion
Get ready to taste your new favorite holiday side dish, y’all! If you love creamed spinach as much as I do, you probably have your own favorite creamed vegetable recipes. I’d love to hear your best recipes, tips, and tricks in the comment section below. Can’t wait to hear from you! 🫶
Watch How to Make It
[adthrive-in-post-video-player video-id=”oiG8ALC2″ upload-date=”2020-10-15T02:55:59.000Z” name=”Creamed Spinach Recipe” description=”Creamed Spinach Recipe – tender wilted spinach draped in a smooth white sauce infused with garlic, onions, creole seasoning, nutmeg and melted cheeses. A great easy holiday side dish for your favorite roasted chicken, steaks and turkey!” player-type=”collapse” override-embed=”false”] This blog post was originally published in October 2018 and has been updated with additional tips, new photos, and a video.