This post is going to be lengthy but an interesting one so I highly recommend you read all the information, tips, and tricks shared below. If you are a beginner or newly married or want to learn South Indian cooking then you will be confident by the end of this post. If you are an experienced cook I would still request you to read the entire post and also share with all of us any other important tips in case I have missed them in the comment section below. Being a South Indian, born as a Konkani girl from the Udupi region of Karnataka where dosa and idlis are popular breakfast items, I should have posted the basic information of preparing delicious dosa and idli a long time ago. My thinking was that because I know to prepare dosa and idli - among the first recipe that I made - and eat it almost on a daily basis for breakfast and sometimes even for lunch and dinner, everybody else in the world knows it as well 🙂 🙂
When I started documenting recipes from cuisines around the world and also several Indian recipes that I tried for the first time in my kitchen, I just documented those recipes in this blog to reflect back on these beautiful memories. It also enabled me to recreate these recipes whenever I needed them in exactly the same way. So it was basically all recipes that were new to us and dosa was not among them 🙂 Sorry about that. I never knew I would get so much love and support from people around the world and that they would make my recipes, read my stories, and spread the word about my blog. I am very thankful and grateful to all of you who are reading this and keep visiting my blog regularly. Now that I have a very supportive and engaging audience, I have been getting numerous requests for sharing a post that contains comprehensive tips and other useful information regarding preparing dosa and idly batter. Whatever I share in this post about dosa batter or idli batter (idly) is not just based on my knowledge or experience, I am also posting experiences and tips shared by my mom, tips passed on by my grandmother, family members, professional chefs, and friends.
In many households with families of 4 or for working moms this batter is prepared once a week and used multiple times. The recipe below makes about 12 to 14 dosas but can be scaled easily to make a large batch. If you are making a large batch that lasts for a week, I would suggest you first prepare idlis as they always taste best with freshly fermented batter and then prepare dosas like masala dosa, spiced dosa, spring dosa, uttapam, appe or paniyaram in the following days - YES, all with the same batter. Easy and interesting right. Now if you ask me if I am a master in making dosa, I would say more than a master I am experienced and know what ratio works, what to do if my dosa batter doesn’t ferment well, what can be done with over-fermented or leftover batter, what to do if my dosas or idlis become thick or hard and so on. Many factors like climate, quality of ingredients, water used for grinding, whether you use mixie or wet grinder, affect the outcome i.e., idlis or dosas. Hopefully, once you complete reading this post you will know what dosa is, what idli is, how to make dosa batter, how to ferment it, how to store leftover batter, what is perfect proportion or ratio, how to make restaurant-style soft dosa, crispy dosa, soft and fluffy idli (steamed cake) and many more. In short, with all these tips you will become well informed and begin to master preparing perfect dosas and idlis every single time. Take this post as a free tutorial or guide from my end to yours and if you find it helpful share it with those who need it.
Perfect Dosa Recipe - How to make idli dosa batter with 3 simple ingredients?
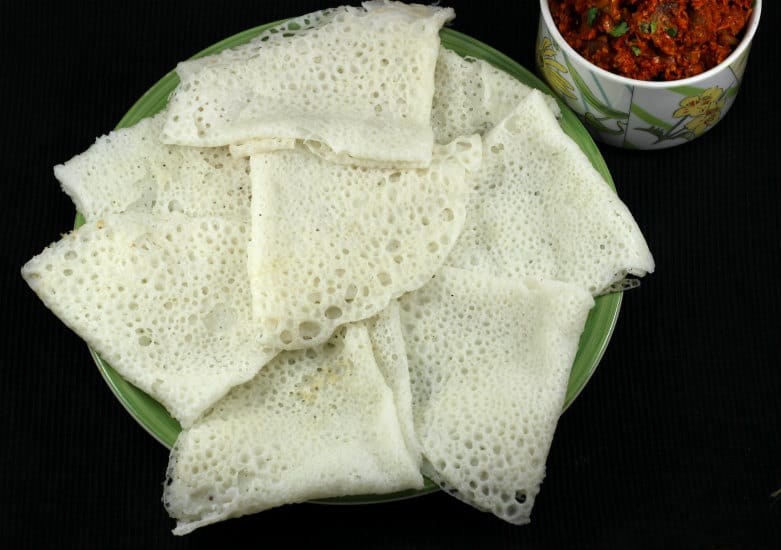
Dosa, also known as Indian crepe or pancake is among the popular breakfast recipes in South India mainly prepared using 2 ingredients - rice and lentil (urad dal or split and husked black gram). Idli, also known as steamed cake or savory cake is another filling and healthy Indian breakfast recipe prepared by steaming the batter prepared using rice and lentil (urad dal or split and husked black gram) You will have to first soak rice and lentil for few hours (usually 4 to 6 hours) and then blend them in a mixer grinder or a wet grinder to form a smooth batter. This batter is then fermented overnight for at least 6 to 8 hours depending on the weather condition and then you cook it like crepe or pancake on a tawa or griddle or cast-iron skillet.
The main ingredient for dosa is rice. To give better texture, body, and taste urad dal is added as the second important ingredient. Fenugreek seeds or methi are added for better fermentation, flavor, and color. If you ask me my answer would definitely be - yes. Idlis and dosas are the go-to popular breakfast item in South India. Idlis and dosas are the main breakfast item served in hospitals in South India, and therefore we can safely assume that idlis and dosas are approved by nutritionists and dieticians at these institutes/facilities. Urad dal or lentil is rich in protein and calcium and eating it is one of the great ways to kick start your day. Rice is a good source of complex carbohydrates and low in fiber. The only problem that I see with rice is it is high in glycemic index (GI). So it is not a good option if you are diabetic or on a weight loss journey. Based on dietary requirements you can alter the ratio of rice to lentil and can also add ragi flour or oats flour or horse gram (kulithu/kulitu in konkani) to increase fiber content in dosas or idlis. To make it perfect every single time consistency of the batter and proportion of rice to urad dal, quality of ingredients is very important.
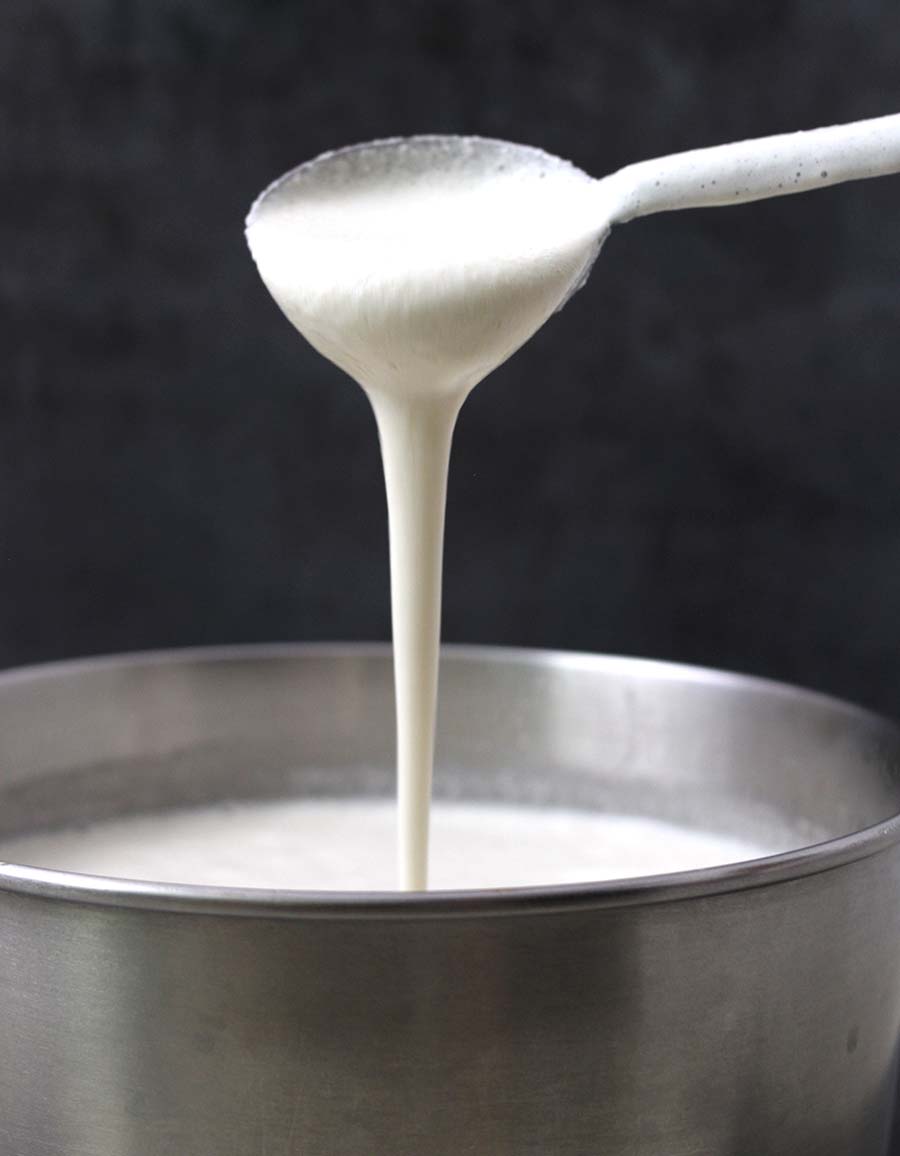
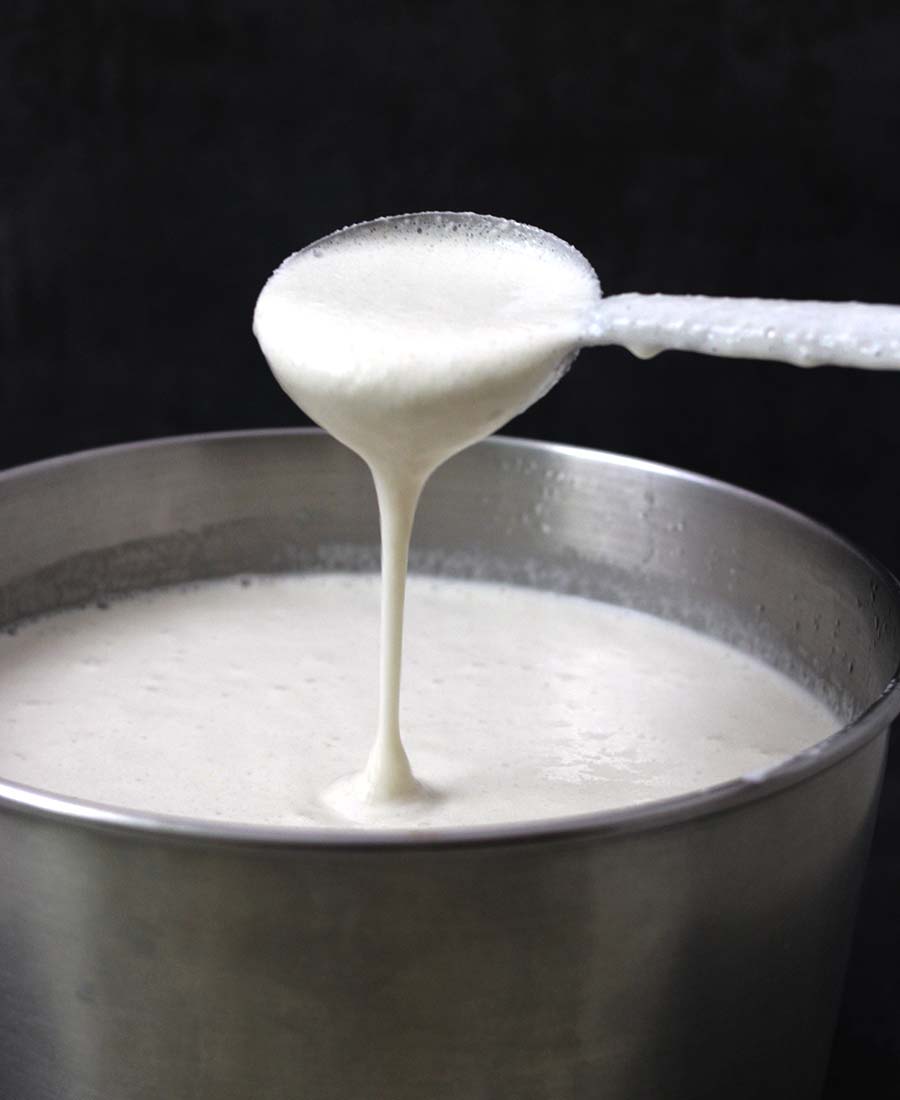
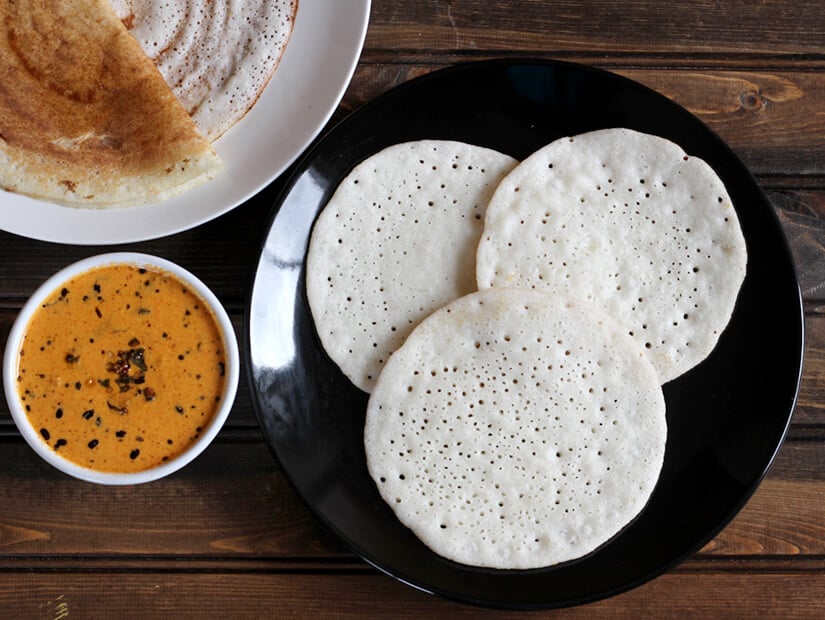
Definitely yes, you can and that is all you will learn in this post. Traditionally idli batter has more urad dal compared to dosa. Addition of urad dal makes it more fluffy and gives that sponginess. Plus the batter is of thick consistency. On the other hand for dosa batter more rice is generally added to give that additional crispiness. But this does not stop you from making dosas, uttapa or appe (paddu, paniyaram) using idli batter. You just have to make adjustments by adding a little water to the batter for pouring consistency as you see in the picture. Now if you know that you are grinding the batter to make both idlis and dosa, I would say once the batter is done and fermented make idlis first, as it always tastes best with fresh batter and the batter needs to be thicker and then add little water to batter and make cripsy, plain or sada, masala dosas and appe or paniyaram, uttapam. I started making my own dosas for the first time in the United States and I always used raw rice for any type of dosas and idli and the result is simply amazing. No complaints from my end or from people who ate the dosas and idlis I have served all these years 🙂 Raw rice works the best. But you are free to use a combination of raw rice, idli rice, or parboiled rice too. In India, parboiled rice is used along with rice while making dosas but I hear that not all parboiled rice gives a successful result. My family and relatives tell me sona masuri and ponni work out well. The taste and texture will vary depending on the quality and ratio of rice you use in the recipe. You can use only raw rice or 1 cup raw rice and 1 cup parboiled rice or idly rice. Patience and experiments are all you have to do. I was even successful while using Great Value long-grain enriched rice from Walmart. Some of my friends have also tried using Basmati rice in their dosa batter, but have mixed results. I have been using mixer or mixie to prepare my dosa and idli batter both in India and the United States for last 7 years and I have no complaints. My parents and relatives who are preparing dosas for ages (my mom, in-laws, aunts) always say wet grinder gives the best result. I personally don’t like it because of lifting those heavy stones, and also the extra work of cleaning after grinding the batter. Grinder aerates your batter making your dosas and idlis more light and fluffy. But if you have high wattage (i.e. 750W or more) powerful mixie or mixer you will get similar results. Using a high power mixer does not warm the batter while blending, compared to a low power mixie which requires longer blending time. Now if you ask me the proportion of rice to urad dal in mixer and wet-grinder I would say traditionally for 2 cups of rice, 1 cup of urad dal works really good both on mixer and wet-grinder for both rice and idli. But here are few adjustments you can make to dosa and idli batter. If you know you are going to do cook both rice and idli with same batter then always use 1 cup dal to 2 cup rice. But if you are cooking only dosas from batter, then ½ cup urad dal is sufficient for 2 cups rice.
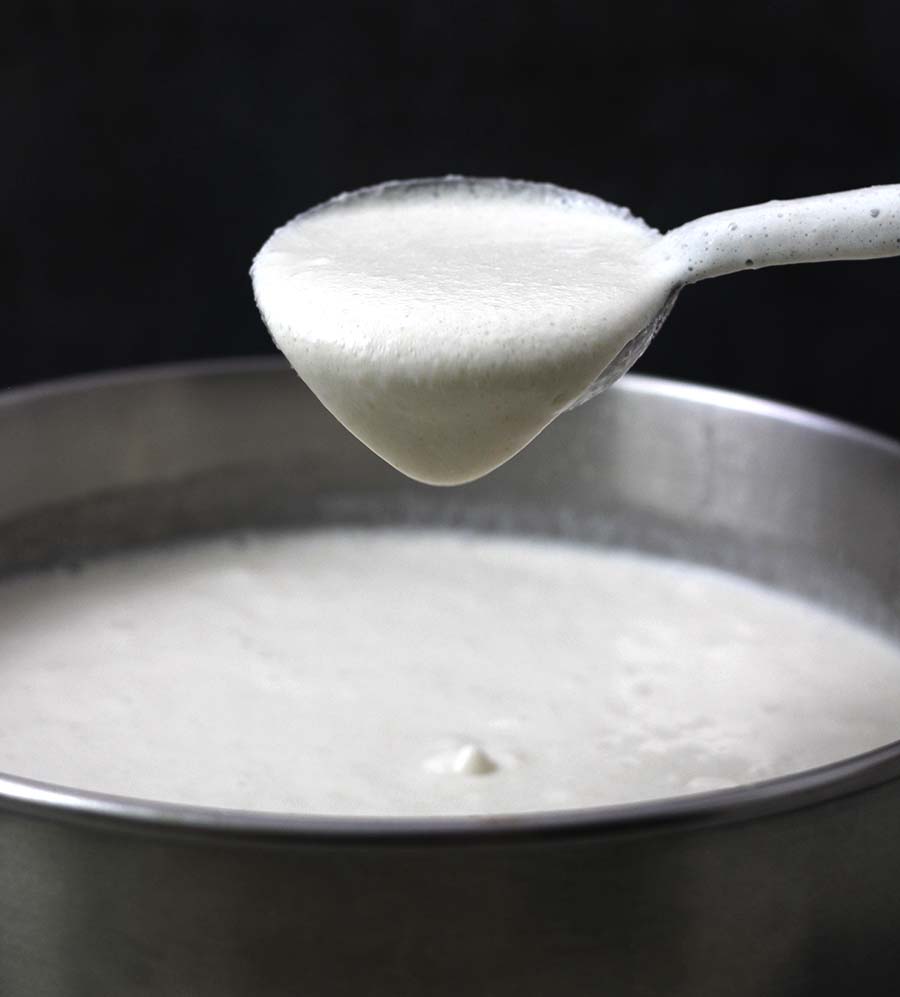
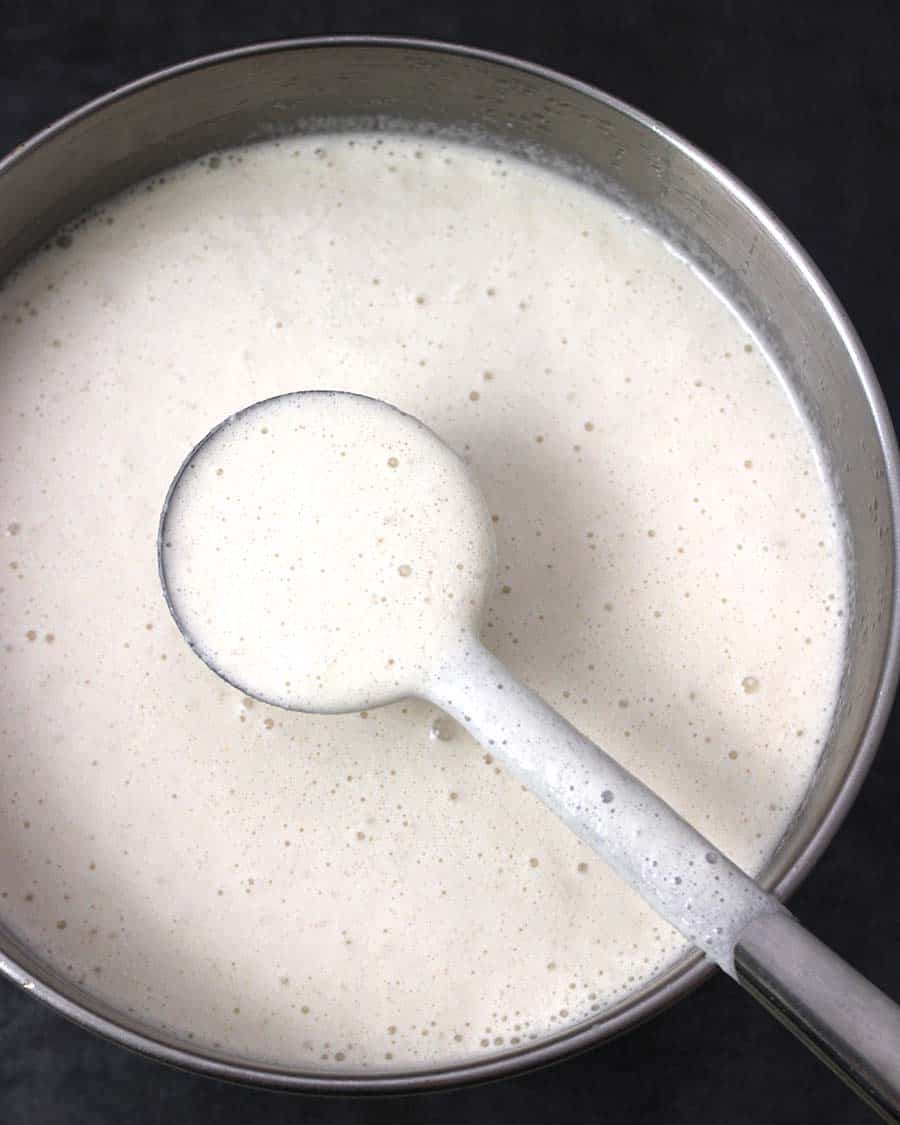
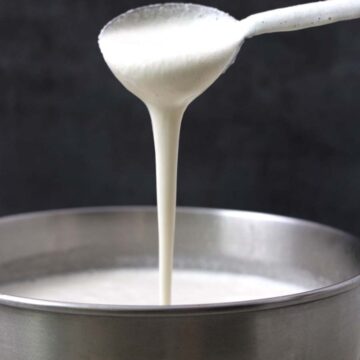
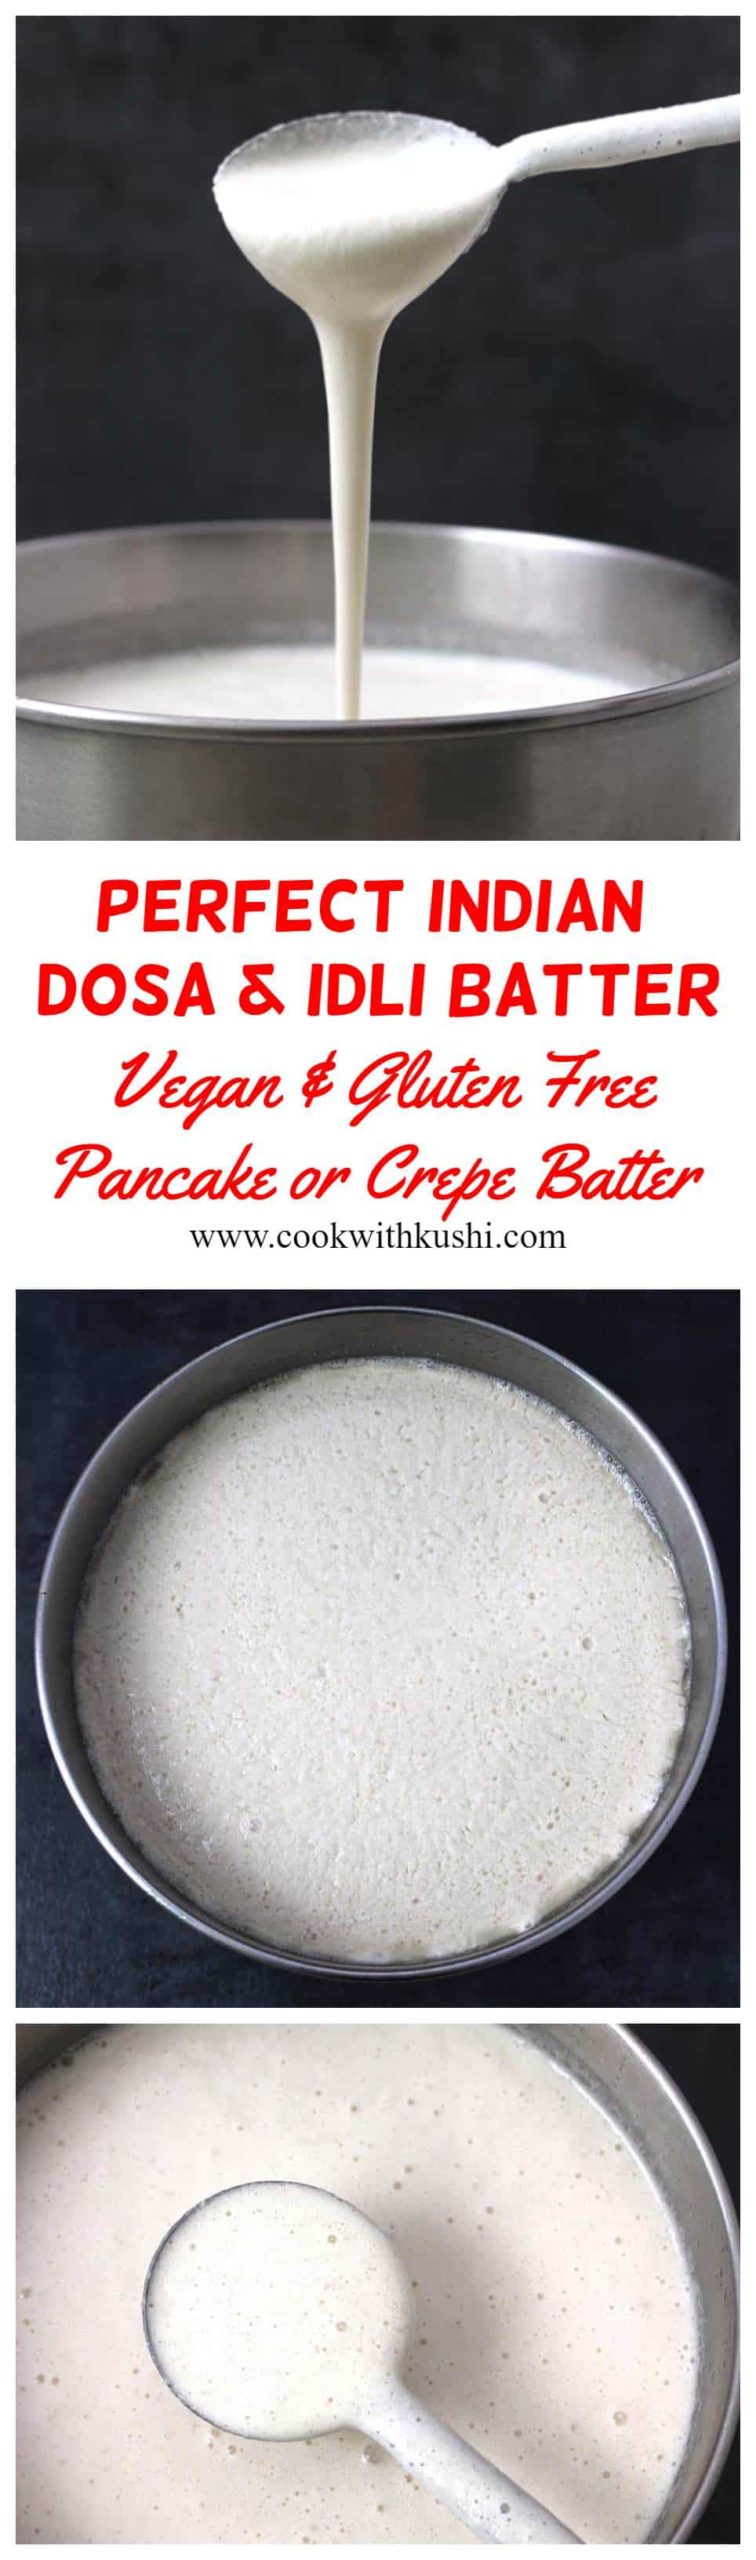
This is among the most frequently asked query. When I first started making my dosa batter, I remember asking this question to my mother. I have tried soaking it together as well as separately. If you are making only dosas, then it does not matter whether you soak and grind - rice and dal - separately. But since rice and dal are different in texture and need different times to grind, it is always good to soak and grind them separately for exceptional results. I generally grind dal to smooth texture and rice to slightly coarse texture which works amazingly for idlis. Also, dal will be more fluffy and will be more in volume if you blend it without the addition of rice thus you can extend your batter for another additional day for breakfast 🙂 Plus adding everything to the mixer will overload it. The amount of water you add to grind rice and dal may vary depending on the quality of ingredients, the amount of time it is soaked, and the mixer or grinder that you are going to use. The more time you soak the less water you will need to grind. The batter should be of good flowing consistency like the one you see in the picture. It should not be runny or too thick. For 1 cup of soaked urad dal, you may need anywhere between 1 ½ to 2 cups of water. For 1 cup of soaked rice, you may need ½ cup of water. If your batter becomes very thick, you can adjust it by adding water. If you add more water while grinding and it becomes runny and if you are a beginner, you may not be able to make idlis but the good news is that by adding sooji or semolina or rice flour and mixing it into the batter you can prepare crispy dosas. When to add salt depends on climatic conditions. In cold places, the batter may take a longer time to ferment. In this case, to prevent the growth of harmful bacteria that lead to a smelly batter, it is recommended that you add at least half the quantity of salt before fermentation. If you are in a hot place, fermentation is faster. So add salt just before you are ready to prepare idlis or dosas.
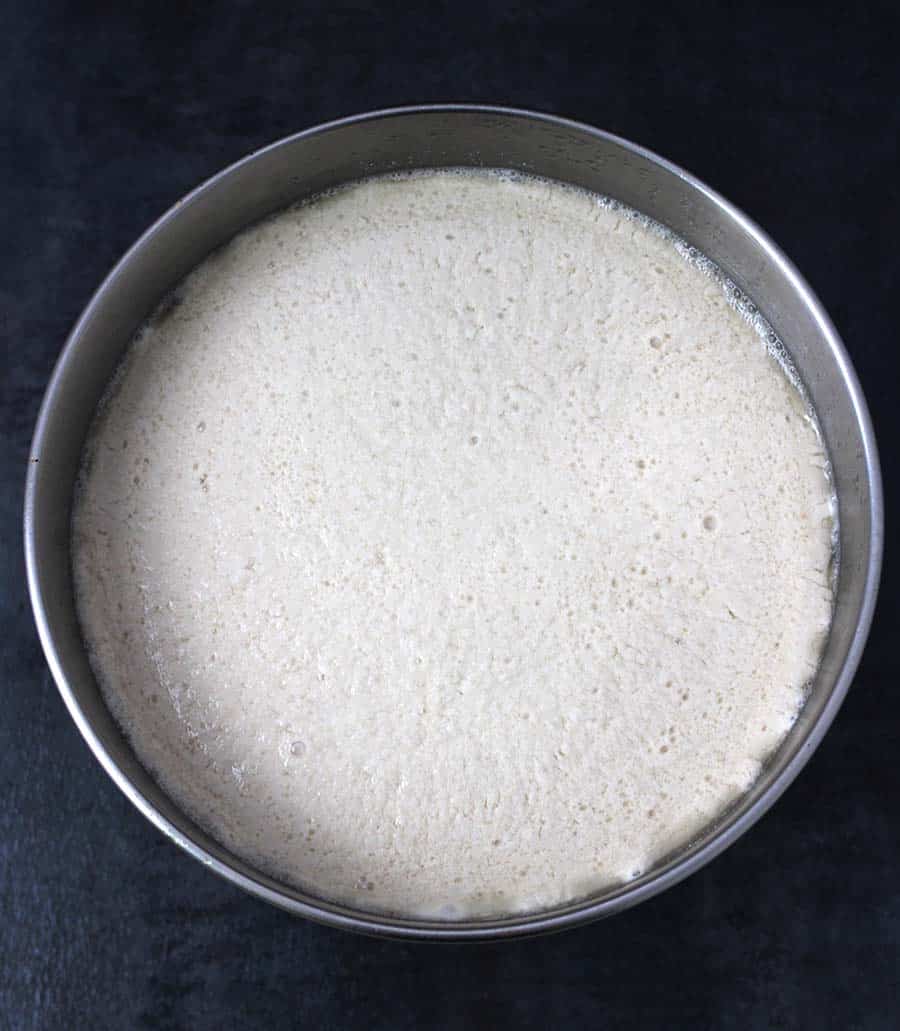
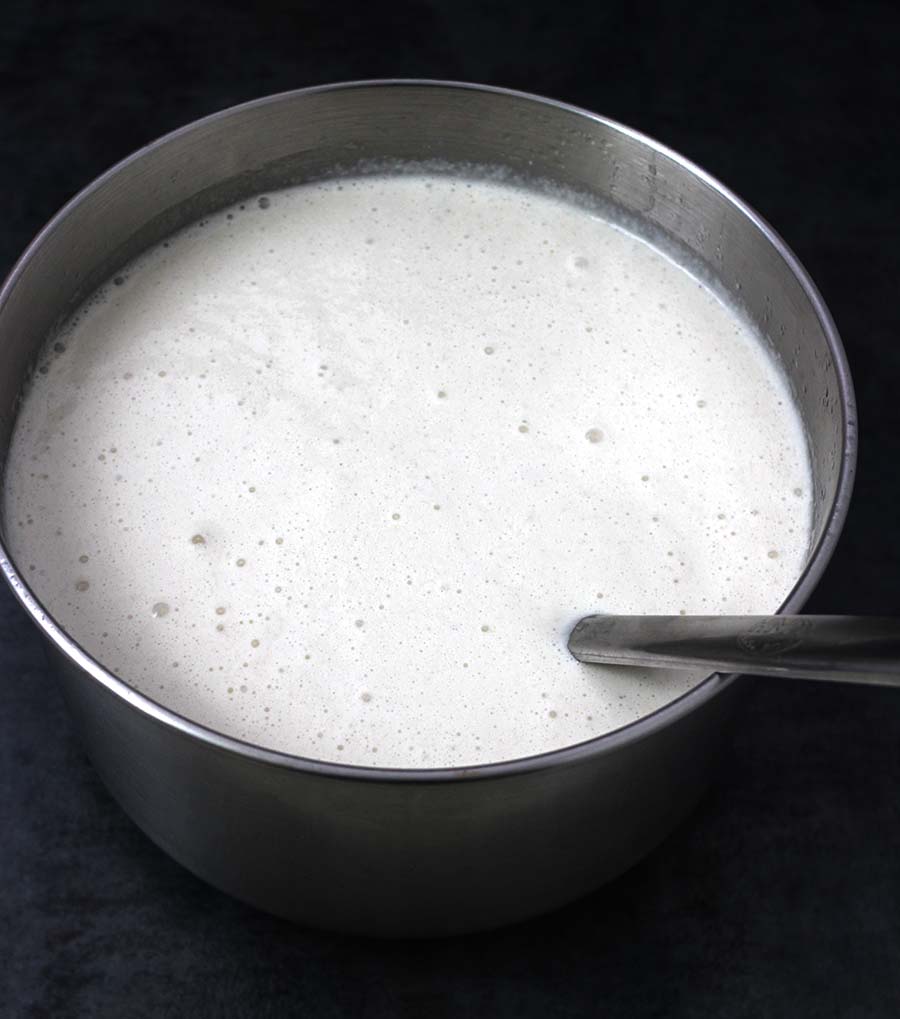
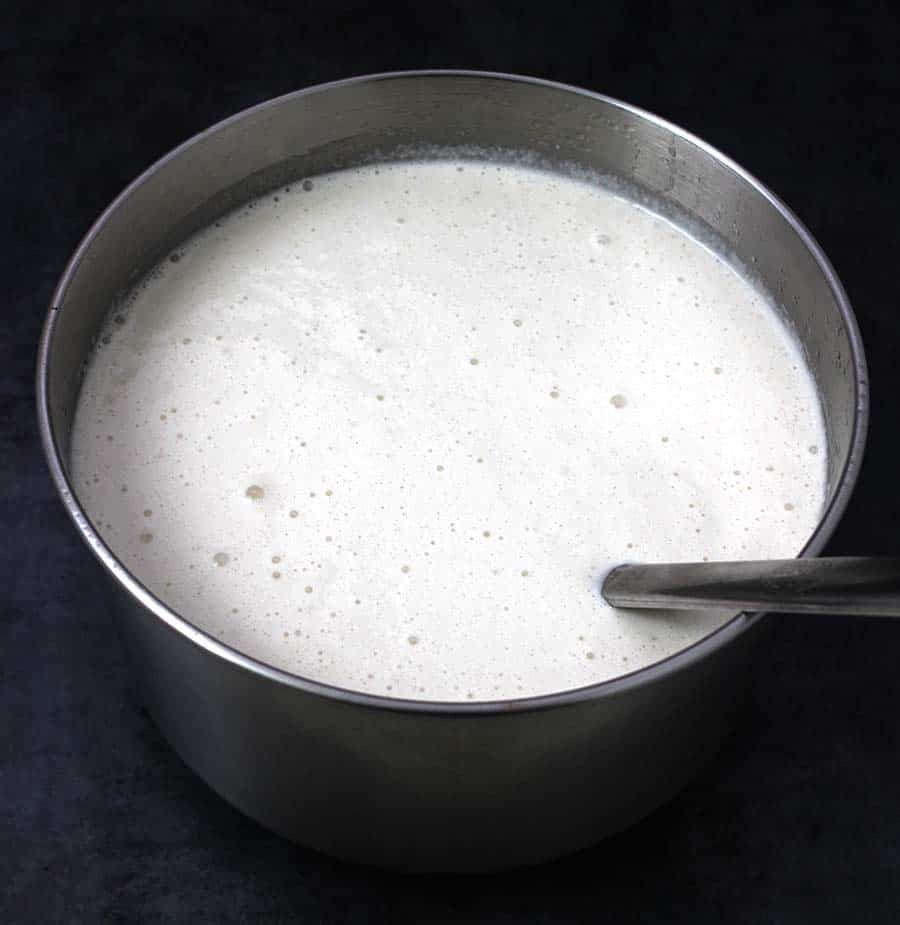
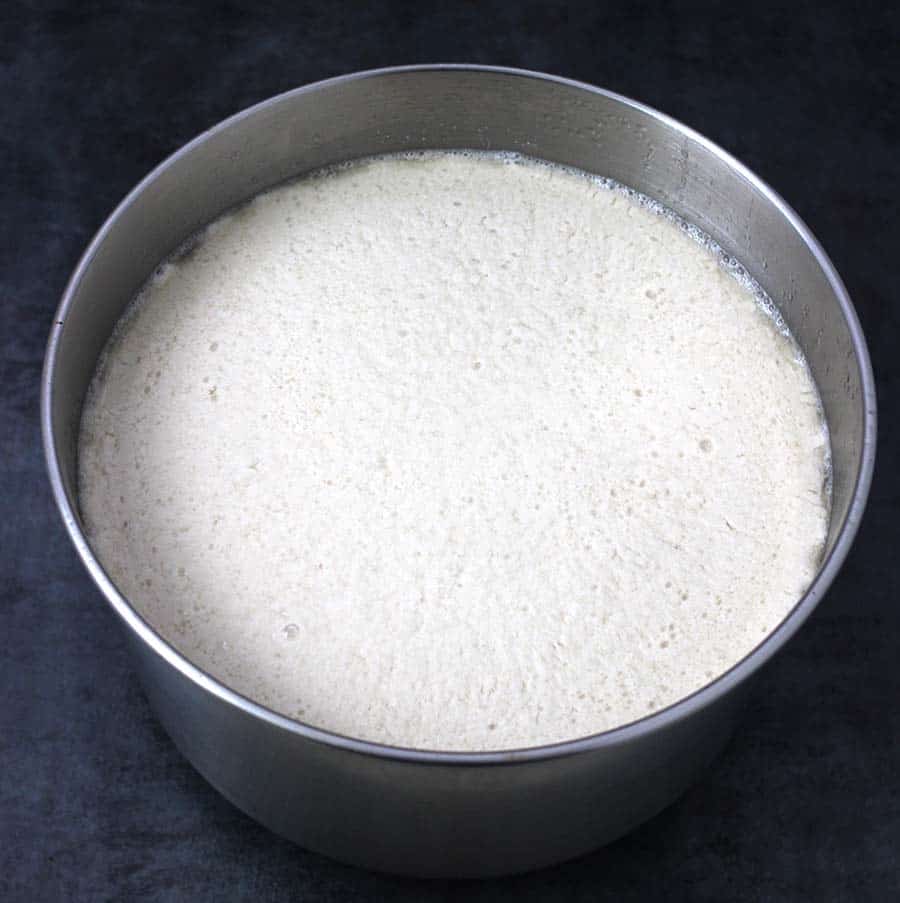
By the time you are ready to cook dosas or idlis, the batter should be frothy on top, airy with bubbles, and should have increased in volume. Like baking, even dosa batter needs a warm place to ferment. If you are living in a warm place you can leave the batter on the kitchen counter and it will ferment in 6 to 8 hours. If you live in a cold place, your dosa or idli batter may take 10 to 12 hours to ferment. You can preheat the oven for 10 mins and switch it off. Then, place the batter in the oven and turn on the oven light and close the door to prevent any cold wind drafts. If you are in a cold place and you still have trouble fermenting dosa or idli batter, I would say wash your hands in running water and mix the batter using clean hands for 2 to 3 minutes. Beneficial micro living organisms in our hands will help in fermentation. For those who have an instant pot, you can ferment the batter using the yogurt mode. Increase time to 8 or 10 hours and make sure you cover it with a glass lid and not with the instant pot lid as this may lock if the batter ferments and overflows. The idli or dosa batter should be frothy on top, airy with bubbles, and should have increased in volume. If for some reason your batter did not ferment well don’t make idlis as you will not get soft fluffy idlis when cooked in steam. But the good news is that you can still prepare a variety of dosas, appe or paniyaram, uttapa or uttapam using the same batter. The idli batter will be thick after fermentation. To make idlis a thick batter is preferred. Grease the idli mould with ghee or oil. We generally use coconut oil for greasing as it is popularly used in Udupi and Mangalore region. Pour 2 to 4 tablespoon of batter on each mold depending on the size of the mould size. Add water to the steamer or pressure cooker depending on the size of your idli stand, usually, 1 to 2 inches of water would suffice. Place the idli stand, cover with a lid, and steam for 12 minutes. If you are using a pressure cooker do not put the weight or whistle. If cooking idlis in Instant Pot, add 1 ½ cups of water to Instant Pot and boil on sauté mode. Place idly stand and cook it on the steam mode in venting position and cook for 12 minutes.
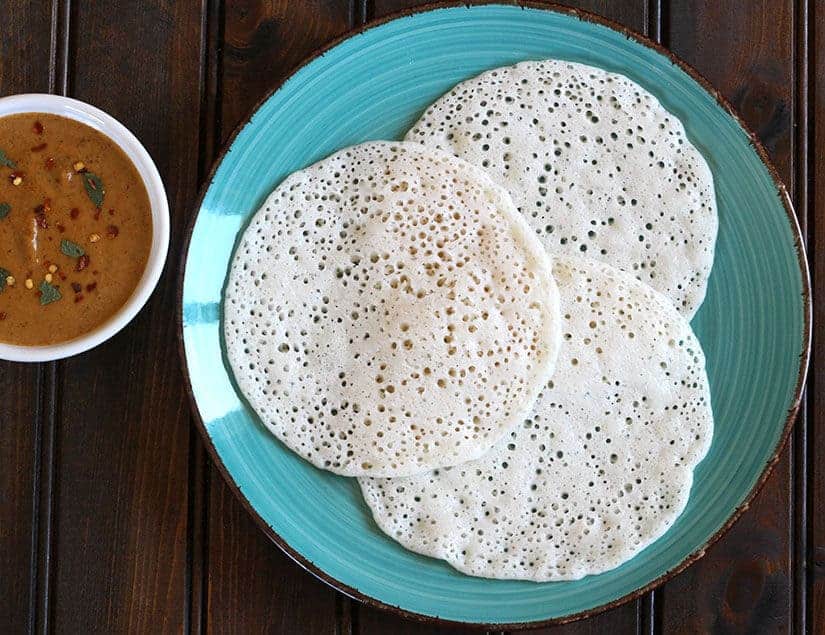
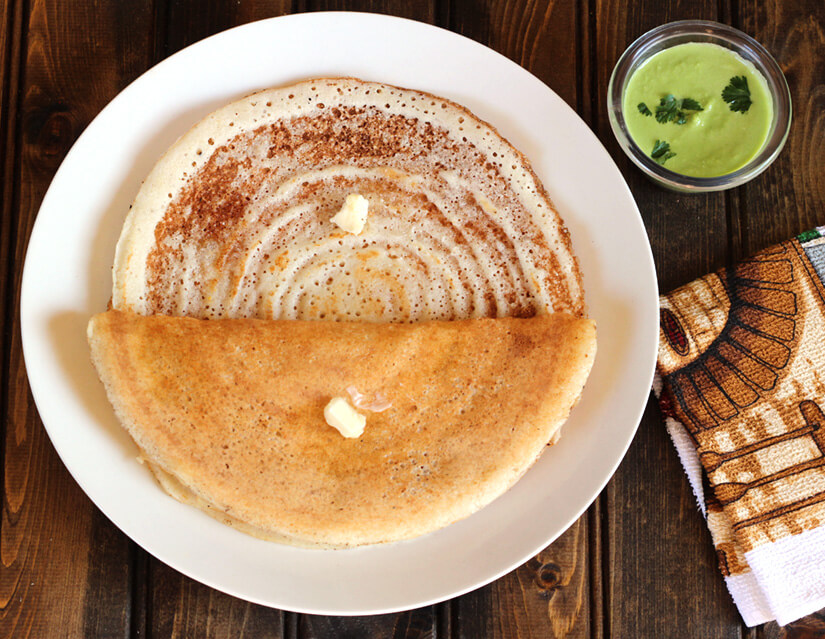
After fermentation, the batter is going to be thick. Depending on the consistency of the batter you may add little water - only if required. But make sure not to add too much as a runny batter will give softer dosas. On the other hand, thicker batter with spreadable consistency will give crispier dosa. Heat a cast-iron or non-stick pan on medium flame. To check if it has heated through, sprinkle water and see if it sizzles. Don’t sprinkle water into a nonstick pan as this may affect the nonstick coating. Once it is hot, continue to keep the flame to medium. Lightly grease the cast iron or non-stick pan with oil. Make sure there is no oil left and it is absorbed completely. Use a clean kitchen towel to remove any excess oil from the pan. Else you cannot spread the batter smoothly. Pour ladle full of batter at the center of the pan and spread it using the back of the ladle in a circular motion till you reach the edges. If you are not able to spread easily, it means your batter is too thick. You may add little extra water to the batter and mix. Add 1 teaspoon of oil or ghee around the edges. In a minute or so, the edges will start to slightly come off or lift off the pan, and the bottom will start turning golden brown in color. This should take about 2 to 3 minutes. At this point, you can remove the dosa from the pan with the help of a spatula, or flip and cook for another 1 or 2 minutes if you like. Generally flipping the dosa to cook on the other side results in a slightly less crispy dosa. This is why you will notice that masala dosas and ghee roast dosas are only cooked on one side in restaurants. Before spreading the next dosa, you may lightly grease the pan with oil or ghee, as directed before. For soft, thick dosa or sada dosa: Pour a ladle full of batter at the center, do not spread, i.e., cook the dosa like a pancake. Add oil to the edges. When you see bubbles on top and the bottom becomes golden brown, flip and cook the dosa for one or two minutes on another side. Traditionally cast iron tava is used for cooking dosas at South Indian homes and restaurants which will make your dosa golden brown and crisper. But to make your task easier and to reduce the amount of oil and any mess with your batter, you can cook them on non stick pan. Once the batter has fermented, you can keep it in the refrigerator and use it as and when required. The batter will remain fresh for 5 to 7 days. Undisturbed batter after fermentation remains good for a long time. So once you are done grinding and mixing you can distribute the batter in 2 or 3 bowls and ferment separately and then transfer these bowls to the refrigerator. Now for those who want to use the batter for more than a week, say 3 to three weeks, simply refrigerate the batter after grinding. Ferment only the quantity of batter at room temperature as and when needed. There may be a couple of reasons your batter gets stuck to ladle. Airy or over-fermented batter or new rice: If the consistency is not right or if your batter has over-fermented you may face this problem. Sometimes if you try using a new brand of rice you may encounter such problems. The batter may have been too airy. In this case nicely stir the batter again, remove the bubbles and try spreading dosas. Oily pan: If you are using a nonstick or cast iron pan, make sure the pan is hot enough. If you have greased your pan, make sure there is no oil left and it has been absorbed completely. Excess oil will make the batter clump together. So wipe off excess oil using a clean paper towel or kitchen towel. Else you cannot spread the batter smoothly.
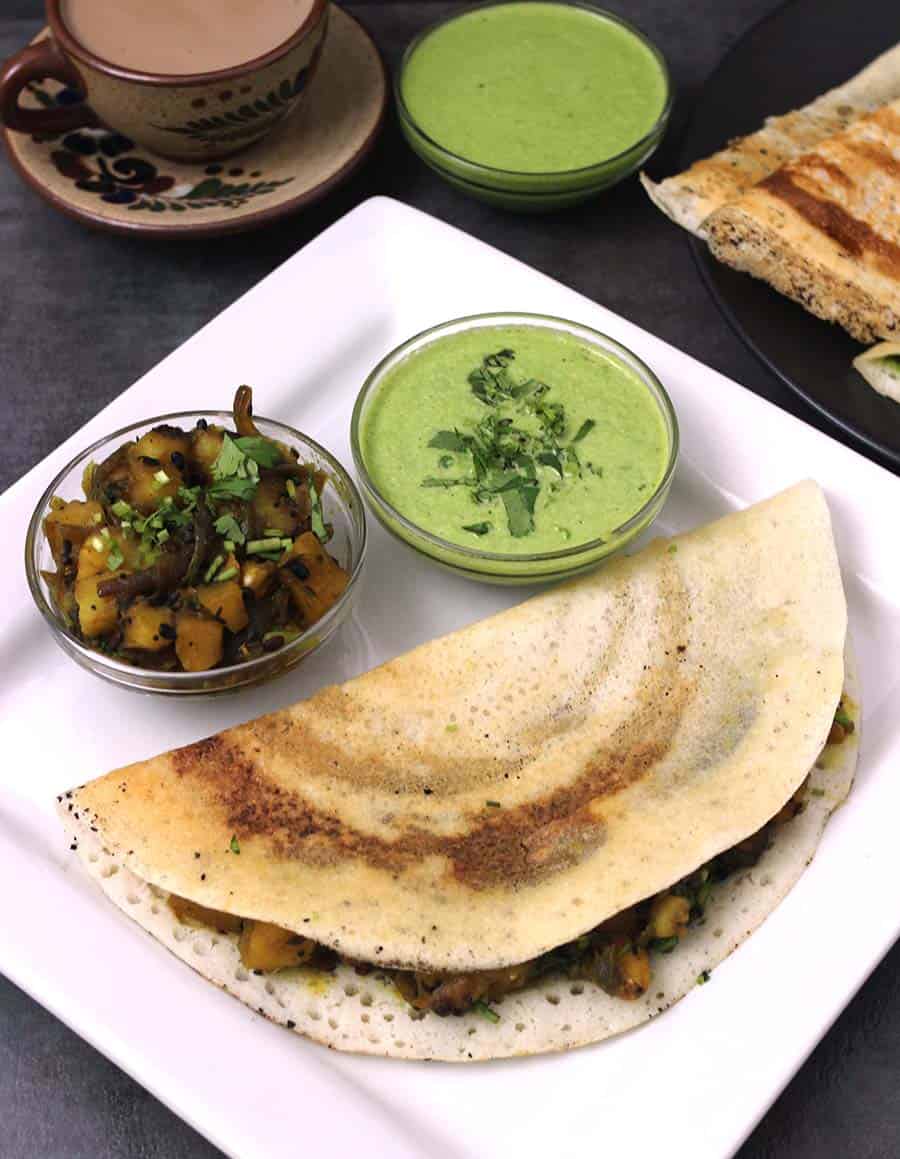
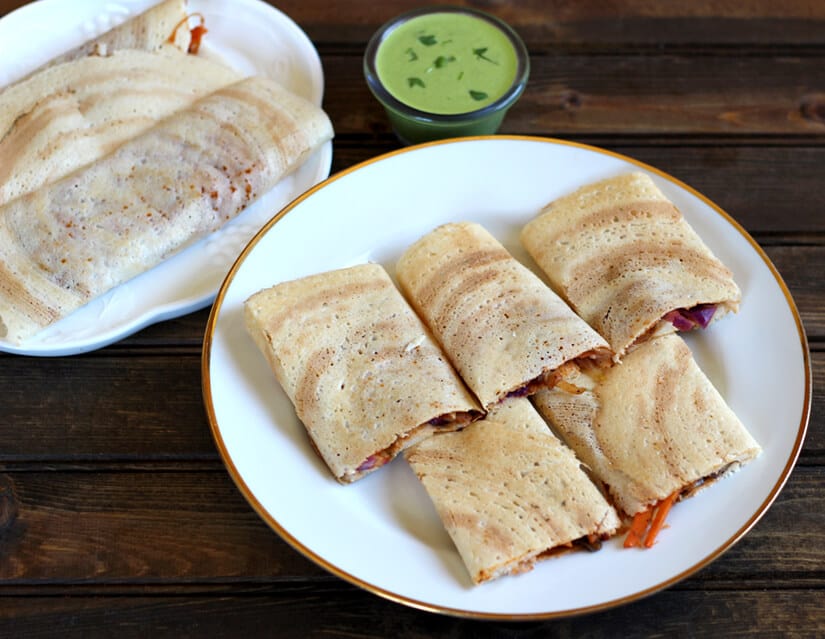
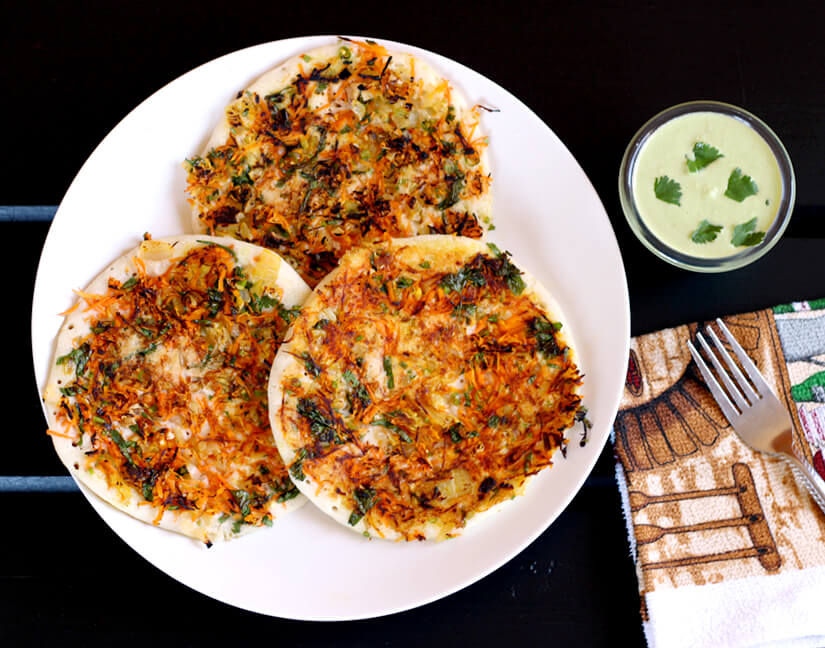
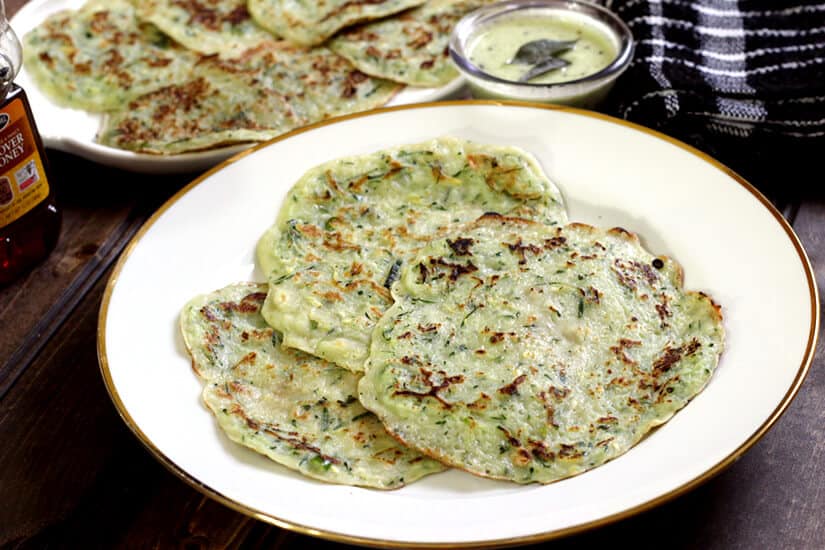
Crispy Plain Dosa Sada Dosa (Soft and thick dosas) Idlis or Idlys Ginger and green chili-spiced dosa: Add 1 or 2 finely chopped green chilies, 1-inch grated ginger, and finely chopped curry leaves to the batter and cook thin or thick dosas. Asafoetida or hing Dosa: Add a pinch of hing along with ginger and green chili mentioned above to the batter. Masala Dosa: You will have to cook thin crispy dosa and serve with potato masala or bhaji and coconut chutney. Mysore Masala Dosa: Like masala dosa, cook thin crispy dosa and fill it with potato masala and red chutney. Onion Uttapam: You need to prepare a mixture of one or two large onions that are finely chopped, one finely chopped green chilie, and coriander leaves. Spread thick dosa in a pan and then sprinkle onion mixture on top of it. Once the bottom of the dosa turns golden in color, flip and cook till onions become translucent then turn the flame to high and char the onions if required. Vegetable Uttapam: Similar to onion uttapam, here you can use a combination of veggies like grated carrot, beetroot, and chopped capsicum. Paniyaram or appe ( Paddu / Guliyappa/ Yeriyappa / Gundponglu): the above batter is used to cook appe or paniyaram in appe pan. Tempered paniyaram or Appe: In each round mould of appe pan add a pinch of mustard seeds, oil, and curry leaves. When they splutter, drop a tablespoon of batter. Cover with lid. Once it’s cooked at the bottom and becomes golden, flip and cook on another side. Spiced appe or paniyaram: Use green chilies and ginger-spiced batter along with hing to prepare delicious appe. Vegetable Paniyram or Appe: Mix grated veggies like carrot along with finely chopped onions and green chilies, coriander leaves to the batter and cook paniyaram. Spring Dosa
To enhance the taste, always cook your dosas with a good amount of oil or ghee or butter. Dosa and idli can be served with chutneys, sambar and curry or gravy.
Green coconut chutney Hing Chutney Garlic Chutney Coriander almond chutney Tomato Chutney Vegetable Kurma Spicy tomato curry Batate song or Spicy potato curry Aloo rasedar Vegetable stew Batate vagu
Dosa Recipe - How to make idli dosa batter? Perfect recipe to make dosa or idli at home with just 3 ingredients.
Recipe card
For more recent updates, follow me on Pinterest, Instagram, and Twitter. Click below to save it on Pinterest