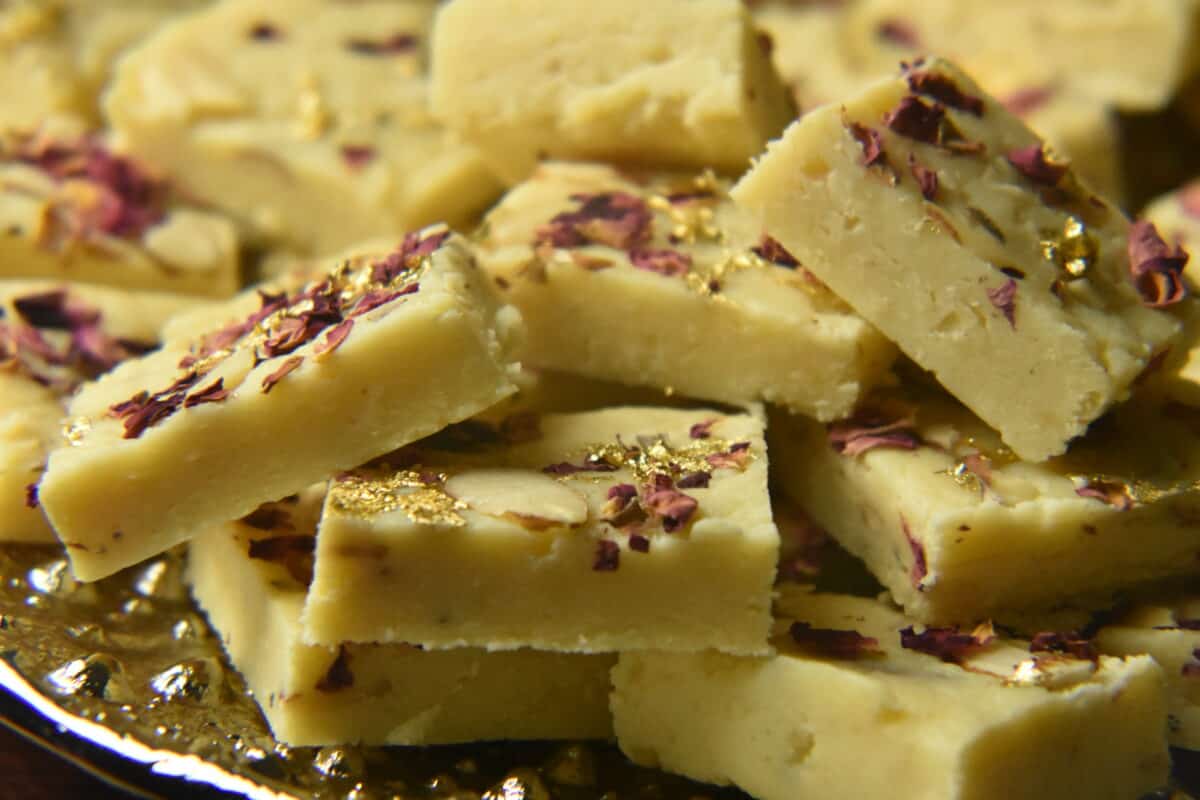
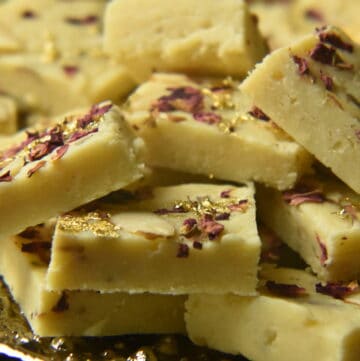
This easy milk barfi is the Pakistani version of milk fudge and is always served on Eid along with Sheer Khurma. Growing up in Pakistan, fresh milk barfi and gulab jamun were purchased from the mithai (sweet) shop for all special occasions. Living away from home I’ve always tried to keep this tradition alive and made my sweets on special holidays.
Why you’ll love this recipe
Gluten-free dessert -This milk barfi is one of the easiest and best gluten-free no-bake dessert recipes you’ll find, just like my date dessert recipe. Quick recipe - Ready in less than an hour {including chilling time} makes this a popular recipe during festivals and celebrations. Easy to source ingredients - The primary ingredients for this recipe are easy to source. You won’t need to go to any specialty stores for this one. Perfect dessert for parties - This dessert is perfect for a themed event. Your garnishes can match the color scheme and occasion.
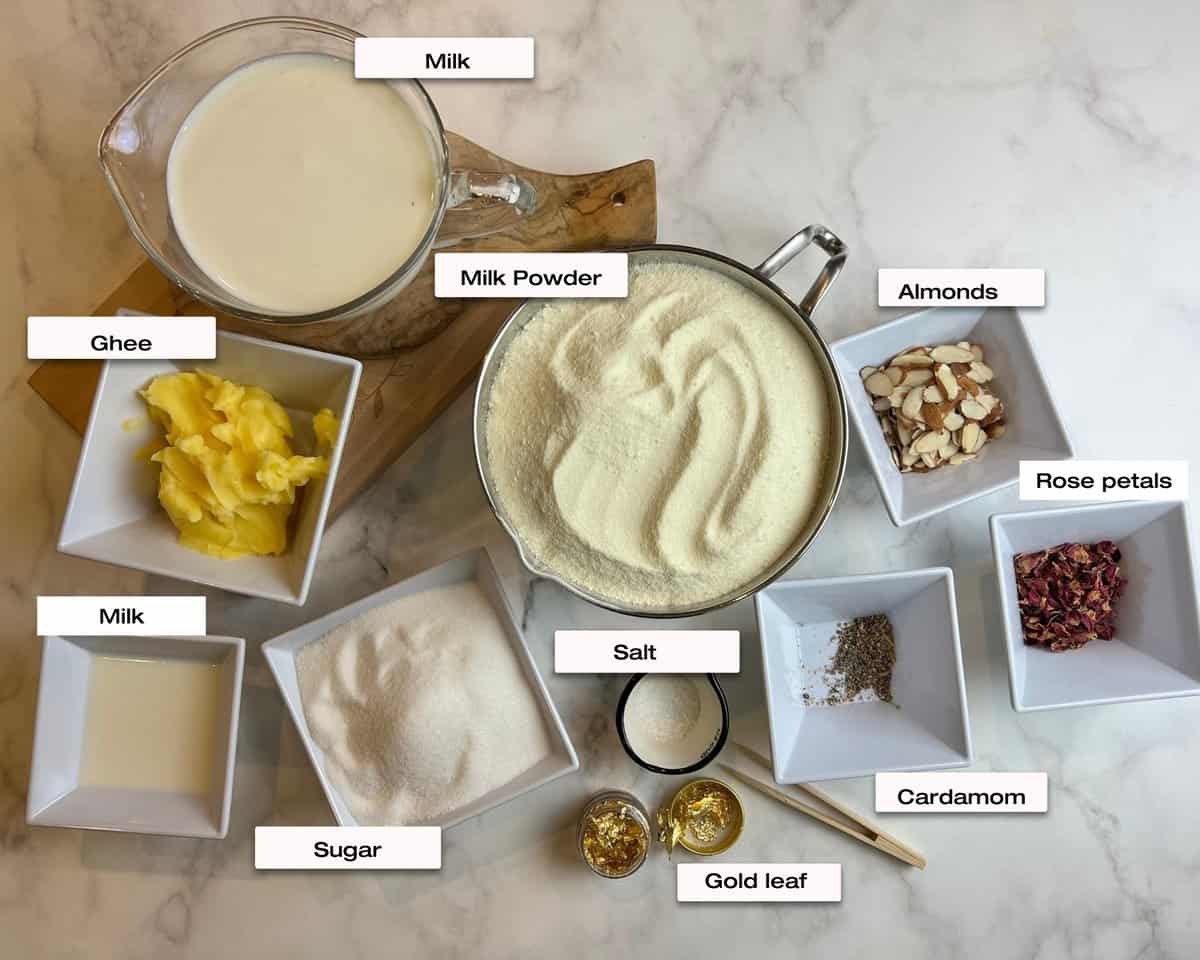
The ingredients
For the complete list of ingredients with measurements plus recipe instructions, please see the recipe card at the bottom of this post.
Substitutions & variations
Step-by-step instructions
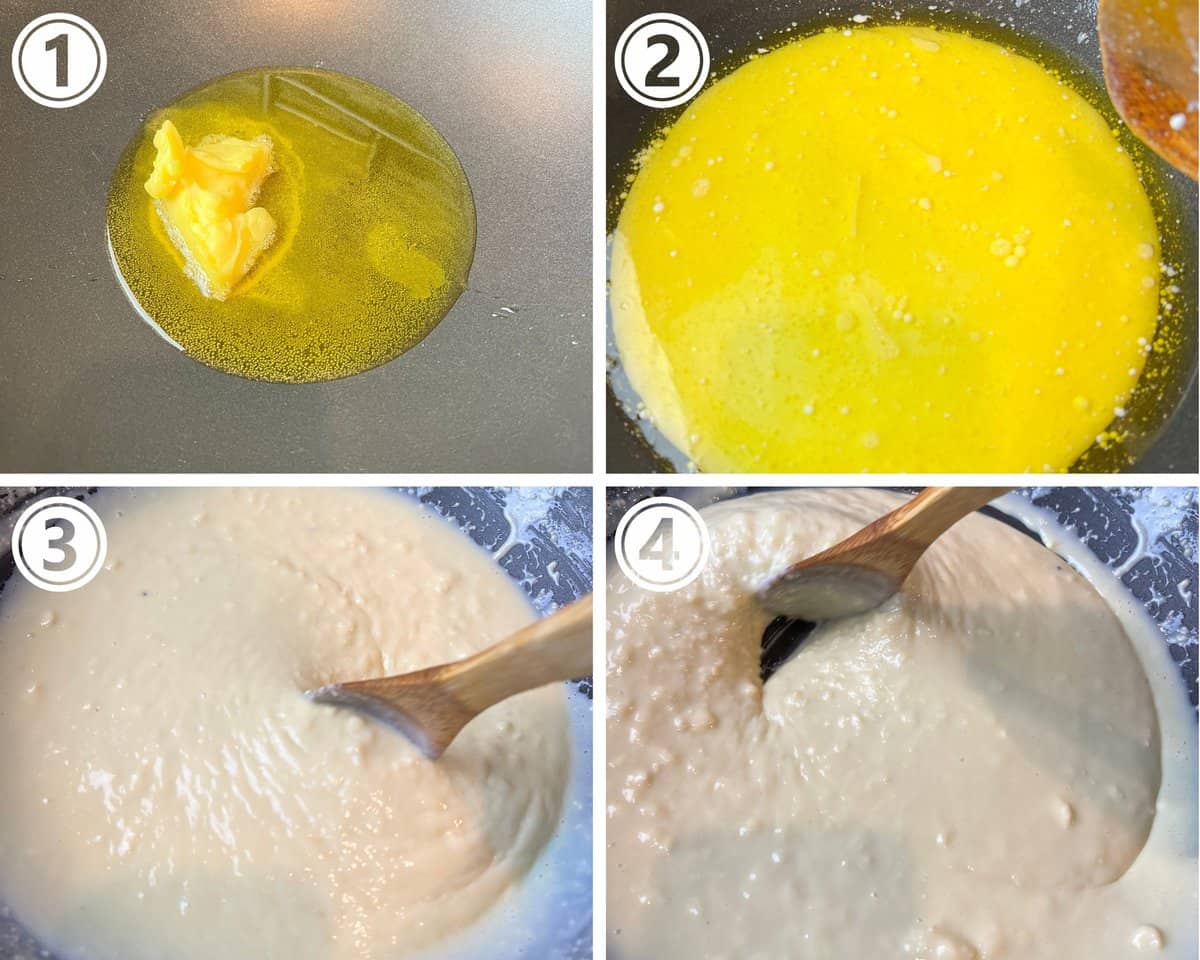
Step 1 - To start off, heat some ghee on medium heat in a non-stick pan. Step 2 - Once the ghee melts, add the milk and continue to heat the mixture till it is at room temperature. Step 3 - At this point, start adding a small amount of milk powder at a time. Make sure not to add in the powder all at once or else it will clump together. Step 4 - As the milk continues to heat to a higher temperature, keep adding in more milk powder. Use a whisk to smooth out any granular pieces. Step 5 - Add in the cardamom and as soon as the barfi mixture starts bubbling lower your heat. A higher temperature takes less time, but slow cooking while constantly stirring on a low flame yields better results.
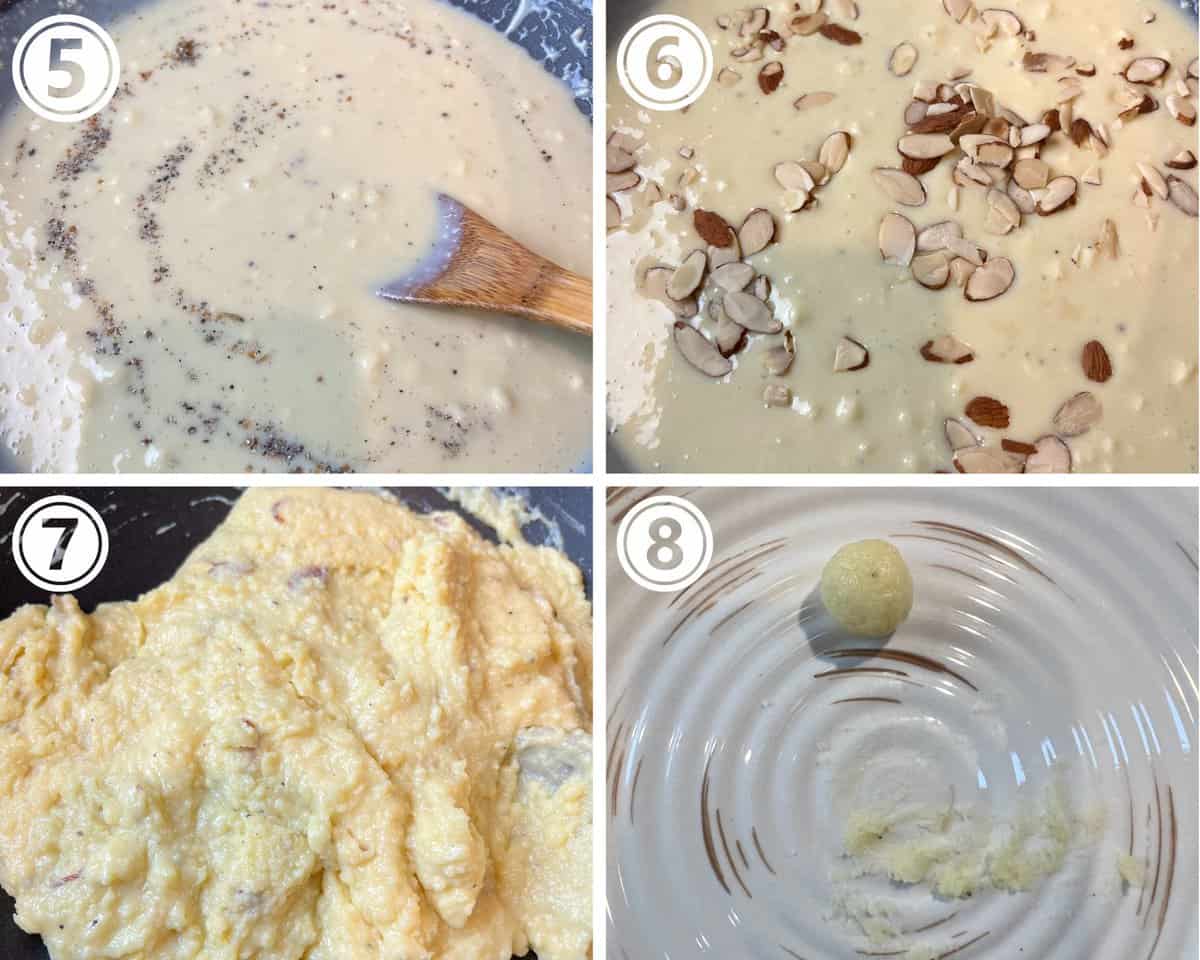
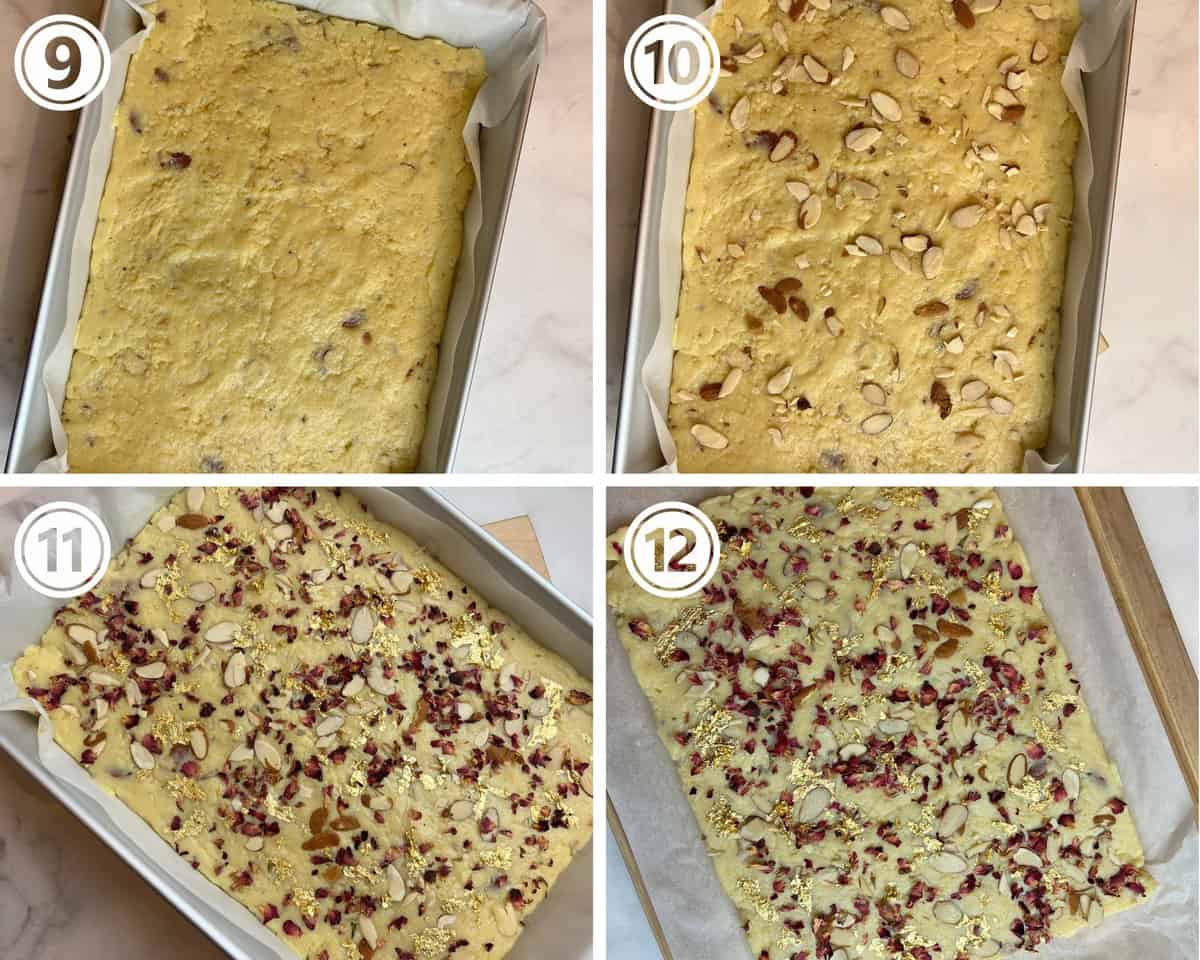
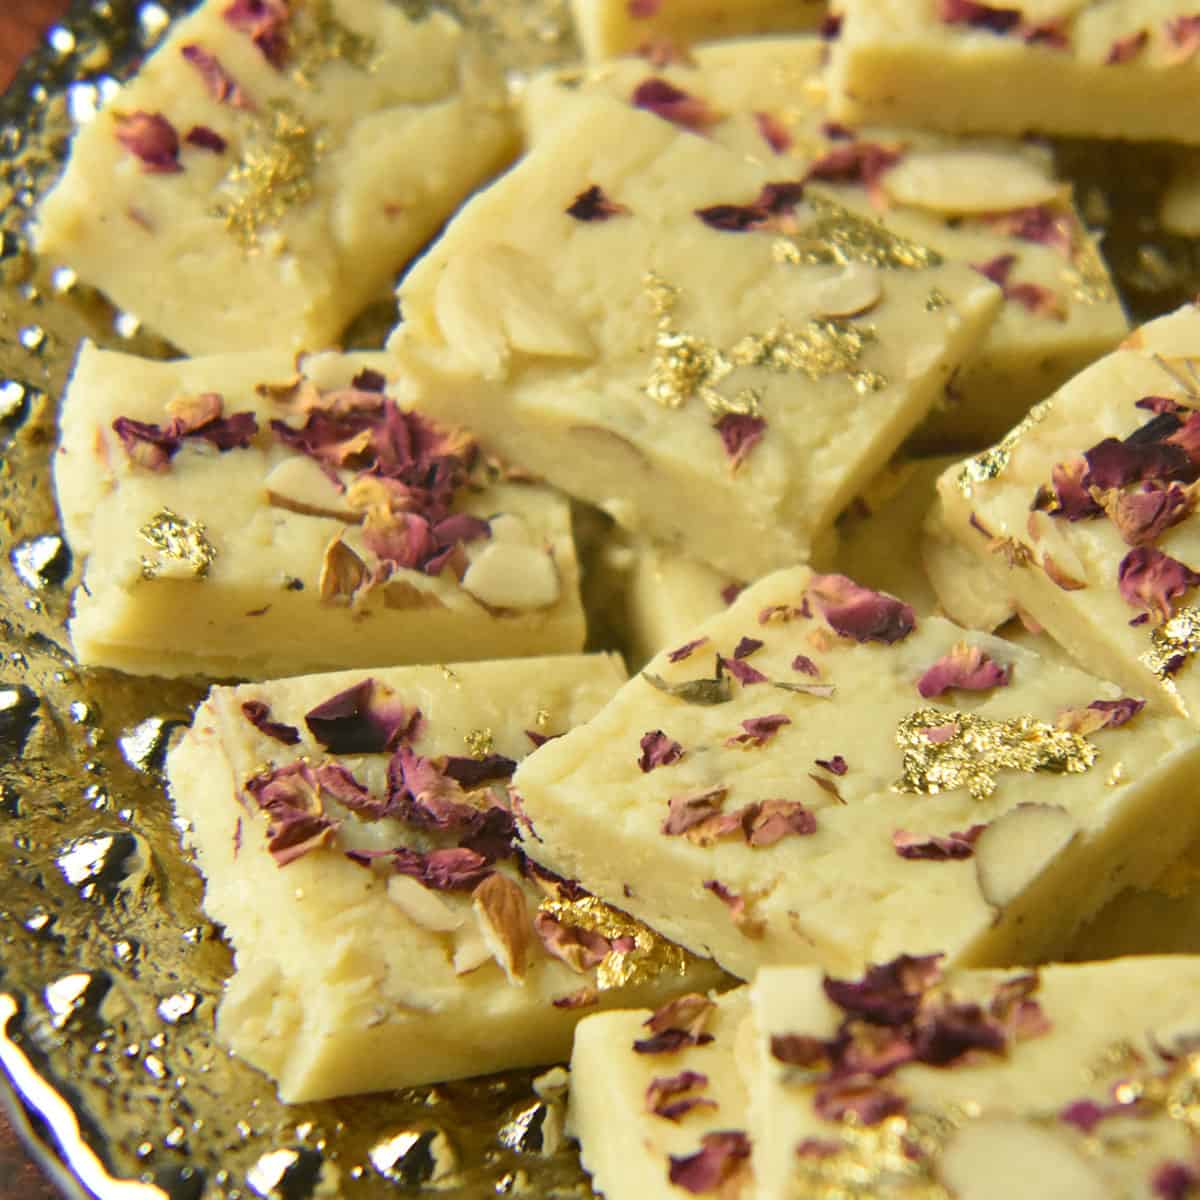
Step 6 - Add in half the almonds while the mixture is slow cooking. I like to do this so I get almonds in every bite. The milk barfi tastes so much better this way! Step 7 - Continue stirring till the mixture starts to leave the sides of the pan. You don’t need a thick dough-like consistency, but the mixture should pull together into a ball. Step 8 - Next, run a TEST to make sure the milk barfi sets. Take a small piece of the mixture, put it on a plate, and place it in the fridge. Remove it after 30 seconds and see if it rolls into a smooth ball. If it does, your barfi will set into a ball. If it doesn’t, turn the heat back on and cook the mixture and thicken it a bit more. Step 9 - Once the mixture is ready, place it in a greased pan lined with parchment. Step 10 - Flatten and smooth the surface of your milk barfi as well as the edges with a spatula. Step 11 - Top with the garnish, and chill for a minimum of 30 minutes. Step 12 - Then remove the entire block of milk barfi and cut it into square or diamond shapes.
Expert Tips
Use the right equipment - I like to cook my milk barfi in a wide nonstick pan. Once the barfi is ready, you will need to transfer it to a greased pan. I use a square or rectangular baking pan that I grease and then line with parchment paper. This makes it easy to pull the barfi out once it sets. Constant stirring & controlled heat - Now the (slightly) tricky part, is the actual cooking! The two most important things to control are the heat & the mixing. Have all your equipment and ingredients set up before you start to cook. This allows you to focus on constantly stirring and monitoring the heat as necessary. Keep extra milk on hand - At times getting the barfi mixture perfect can be a bit of a struggle. I recommend keeping a few tablespoons of milk on hand. Add a tablespoon at a time, as necessary, to help get a smoother batter.
Other Dessert Recipes You May Like
For more Pakistani recipes like this, check out 20 popular Pakistani recipes. If you decide to try this recipe, Please don’t forget to leave a rating and comment below! If you take a picture then tag me on Instagram! Thank You!