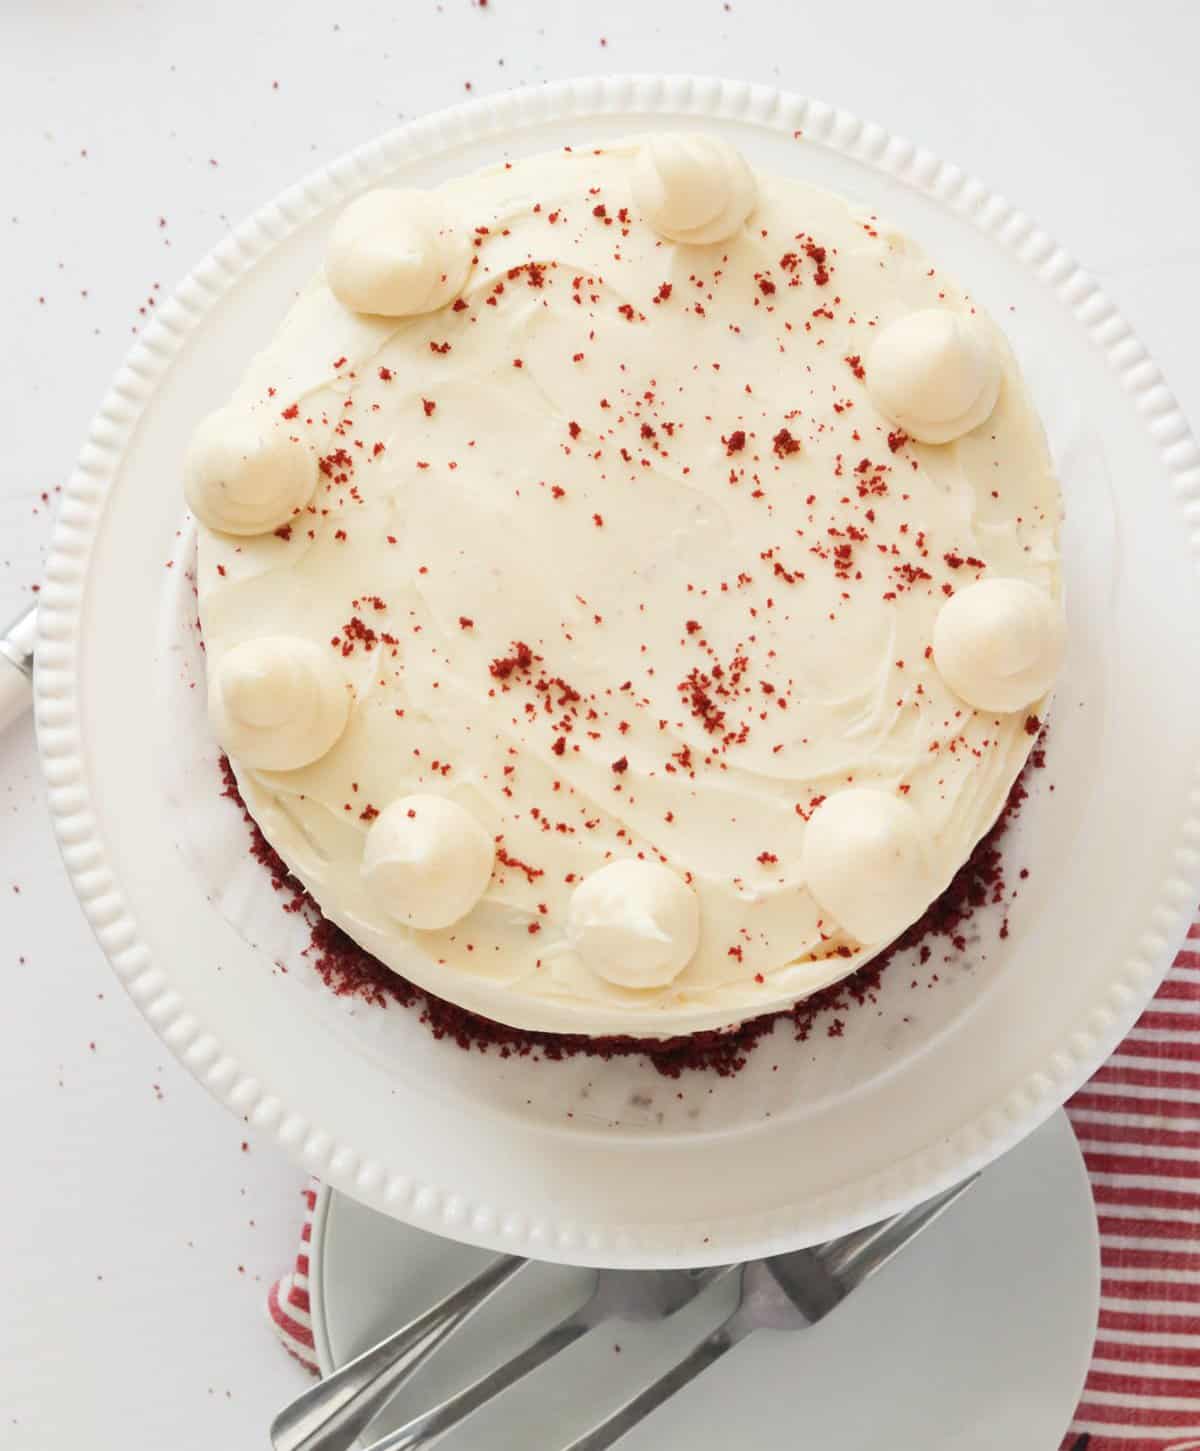
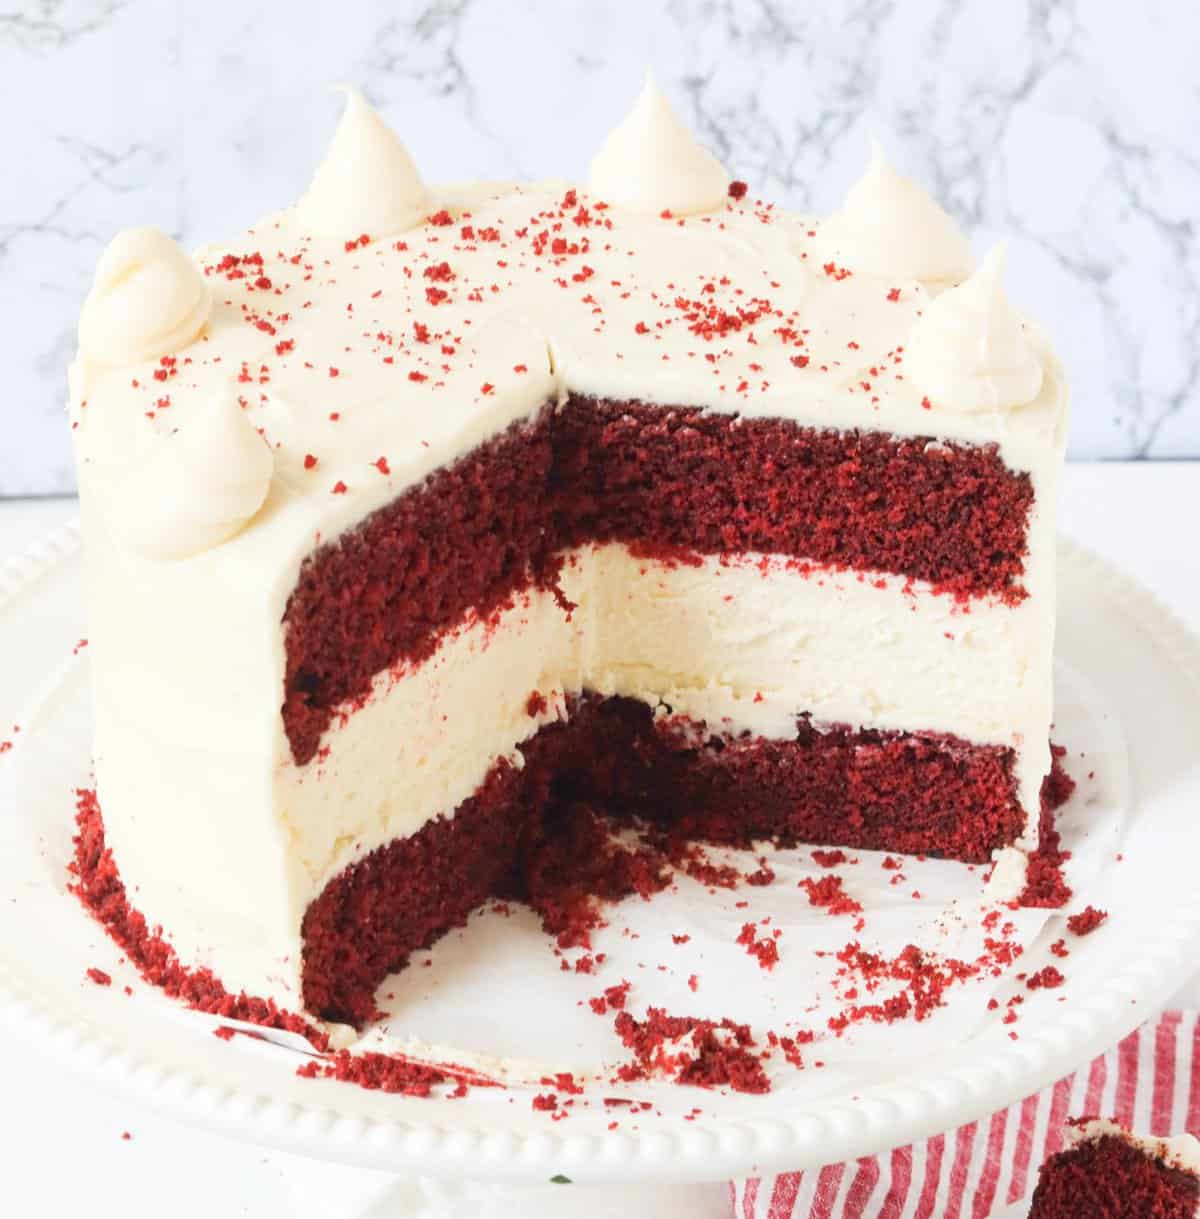
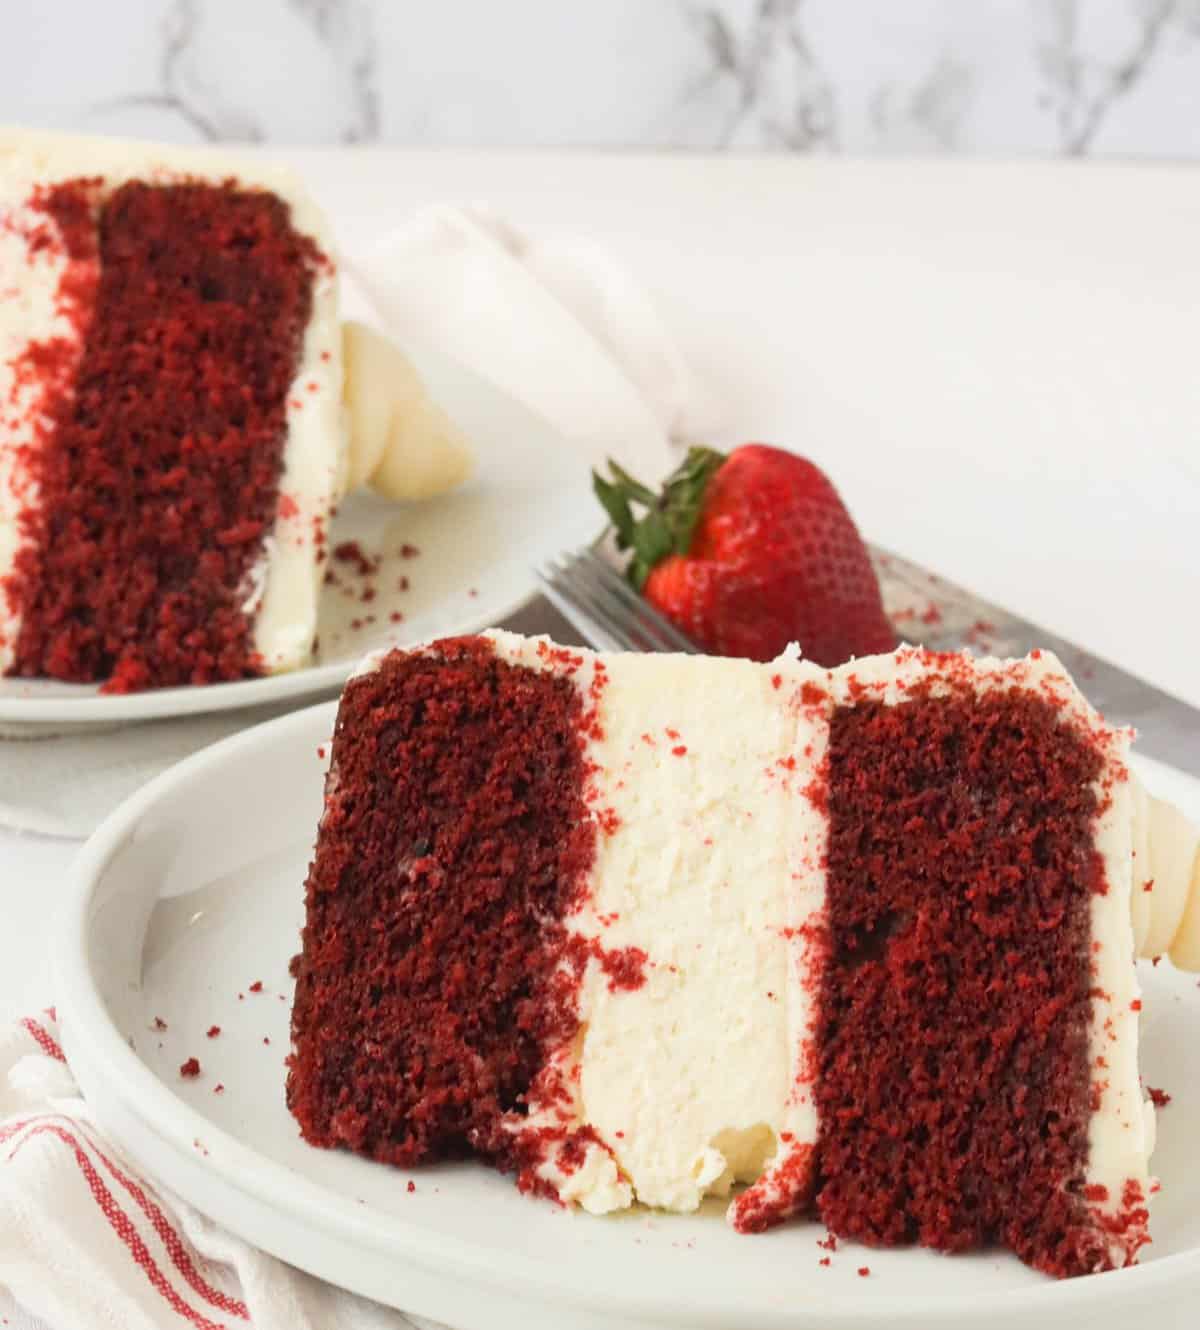
I don’t know about you, but red velvet cake always mesmerizes me whenever I see it. Not only is it gorgeous, but it’s also absolutely mouthwatering. That decadent ensemble of chocolate, vanilla, and cream cheese is irresistible. Amazing, right? But this red velvet cheesecake is on a higher level of deliciousness. Imagine enjoying two favorites (chocolate cake and cheesecake) in one dessert. Aaah! That’s pure heaven right there. I can already taste its lip-smacking goodness. The real MVP of desserts, I must say. ❤️
Recipe Ingredients
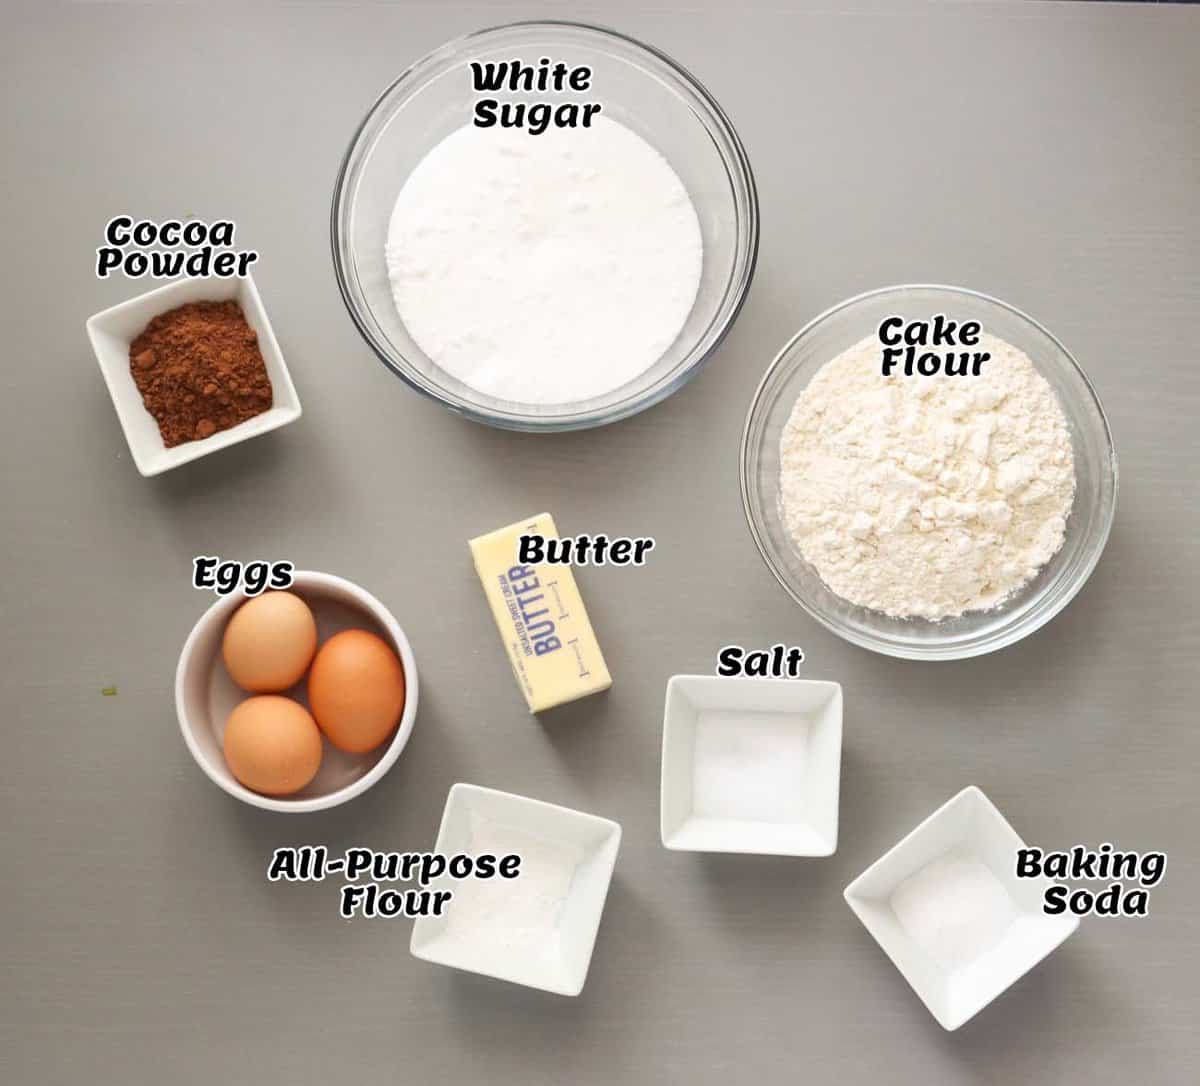
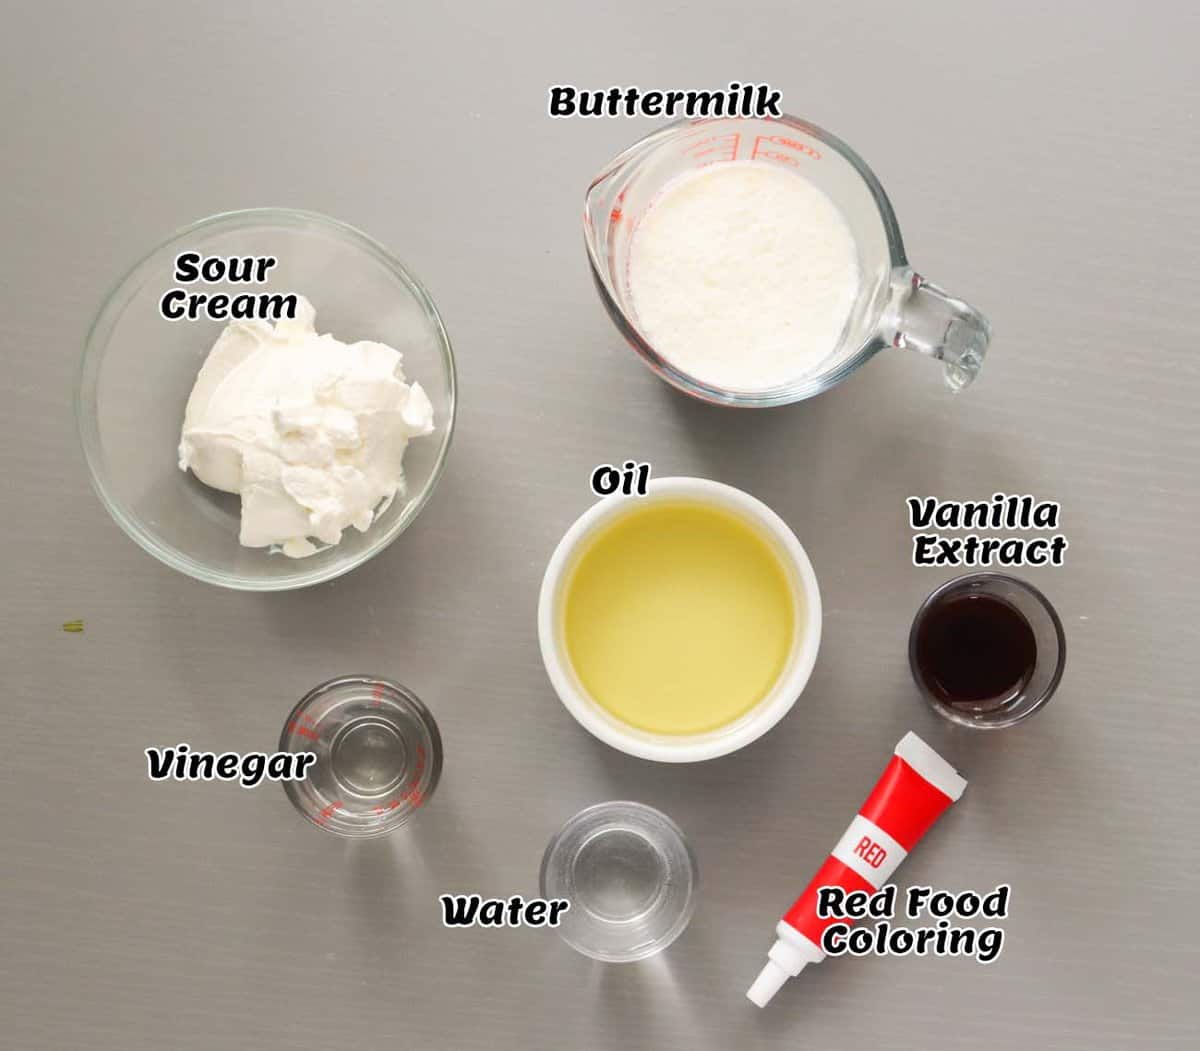
This elegant cheesecake does take a bit of effort since you’re making two kinds of cake. Don’t worry, though, because it only involves mixing and baking. Advanced decorating skills are not required, and most of the ingredients are pantry staples. Red Velvet Cake Layer Cheesecake Layer Cream Cheese Frosting
How to Make Red Velvet Cheesecake
The Cake
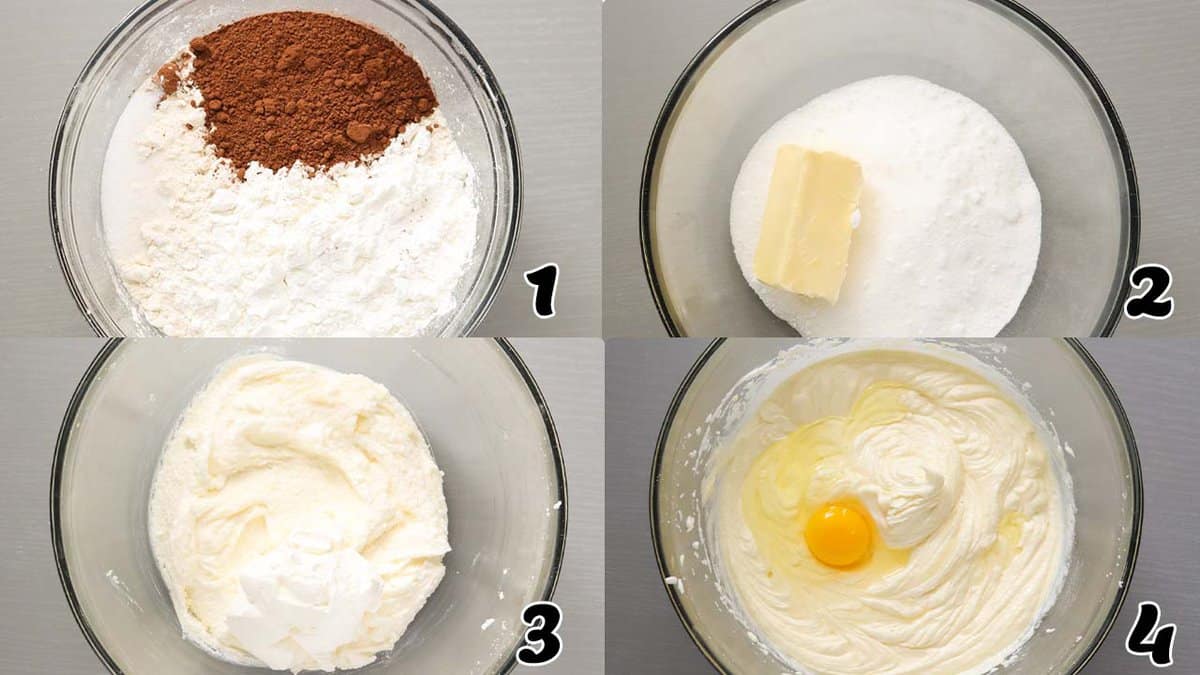
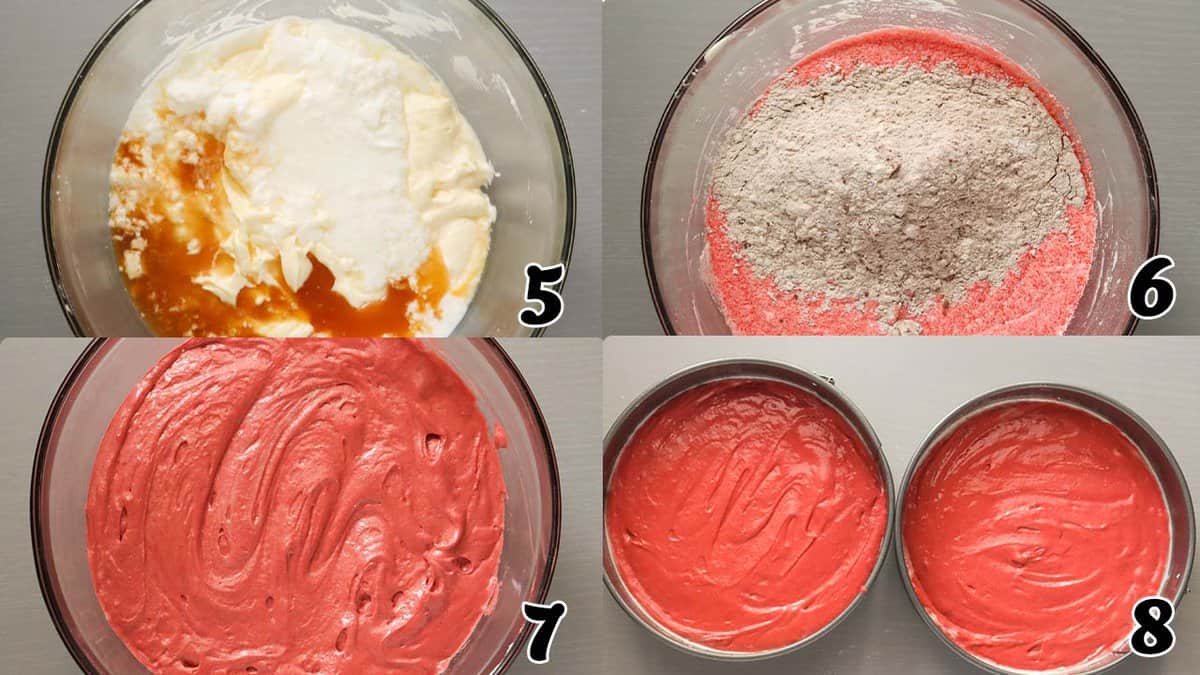
Combine Dry Ingredients – Combine flour, salt, and cocoa powder in a medium bowl. Set aside. (Photos 1-2)Combine Wet Ingredients – Cream the butter and sugar at high speed in a stand mixer for 4 minutes or so until it’s fluffy and looks white. Then add in the sour cream and mix for another minute. Follow with the oil, and mix for another minute. (Photo 3)Add the Eggs – Add in eggs, one at a time, beating the mixture well between each addition. (Photo 4)More Liquid – Next, pour in the buttermilk, vinegar, and vanilla, and thoroughly mix. (Photo 5)Food Coloring – Add food coloring until the desired color has been reached. Combine the Dry and Wet – Slowly add the flour mixture to the batter. Stir the baking soda and water, then gently fold it into the cake batter. Scrape down the sides of the mixing bowl. (Photo 6-8)Bake at 350℉/177℃ for about 25-30 minutes or until a toothpick inserted in the cake comes out clean.Cool – Let the cakes sit in their pans for about 10- 15 minutes. Gently place the cakes on a wire rack and invert, lifting off the pan.Refrigerate – Once the cakes have completely cooled, wrap them in plastic paper and place the cake in the refrigerator for at least an hour or preferably overnight. It makes it so much easier to apply the frosting.
The Cheesecake
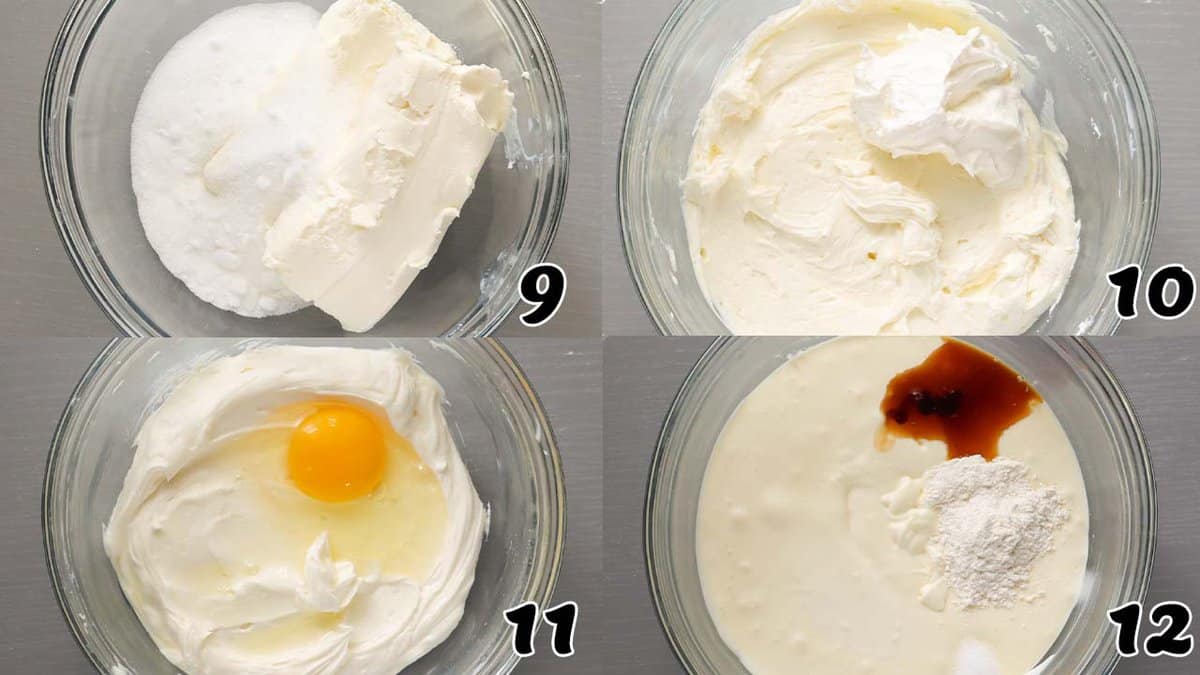
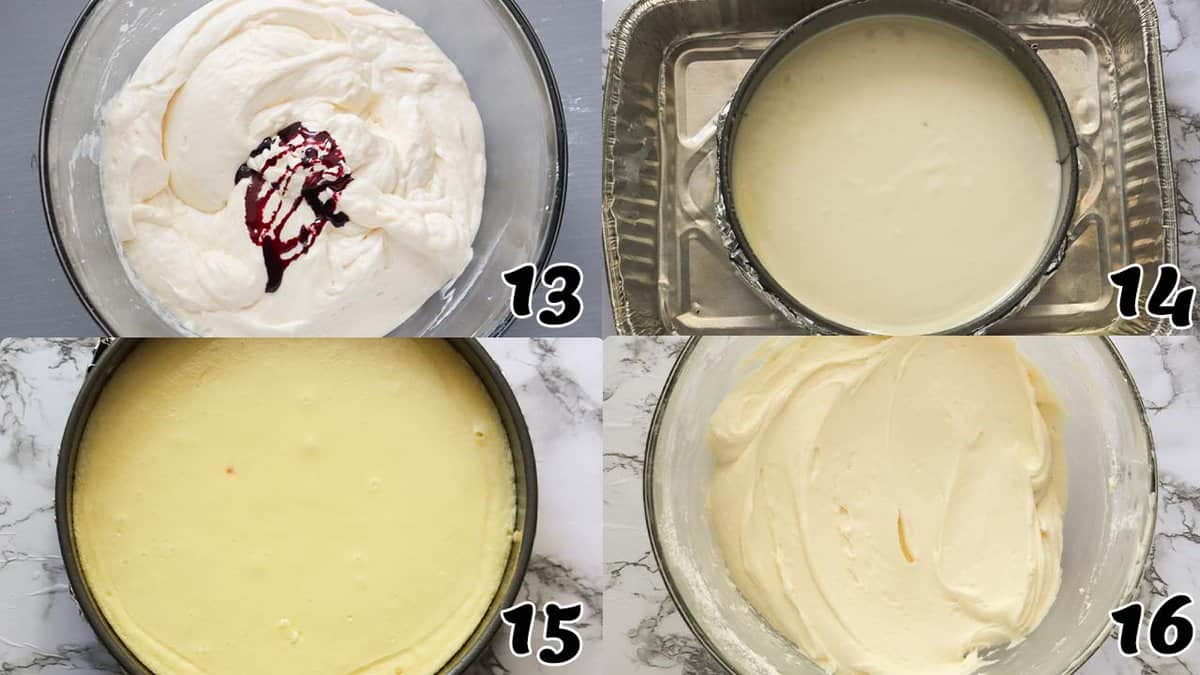
Beat Cream Cheese and Sugar – In a large bowl using a hand mixer, beat cream cheese and sugar until fluffy, 3-5 minutes. Add sour cream and beat for about a minute. (Photos 9-10)Mix – Add eggs, one at a time, beating the mixture well between each addition. Next, add flour, salt, and vanilla and mix until fully combined. (You could also make it even more spectacular by adding a touch of red food coloring.) (Photo 11-13)Bain-Marie – Pour the batter into the prepared springform pan; wrap the springform pan in two layers of heavy-duty aluminum foil or save your foil and place the springform pan in a slightly larger pan filled with 1 inch of hot water. (Photo 14)Bake – Place the cheesecake into the preheated oven and bake for 50-60 minutes until the edges set and the center jiggles slightly. (Photo 15)Chill – Remove the cheesecake from the oven, let it cool to room temperature, then transfer it to the refrigerator to cool completely. It should chill to firm up for at least 8 hours before assembling.
Assembly
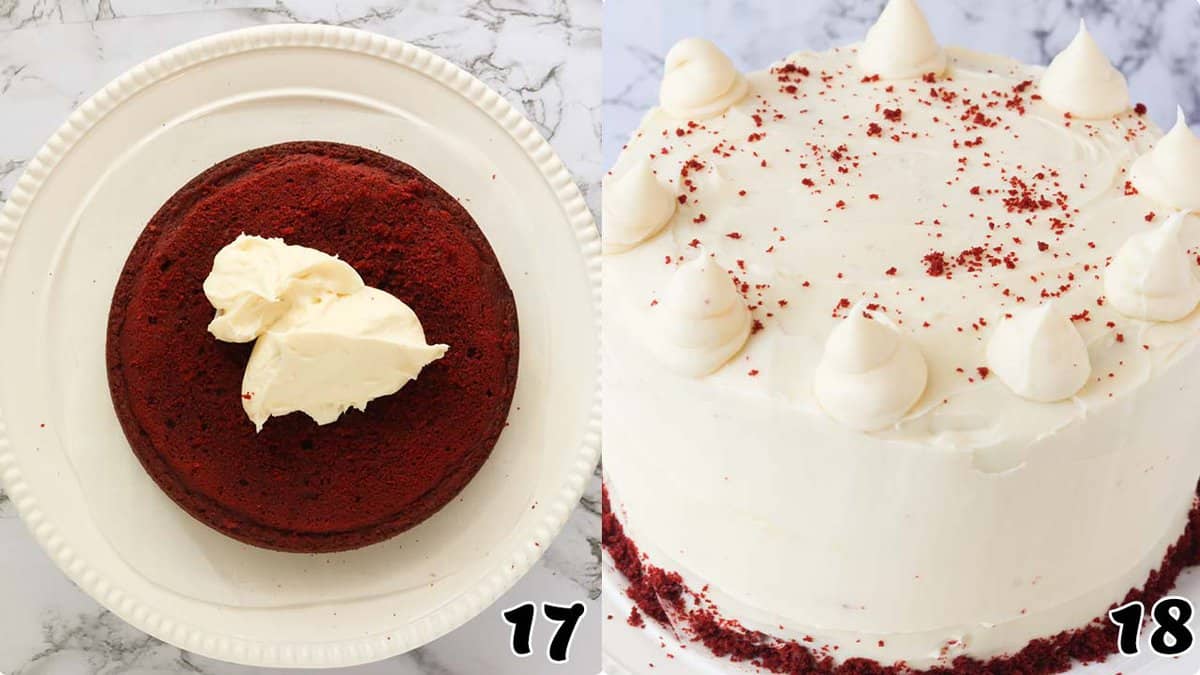
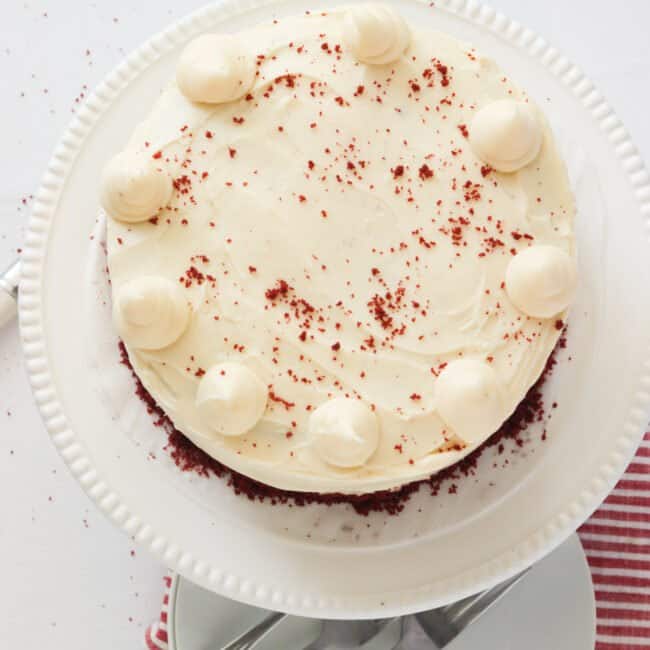
Make Frosting – In a large bowl, beat cream cheese and butter until light and fluffy, about 3-5 minutes. Next, add the powdered sugar and vanilla extract, and beat until combined. (Photo 16)Even the Top of the Cake to Level – Trim and level the two red velvet cake layers with a long knife. Then set aside the slices you cut off, reserving them to crumble for the garnish.Layer the Red Velvet Cake and Cheesecake – Place one red velvet cake on a cake platter, then add a small amount of cream cheese frosting to the center of the cake and thinly spread it out using an offset spatula. Then top with the cheesecake, pressing down firmly, spread another thin cheese frosting layer on the cheesecake, and top with the second red velvet cake.Frost the Cake – Cover the entire cake with the remaining cream cheese frosting. (Photo 17)Garnish and Decorate – Garnish with red velvet cake crumbs and design cake as desired before serving. (Photo 18)
Recipe Variations
Tips and Tricks
Make-Ahead Instructions
I recommend baking the cake and cheesecake layer at least a day ahead since they both need to be chilled before assembling. Wrap the red velvet cake tightly with a cling wrap before storing it in the fridge to keep it moist. You can freeze both the cake and cheesecake layers for two months. Once frozen, wrap it tightly with a cling wrap, then put it inside a heavy-duty resealable bag before storing it in the freezer. Thaw them in the refrigerator overnight for quick and easy assembling. Make the cream cheese frosting, assemble, and decorate on the day of serving. If you decide to make the frosting the day before, let it come to room temperature so it’s easier to frost the cake.
Serving and Storage Instructions
You can serve this fancy dessert at room temperature or chilled. Although I prefer mine cold because I like it firm and it reminds me of ice cream. Yum! But if you want it at room temperature, take it out from the fridge and let it sit on the countertop for about 30 minutes before serving. You can store leftover red velvet cheesecake in an airtight container, and it will keep in the fridge for 5 days or 2 months in the freezer.
What to Serve with Red Velvet Cheesecake
Nothing beats a steaming cup of coffee with dessert. But for a fancier and sophisticated dessert experience, why don’t you serve this stunning red velvet cake with cheesecake with the following cocktails below?
More Decadent Cake Recipes to Try
Conclusion
Red Velvet Cheesecake is a guaranteed crowd-pleaser. What special occasion would you love to wow your guests with this creation? Please let me know. 😉