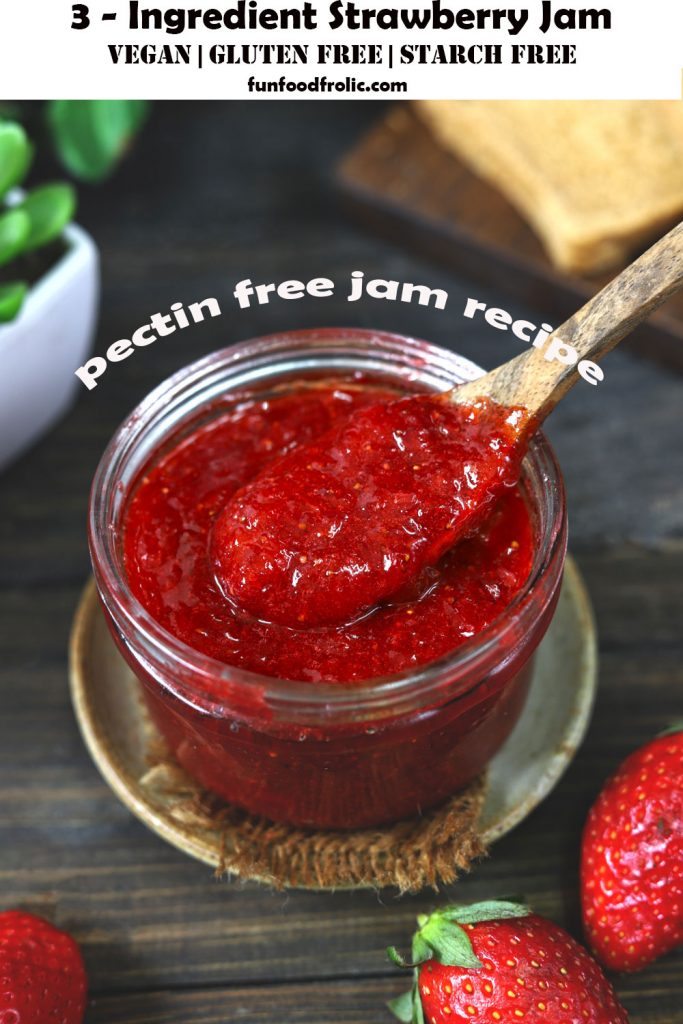
Reasons to LOVE Homemade Jam
Since I started making fresh strawberry jam or mango jam at home, I have not been going back to readymade ones. I will give you more than one reason to LOVE homemade strawberry jam.
gluten-free & vegan 3-ingredient recipe no added pectin one-pot recipe zero thickening agent natural colour & flavour chemical preservative free easy to make and store
Ingredients Required
Only 3 ingredients, a chopping knife, a saucepan, and a clean jar are required for this strawberry jam recipe.
Strawberry: The fresh, ripe, sweet-tasting strawberries work best for making jam. Frozen strawberries work too. Sugar: Granulated fine-quality white sugar always works best for making any fruit jam. Lemon Juice: It balances the sweet flavour and is a natural preservative.
Saucepan: Use a non-stick, ceramic, or stainless steel saucepan to make the jam. Cast iron and other reactive metals alter the colour and taste of the strawberry jam. Jar: Use a sterilized glass jar to store the strawberry jam. The glass is a non-reactive metal. Hence, best for storing perishable relish such as jam.
Strawberry to Sugar Ratio
The traditional strawberry jam recipes recommend following an equal 1:1 (fruit to sugar) ratio. Usually, it is always best to taste the strawberries to check their sweetness and tartness. Then add sugar accordingly. I add 1 to 1 ¼ cups of sugar to one kilogram of fresh strawberries. Always remember that a fruit jam with slight tartness is more delicious than one tastes like a sugar syrup with no original fruit flavour.
How To Make Jam
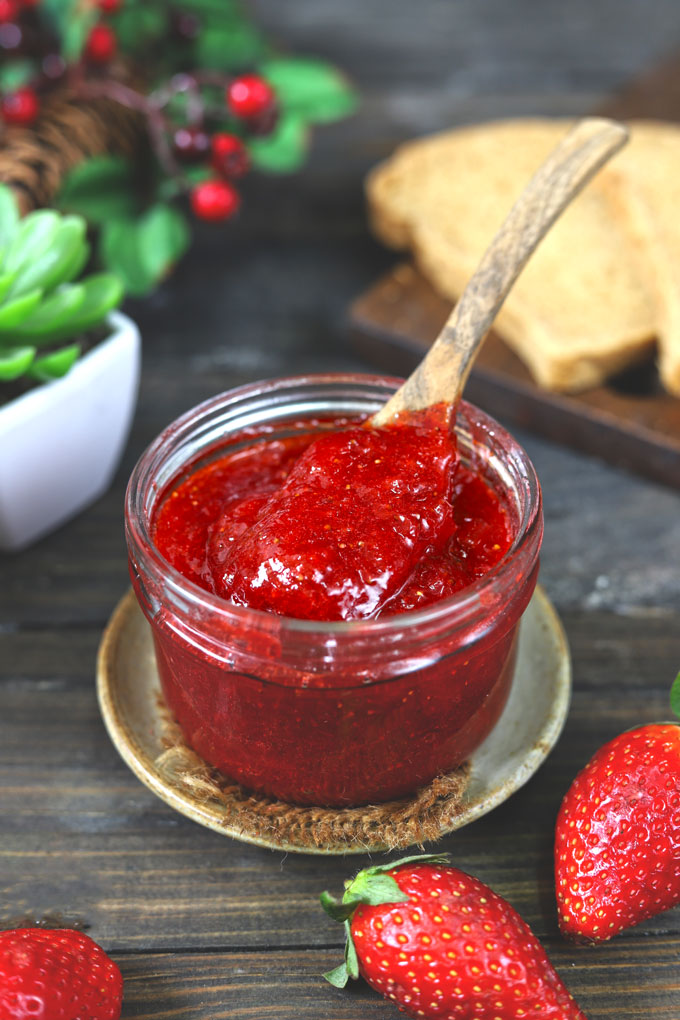
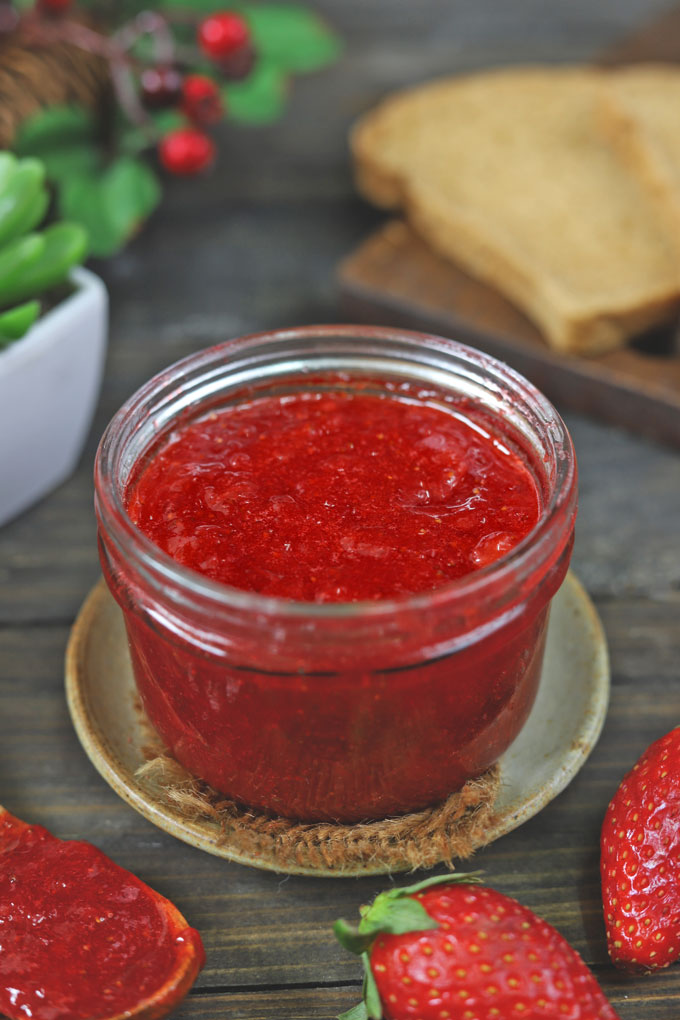
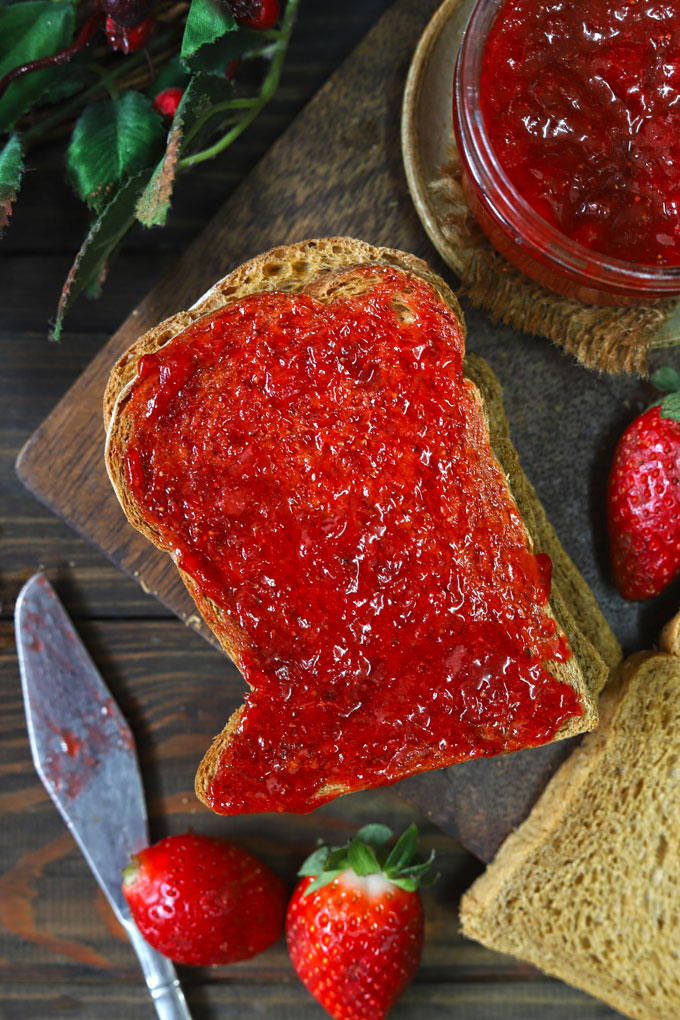
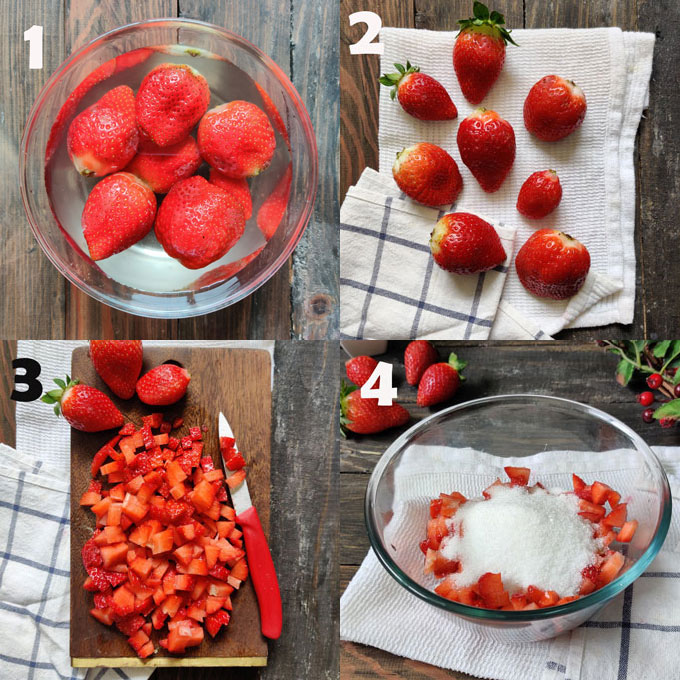
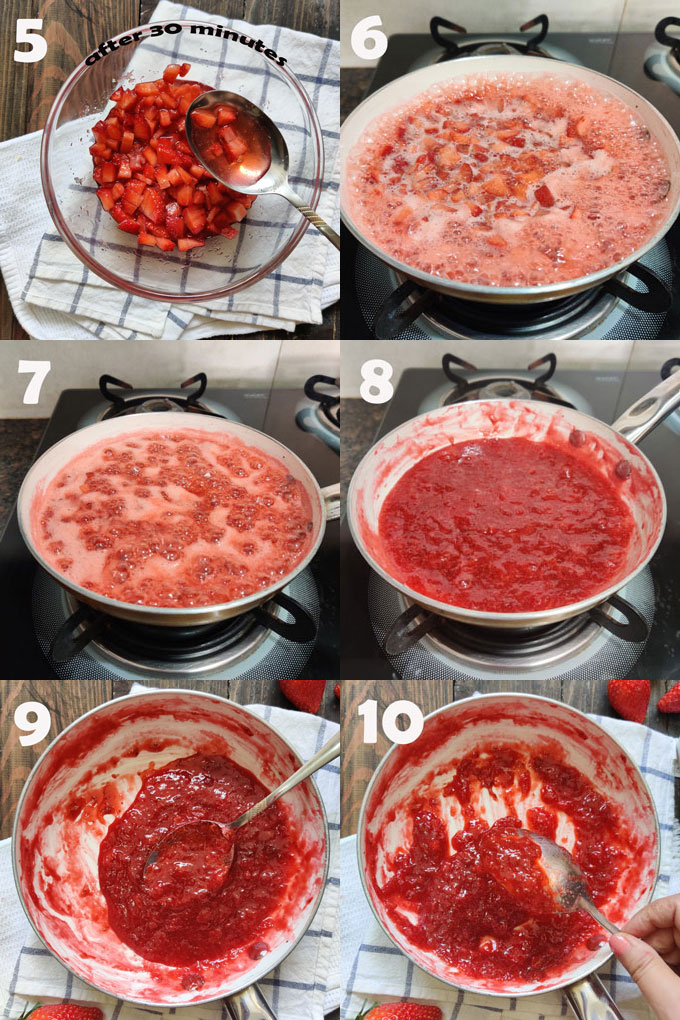
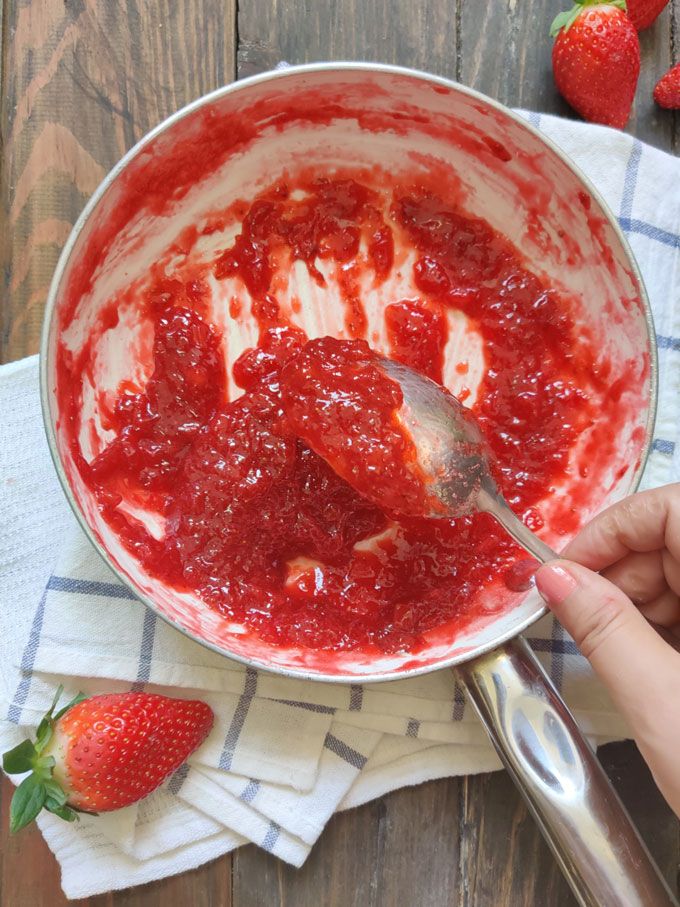
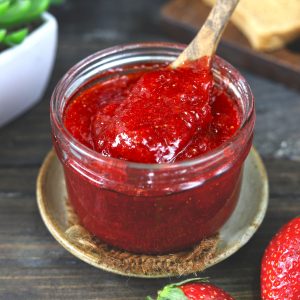
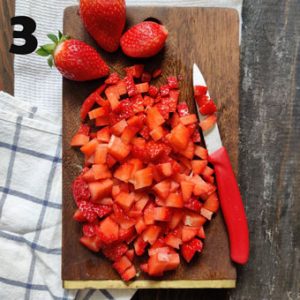
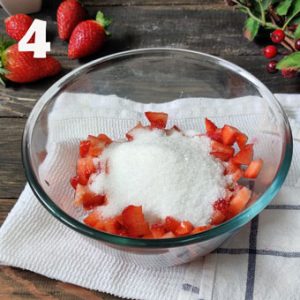
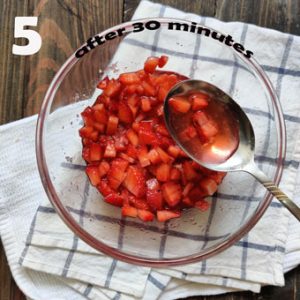
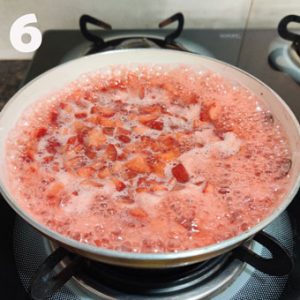
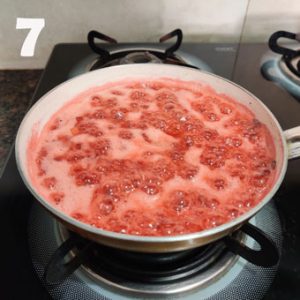
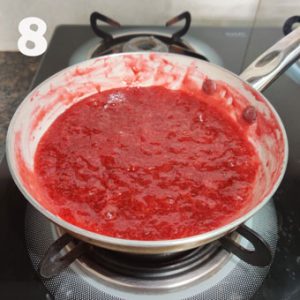
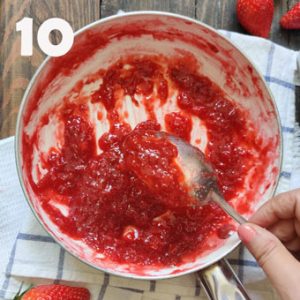
Step 1) Wash the fresh strawberries. Remove the green top (crown). Wipe clean and pat dry with a kitchen towel. Ensure they are not wet or moist (images 1 & 2). Step 2) Next, finely chop the strawberries. Cut and discard the inner white part of the strawberries (Image 3). Step 3) Transfer chopped strawberries to a wide mixing bowl. Add granulated white sugar. Mix nicely. Cover and set aside for 20 – 30 minutes. Step 4) After 20 – 30 minutes, sugar granules will be completely dissolved with the berry, and pink juice will be released. Do not rush this process (image 5). Step 5) Add lemon juice and mix nicely. Transfer the strawberries along with all the pink liquid to a saucepan. Turn on the stovetop heat to low. Start cooking the jam. In Stage 1, the jam will be watery, with big chunks of strawberry and white foam on top (images 6 & 7). Keep cooking on low heat while stirring at regular intervals. Slowly, the white foam will start reducing, and the texture of the jam will thicken a bit. This is Stage 2. Use a potato masher or a ladle to mash the strawberries gently. Keep stirring at regular intervals. After 15 – 20 minutes on low heat, the white foam on top will disappear, the strawberries will mash up, and the jam will start sticking to the spoon (images 8 & 9). Turn off the heat. To check the consistency of the jam, spread a big tablespoon of strawberry jam on a metal plate. The strawberry jam should be thick, don’t drop off easily, and would stick to the plate. Else continue to cook further. Allow the strawberry jam to cool completely at room temperature before serving or storing.
Storing Suggestion
Most of the time, homemade jams get spoiled because of the wrong storage.
I highly recommend storing strawberry jam in a glass jar rather than a plastic or metal container to avoid flavour alteration.
Use a clean, dry, sterilized jar for storing the fruit jam. Dirt or junk in the jar lid will also spoil your strawberry jam.
Store strawberry jam in the refrigerator. It remains fresh and tasty for 3 – 6 months.
Use a clean and dry spoon to scoop out the jam. Keep homemade jam away from moisture and water.
More Strawberry Recipes
Teatime Strawberry Cake No-Bake Strawberry Cheesecake Subscribe to our weekly newsletter or follow us on Youtube for video recipes.